Billet Rings II

Signed-In Members Don't See This Ad

mark james

IAP Collection, Curator
Joined
Sep 6, 2012
Messages
12,751
Location
Medina, Ohio
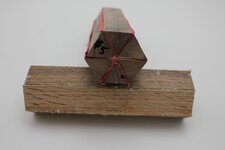
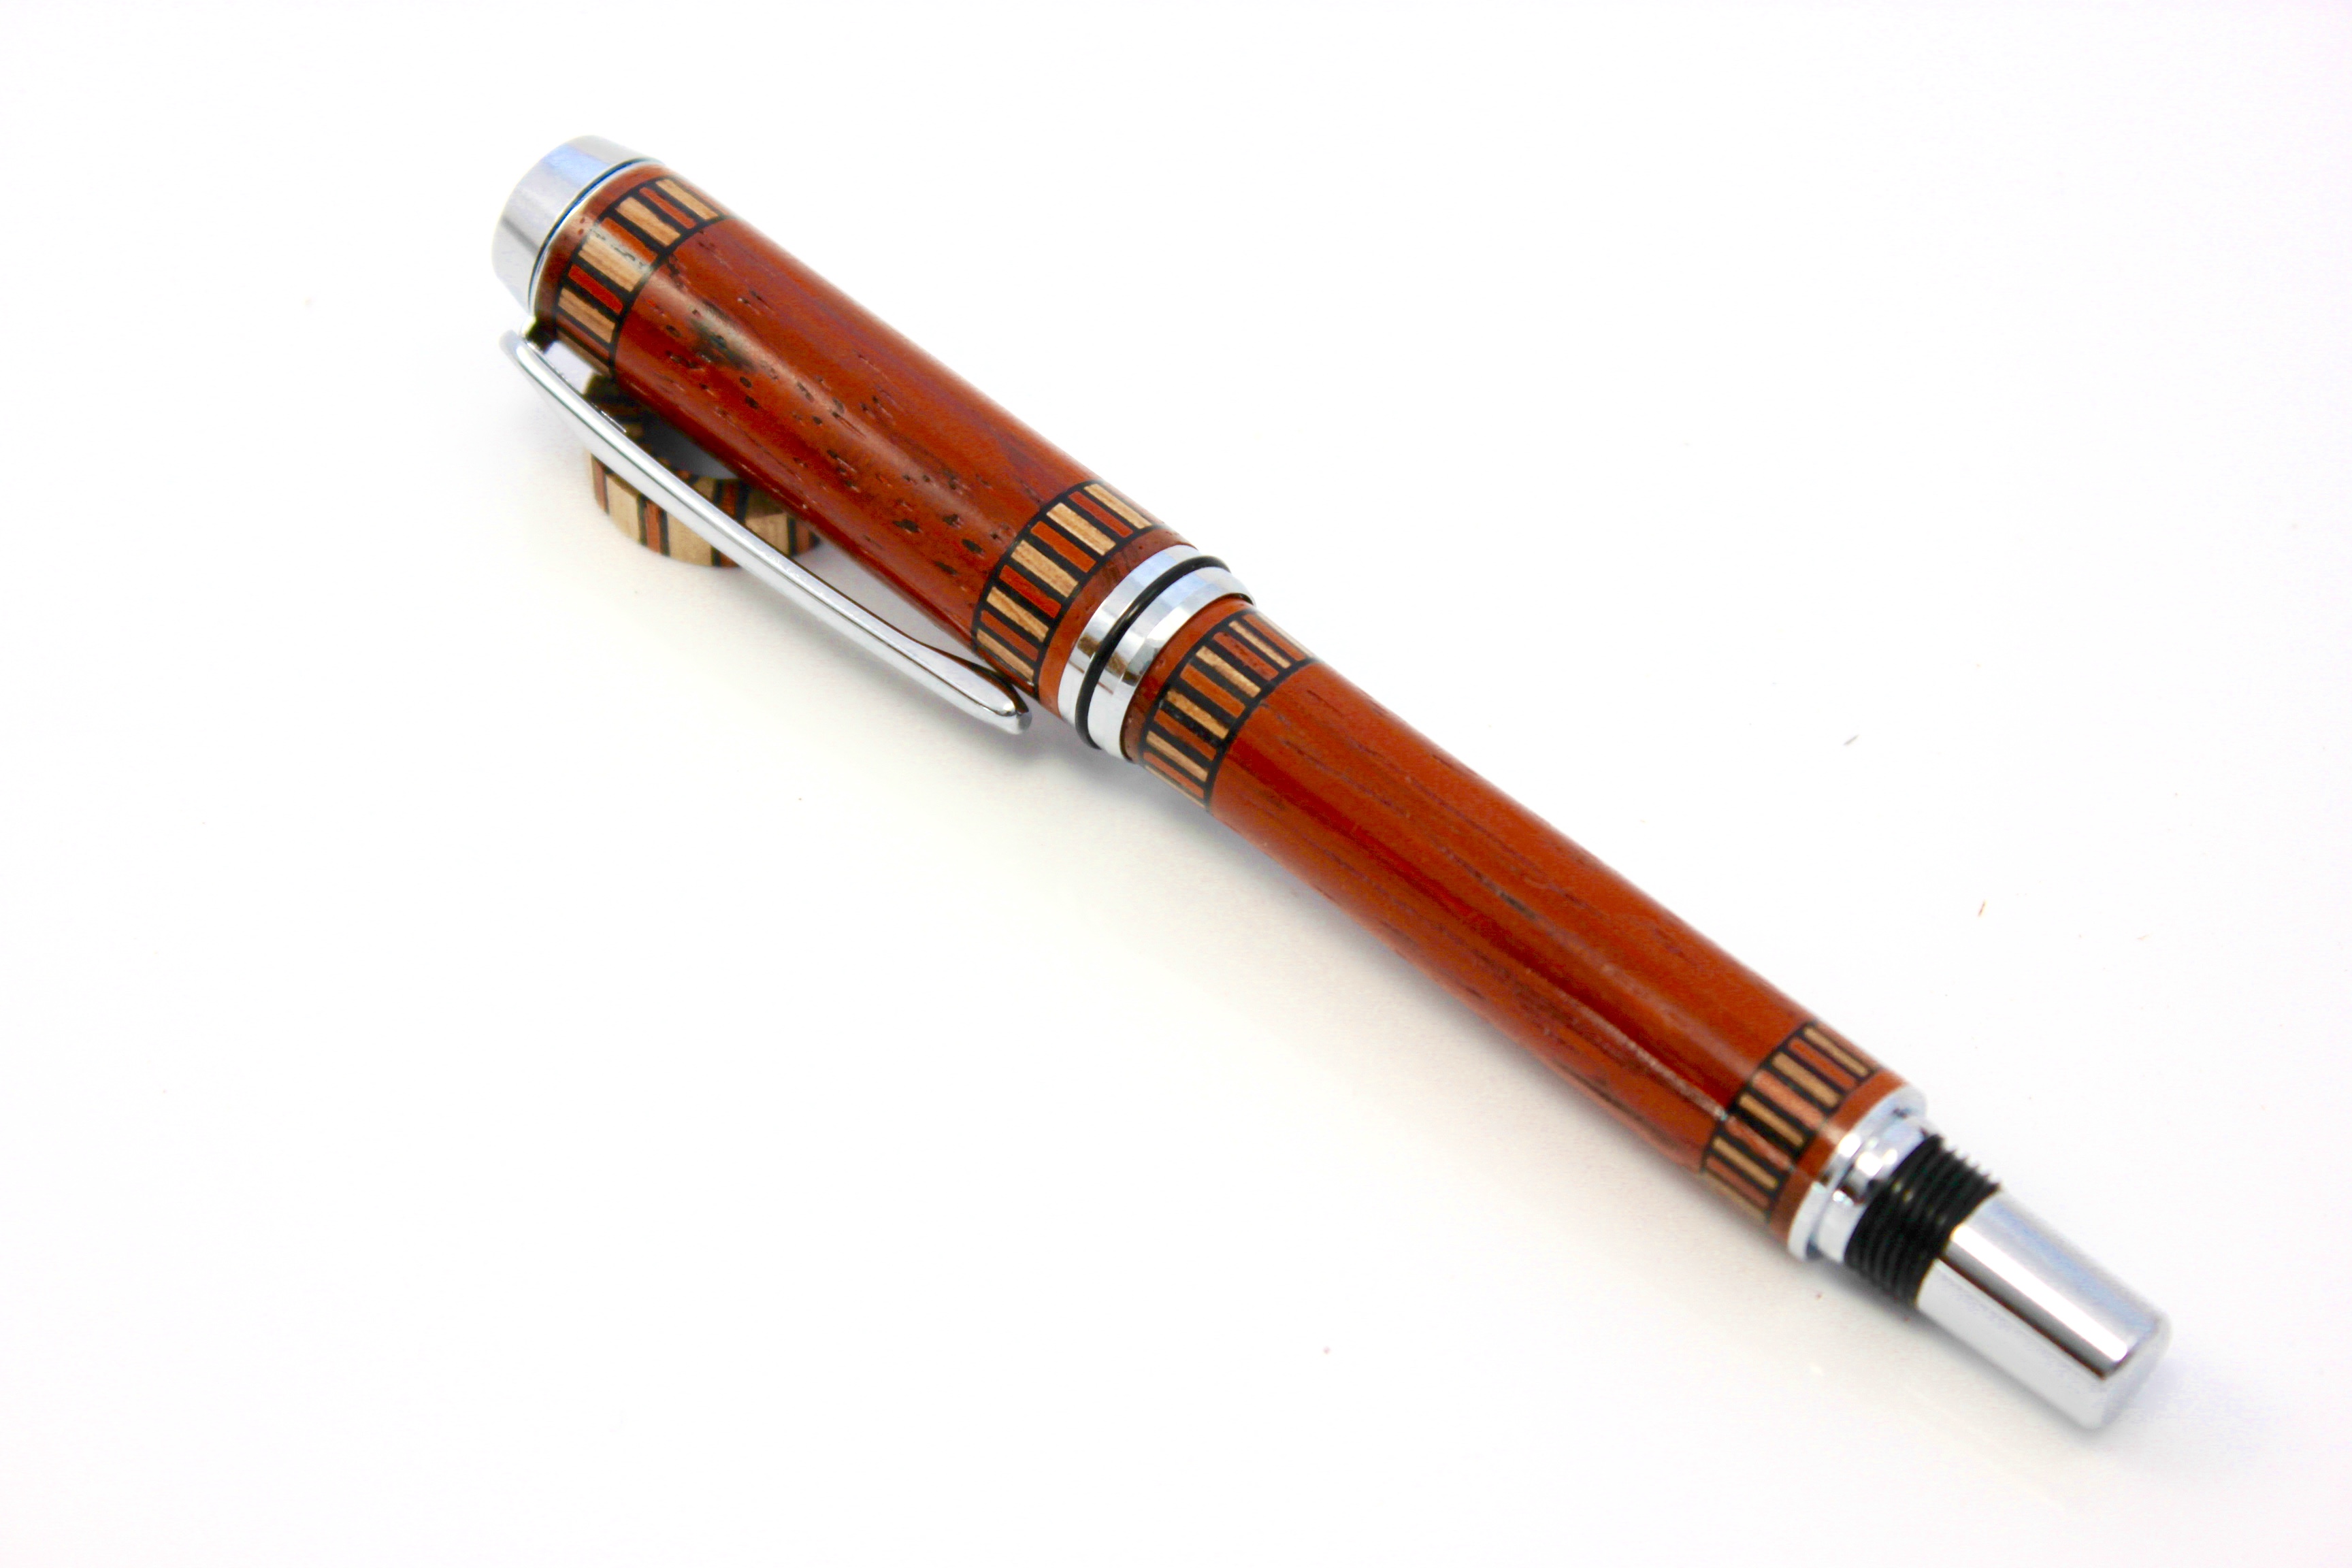
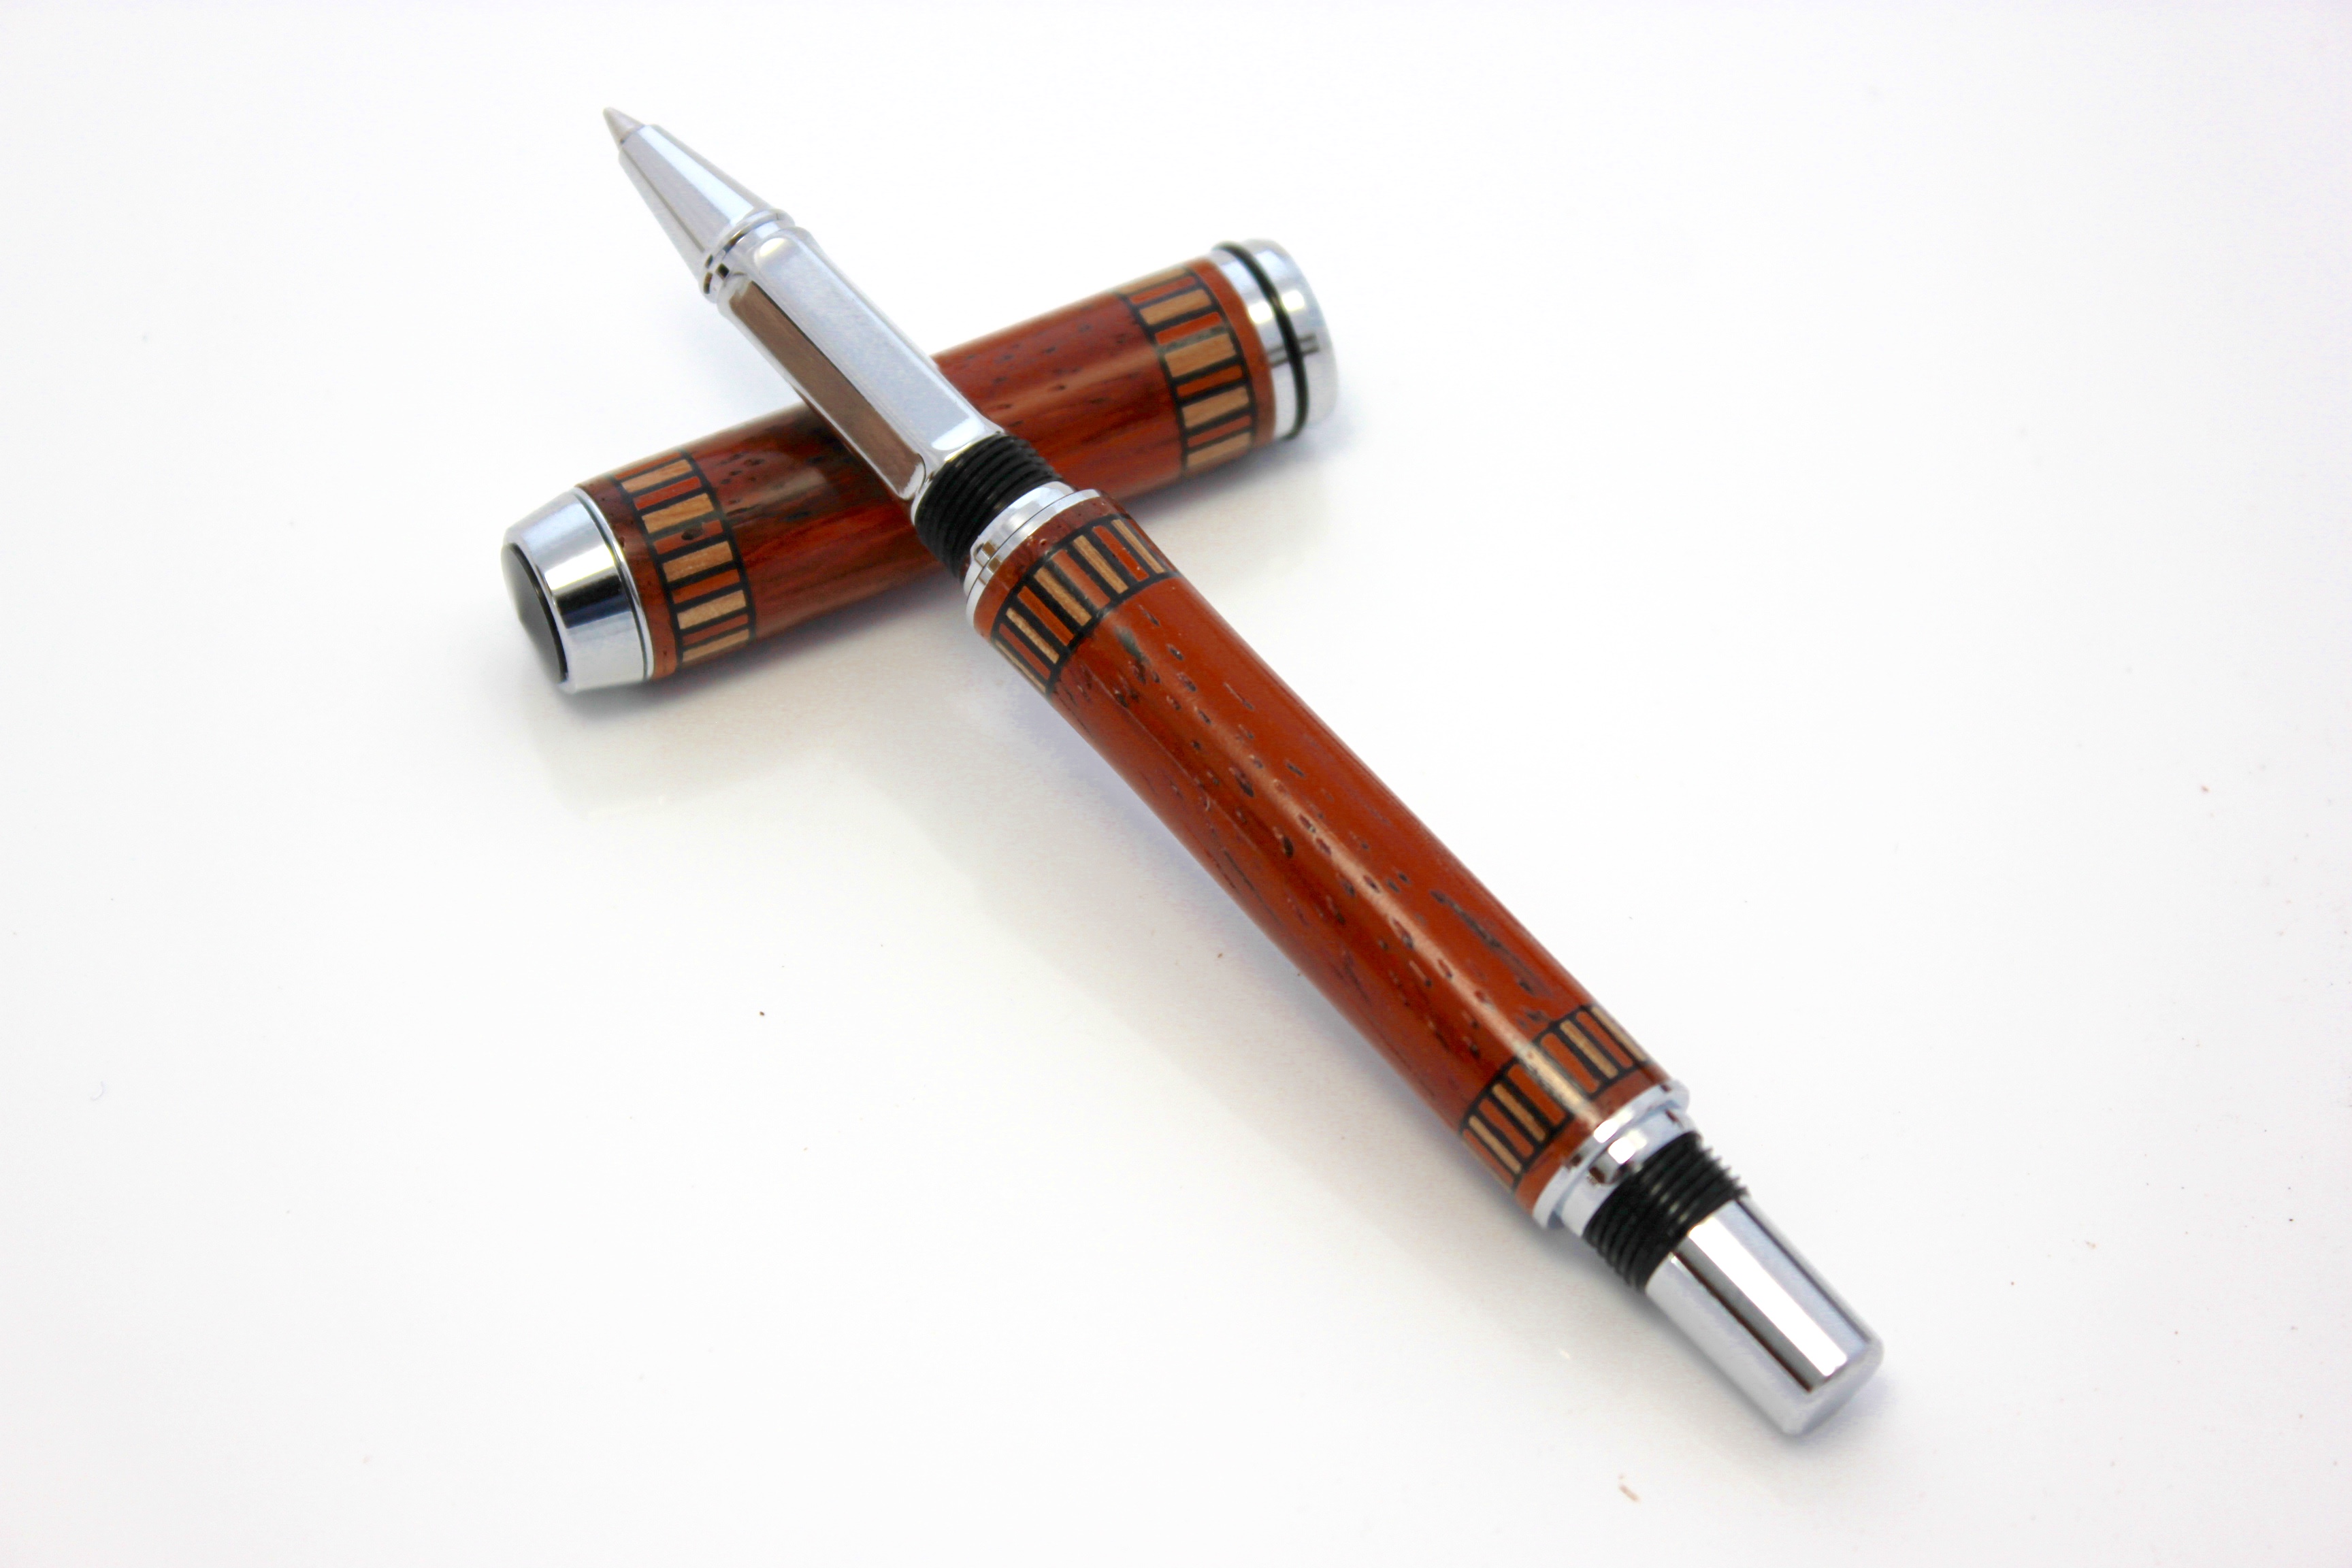
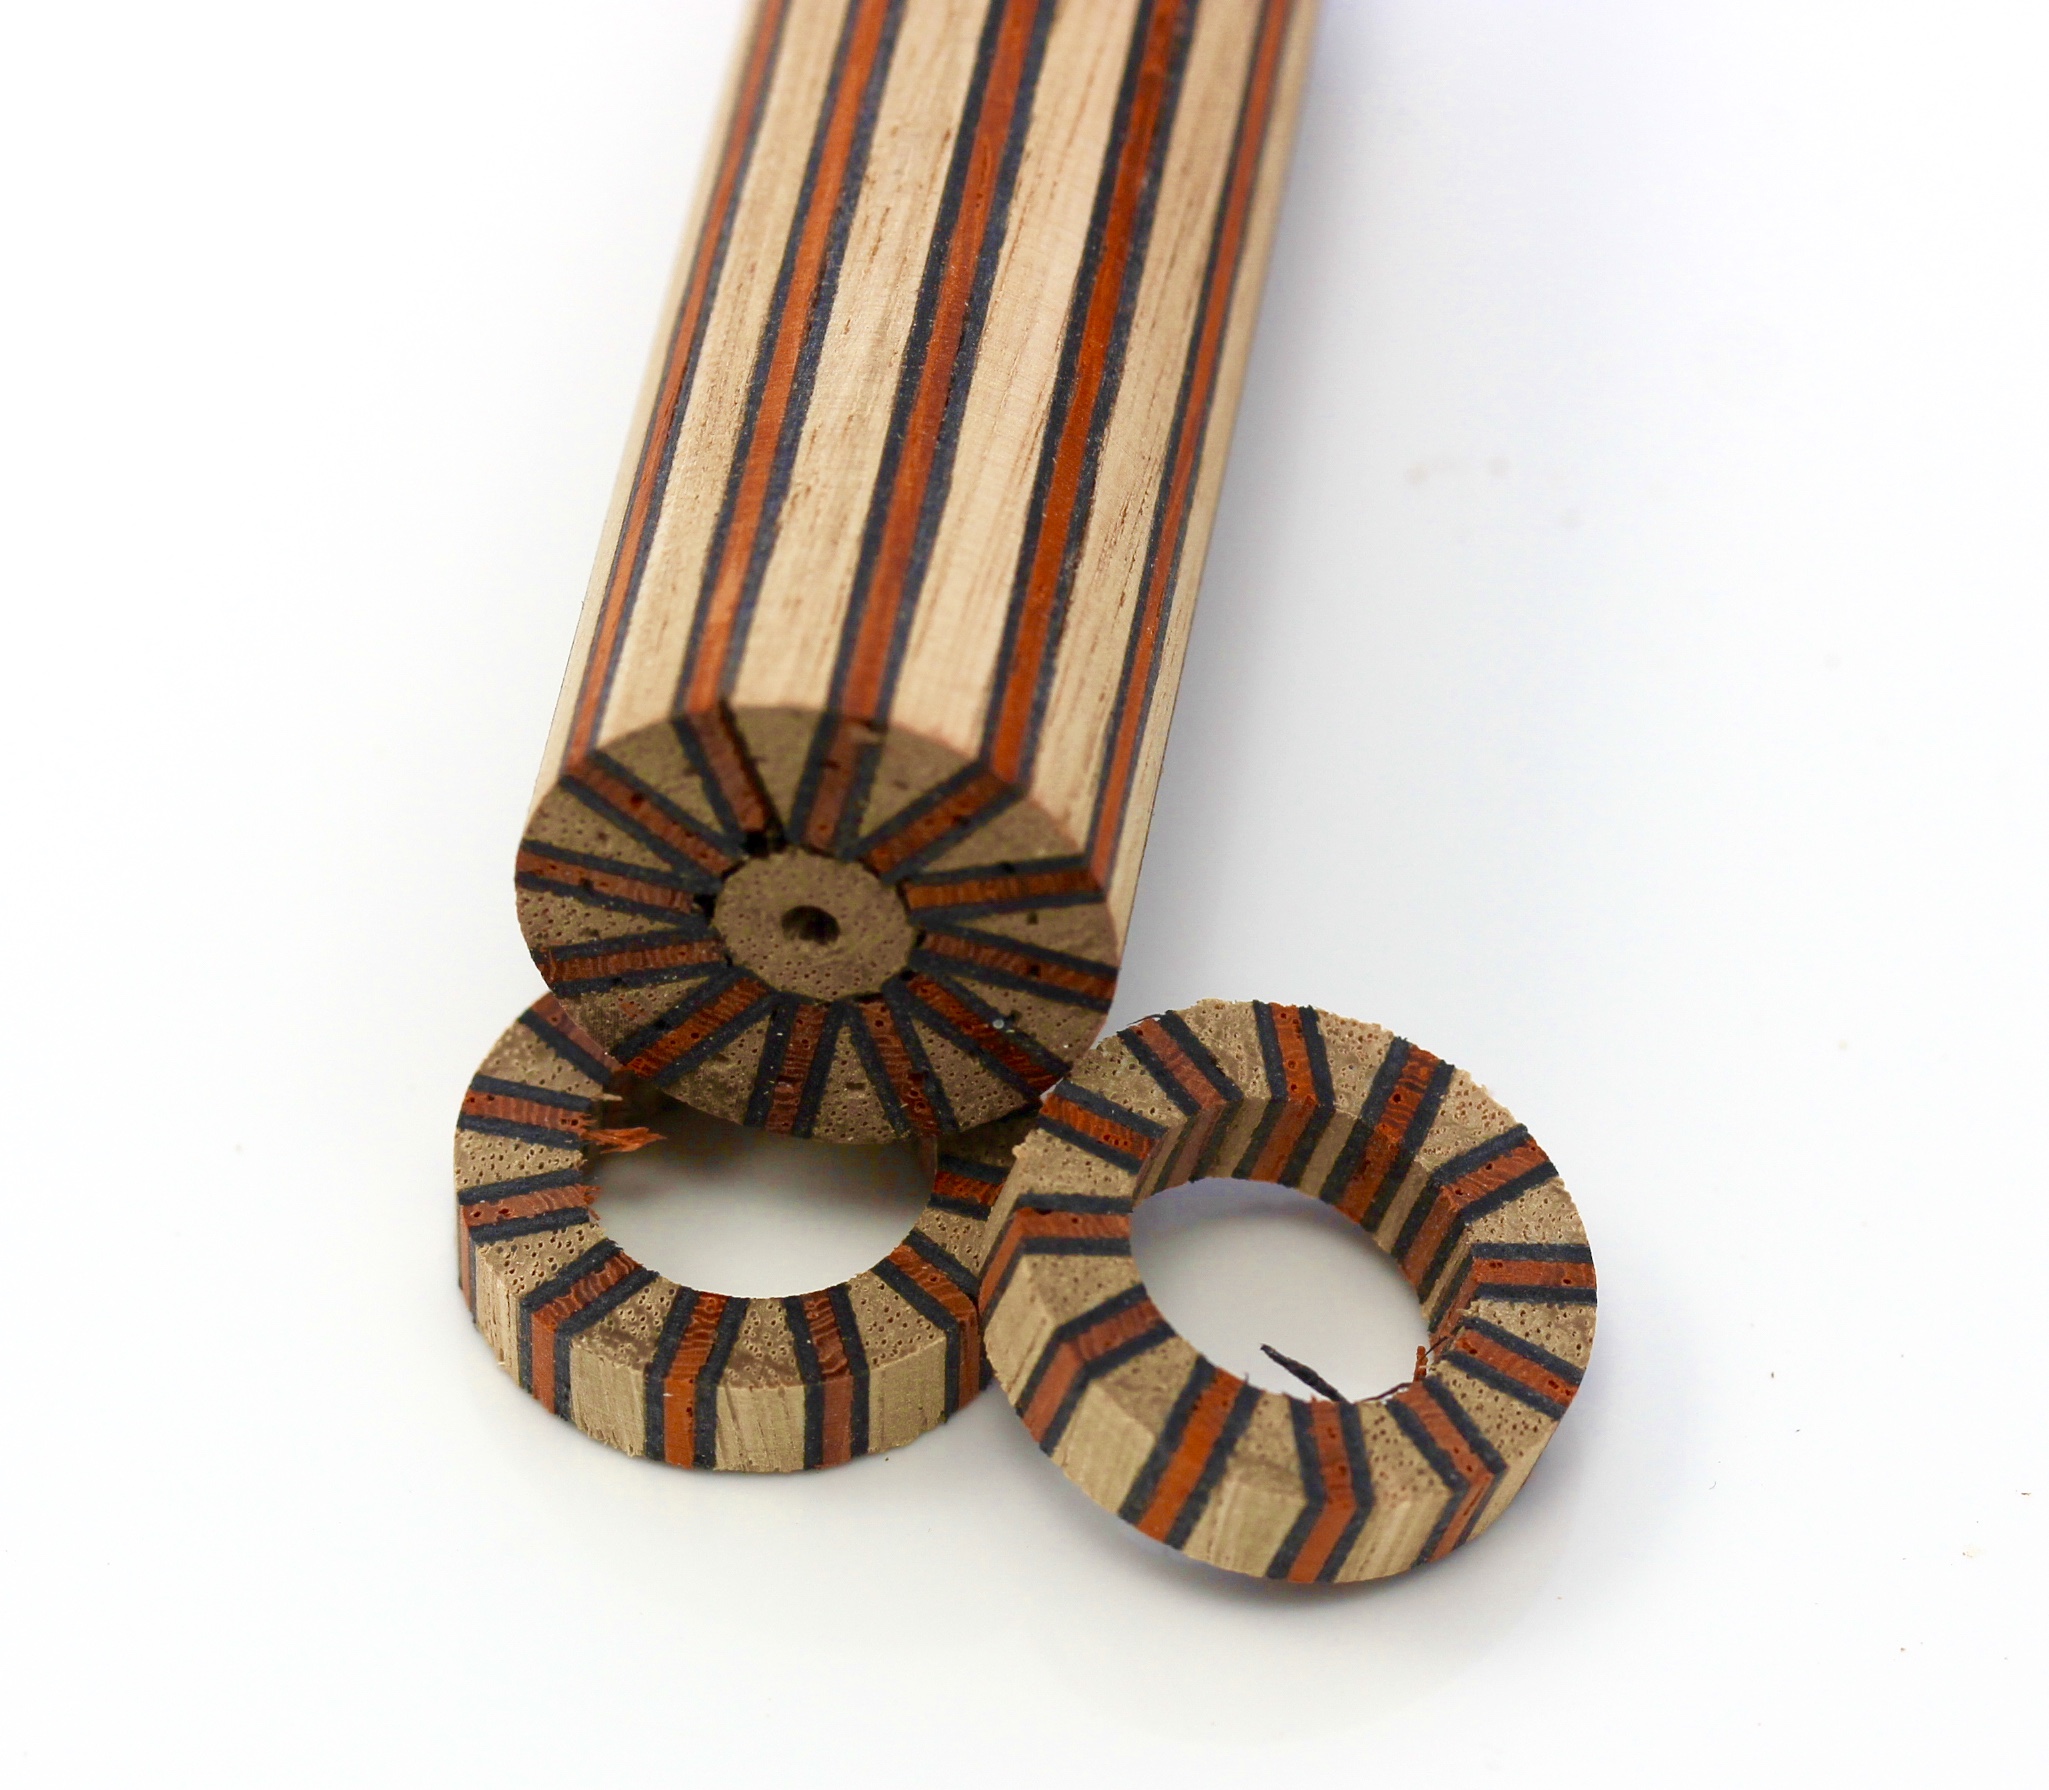
Padauk and Black veneers. Slots were .077" . I started with 1/16" Padauk and had to sand it down to about .04" to allow the inserts to fit. Black veneers were about .023". The 4 1/2" long blank will probably accomodate 2 more pens; although I think a format with the rings on just the top blank will be nicer. Then there will not be the difference in the inlays as the diameter difference makes this noticable (not bad, but kind of bugs me).

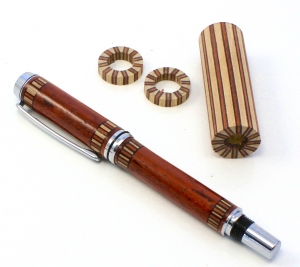
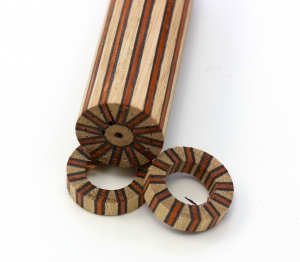
I think I liked the thinner billets on the first pen, but this came out nice.


View in Gallery


View in Gallery


View in Gallery


View in Gallery


View in Gallery
 
Signed-In Members Don't See This Ad

farmer

Member
Joined
Jun 16, 2012
Messages
807
Location
NV
Look great

Very professional looking .......................

The slotted rings normally look better if they are not real wide .
I have made that mistake several times myself
I have also seen where guys double up on the trim rings and they don't look so good either.

Billet rings ,,, a cue make developed using slotted trim rings in pool cues , he was copying poker chips............:wink:
Mark You have done a great job on your billet rings ..

Ever thought of using brass shim stock :wink:
 

mark james

IAP Collection, Curator
Joined
Sep 6, 2012
Messages
12,751
Location
Medina, Ohio
Amazing work. I wish I still lived in Ohio so I could bribe you into taking me on as an apprentice.

Arizona is close to Ohio, no???... No apprentice needed! Ask away, PM Q's, this is not a secret technique; as you can tell, I am getting advice from several great sources - This is so cool!

If you really want to make these... What equipment do you have?
 
Joined
Aug 13, 2016
Messages
1,460
Location
Surprise, Arizona
Amazing work. I wish I still lived in Ohio so I could bribe you into taking me on as an apprentice.

Arizona is close to Ohio, no???... No apprentice needed! Ask away, PM Q's, this is not a secret technique; as you can tell, I am getting advice from several great sources - This is so cool!

If you really want to make these... What equipment do you have?

My setup is basic: 2 lathes 10" & 12", a table saw, compound miter saw, router, disc sander and drill press. Adding a bandsaw soon, eventually followed by a planer & jointer. I like your technique using the router for segmented pieces that look like they were made with small staves. It's on my to do list.

I'm sure you need precision equipment for that type of segmenting (as well as a good amount of skill and experience). What do you recommend?
 

mark james

IAP Collection, Curator
Joined
Sep 6, 2012
Messages
12,751
Location
Medina, Ohio
Amazing work. I wish I still lived in Ohio so I could bribe you into taking me on as an apprentice.

Arizona is close to Ohio, no???... No apprentice needed! Ask away, PM Q's, this is not a secret technique; as you can tell, I am getting advice from several great sources - This is so cool!

If you really want to make these... What equipment do you have?

My setup is basic: 2 lathes 10" & 12", a table saw, compound miter saw, router, disc sander and drill press. Adding a bandsaw soon, eventually followed by a planer & jointer. I like your technique using the router for segmented pieces that look like they were made with small staves. It's on my to do list.

I'm sure you need precision equipment for that type of segmenting (as well as a good amount of skill and experience). What do you recommend?


The chevrons should be doable with what you have got. You will need to stay with stock thicknesses for the brick assembly. Not sure if you saw it, but here is a link:

http://content.penturners.org/library/pen_blanks/chevron_blank.pdf

PM me if you have any questions.

Making the billet/trim rings requires an accurate indexing head, or you use the stave method, or you'll need to be a magician. :tongue:
 

mark james

IAP Collection, Curator
Joined
Sep 6, 2012
Messages
12,751
Location
Medina, Ohio

HI Pete:

Yea, I tried his method last summer and have a whole coffee can of staves that were not accurate enough IMO. He does "magical" work for sure!

A few came out OK, but my failure rate was pretty poor.
 

Attachments

  • IMG_2496.jpg
    IMG_2496.jpg
    90.3 KB · Views: 139

jttheclockman

Member
Joined
Feb 22, 2005
Messages
19,140
Location
NJ, USA.
The key thing with staves is to get the correct angle. It really is an easier way of doing them but you would probably could not go below 12 staves. It would be a challenge.
 
Joined
Aug 13, 2016
Messages
1,460
Location
Surprise, Arizona
Amazing work. I wish I still lived in Ohio so I could bribe you into taking me on as an apprentice.

Arizona is close to Ohio, no???... No apprentice needed! Ask away, PM Q's, this is not a secret technique; as you can tell, I am getting advice from several great sources - This is so cool!

If you really want to make these... What equipment do you have?

My setup is basic: 2 lathes 10" & 12", a table saw, compound miter saw, router, disc sander and drill press. Adding a bandsaw soon, eventually followed by a planer & jointer. I like your technique using the router for segmented pieces that look like they were made with small staves. It's on my to do list.

I'm sure you need precision equipment for that type of segmenting (as well as a good amount of skill and experience). What do you recommend?


The chevrons should be doable with what you have got. You will need to stay with stock thicknesses for the brick assembly. Not sure if you saw it, but here is a link:

http://content.penturners.org/library/pen_blanks/chevron_blank.pdf

PM me if you have any questions.

Making the billet/trim rings requires an accurate indexing head, or you use the stave method, or you'll need to be a magician. :tongue:

Thanks for the link Mark. I'm going to have to take my time on this, I know I don't have the skill yet but there's only one way to acquire it. I hope to eventually have a chevron pen worthy of showing.
 
Top Bottom