Billet Rings

Signed-In Members Don't See This Ad

leehljp

Member Liaison
Joined
Feb 6, 2005
Messages
9,326
Location
Tunica, Mississippi,
This was a "proof of skill" pen. The billet rings are fairly common, but whether I could make them was another issue.

A few quality issues need to be worked out, so I guess I'll have to keep this one.

I know the feeling. To me, there are more issues than just precision cutting. Search for the technique that gives repeatable precision cuts. I started off trying to make the angled stringer and found I couldn't repeat it. And if I did, the spacing was determined by minute' imperfections and threw everything off.

Back to "technique". Next I tried a square blank; made it into a hexigonal shape, and made slices in it on a precision table sled. Nailed it the second try! Added the stringers. That blank was beautiful. But not the third, fourth, fifth, six, seventh blank! Gave up! I just got LUCKY on the second try; Big blow to my ego, it wasn't skill at all! :rolleyes:

NOW, when you get this worked out, I am all ears and eyes.
 

mark james

IAP Collection, Curator
Joined
Sep 6, 2012
Messages
12,750
Location
Medina, Ohio
Wow! Really have to do the math to get the angles and thickness correct. That would be fun to try!

For me little math involved. I cut the slots with a slitting blade, in this case I believe it was .060" (Wisconsin Knife Works, Slitting router blades).

Then I had to make/sand the inlays for the slots (about .065" allowing space for glue). I have a Byrnes Thickness Sander, so I am able to take 1/16" stock and sand it down to size.

I do have a 6" blank drying where I have a Red/Black/Red inlay. The glue looks OK, so it may be a fun set of rings.

Try It!
 

robutacion

Member
Joined
Aug 6, 2009
Messages
6,514
Location
Australia - SA Adelaide Hills
Oh, the things a person can do when he/she retires, huh...???:wink::biggrin:

Those are great time-consuming process/operation, regardless of how you see it and sometimes we get too frustrated with the failures and "we" give-up however, the truth should be said to those that have perfected that art and can produce consistent work at constant basis, my hat goes to those people and their stubbornness and dedication.

Are you going to become one of these persons, Mark..??:biggrin:

Well, I hope you do, you seem to be enjoying the process so far, you may need a little more time and correct tools set-ups but, you seem to be in the right track so, congrats...!

Cheers
George
 

mark james

IAP Collection, Curator
Joined
Sep 6, 2012
Messages
12,750
Location
Medina, Ohio
Oh, the things a person can do when he/she retires, huh...???:wink::biggrin:

Those are great time-consuming process/operation, regardless of how you see it and sometimes we get too frustrated with the failures and "we" give-up however, the truth should be said to those that have perfected that art and can produce consistent work at constant basis, my hat goes to those people and their stubbornness and dedication.

Are you going to become one of these persons, Mark..??:biggrin:

Well, I hope you do, you seem to be enjoying the process so far, you may need a little more time and correct tools set-ups but, you seem to be in the right track so, congrats...!

Cheers
George

D'Day George:

Yes, I actually like the challenge for a more time-consuming project. This pen I envisioned last summer. Another IAP member (Farmer) pointed me in the right direction on a couple of issues, but there were some skills that I needed to learn in small bites.

It was fun to make.

Cheers, Mark
 

leehljp

Member Liaison
Joined
Feb 6, 2005
Messages
9,326
Location
Tunica, Mississippi,
Mark,

Below are two links that I think you may have seen that show two photos of cutting the slots/kerfs on the lathe. One is from "Skiprat" and the other is from "farmer"

http://www.penturners.org/forum/f179/tool-supplies-help-145212/index2.html
http://www.penturners.org/forum/f13/fender-stratocaster-47127/
(You may have to scroll down to see the tool that cuts the kerfs.

The point on both is that while the tool used by each are not exactly the same but they are similar. Skiprat's is cross cut but the application is the same.

Doing slots on a sled/table saw is not as exacting as the method in the photos of Skiprat and farmer. I have not yet done kerfs by this method but I have an accurate sled. It still has problems. Cutting on a sled to the accuracy needed is hindered by the force and minute' vibrations of the saw that act on the sled and the clamp. It only takes enough force to change the cuts by .005 - .007 to throw everything out of kilter.

I think, from what I have read in different places that there is much better accuracy on the slots by cutting them on the lathe.
 
Last edited:

jttheclockman

Member
Joined
Feb 22, 2005
Messages
19,132
Location
NJ, USA.
Well Hank the thing about cutting slots on a lathe is that you can index the spacing very easily without all the math. I have shown these pens countless of times here and have shared with all my method of doing slots. I use a router and a jig to support this. The only limit I have is the smallest bit I have for my router is a 1/16" bit which is as small as I would ever consider of using anyway for design purposes. I could reconfigure to use a dremel drill motor and go from there but I find no need for this. I do not know how Mark did these and if he is using a tablesaw then it is possible he is finding it somewhat hard to hold the accuracy, even with an accurate saw as he has. But that is the fun in things. Trying to work out those problems and developing your own methods. I did that with my method and it lends me to be able to do other designs which I will get into at a later date.


mark james

IAP Collection, Curator
Joined
Sep 6, 2012
Messages
12,750
Location
Medina, Ohio
Hank and John:

No, I did not use a table saw for these slots. For this pen, there are 12 slots, with a slitting blade of (.07"). I do have thinner blades, so it might be possible to get a 16 slot blank.

I feel the slots are very even and accurate as long as it is set up for the center of the blade to be in line to the points on my centers. After that I can cut the 12 slots in about 3-4 minutes. For this blank, I actually cut 4 blanks, and am working on some nicer inlays.
 

Attachments

  • IMG_3424.jpg
    IMG_3424.jpg
    218.7 KB · Views: 305
  • IMG_3425.jpg
    IMG_3425.jpg
    174.2 KB · Views: 323
  • IMG_3426.jpg
    IMG_3426.jpg
    172.7 KB · Views: 298

mark james

IAP Collection, Curator
Joined
Sep 6, 2012
Messages
12,750
Location
Medina, Ohio
I thought I had previously described it.

I traded some PM's with "Farmer" (IAP), last year and he was very helpful in my search for how to make these rings. I tried to make a sled like JT uses, but could not get the accuracy.

So... Mike (Farmer) let me know when one of his billiards friends was selling this machine.

It is an Atlas Clausing Metal Lathe, that has lost its motor long ago, and has an indexing plate welded into the headstock. Its only purpose now is to make these rings, or slots, flutes, etc. I suppose how creative one wants to be with the jigs, it can be useful in other ways (i.e., drilling indexed holes for patterned inlays). I'm just beginning to play with it, and see many design possibilities.

These are more of my glue-ups. As you can see, getting the inlays to fit also has a learning curve. The gray one I may not use, but the black one and the black-red-black look pretty good.
 

Attachments

  • IMG_3491.jpg
    IMG_3491.jpg
    124.9 KB · Views: 245

farmer

Member
Joined
Jun 16, 2012
Messages
807
Location
NV
Trim rings or billets

I thought I had previously described it.

I traded some PM's with "Farmer" (IAP), last year and he was very helpful in my search for how to make these rings. I tried to make a sled like JT uses, but could not get the accuracy.

So... Mike (Farmer) let me know when one of his billiards friends was selling this machine.

It is an Atlas Clausing Metal Lathe, that has lost its motor long ago, and has an indexing plate welded into the headstock. Its only purpose now is to make these rings, or slots, flutes, etc. I suppose how creative one wants to be with the jigs, it can be useful in other ways (i.e., drilling indexed holes for patterned inlays). I'm just beginning to play with it, and see many design possibilities.

These are more of my glue-ups. As you can see, getting the inlays to fit also has a learning curve. The gray one I may not use, but the black one and the black-red-black look pretty good.

Hi Mark

Way cool looking pen , glade to see you getting it figured out .
I had faith in you .
You still need a metal lathe or the right cue lathe .
Double red veneers and Gaboon ebony .......
 

farmer

Member
Joined
Jun 16, 2012
Messages
807
Location
NV
Slots

Hank and John:

No, I did not use a table saw for these slots. For this pen, there are 12 slots, with a slitting blade of (.07"). I do have thinner blades, so it might be possible to get a 16 slot blank.

I feel the slots are very even and accurate as long as it is set up for the center of the blade to be in line to the points on my centers. After that I can cut the 12 slots in about 3-4 minutes. For this blank, I actually cut 4 blanks, and am working on some nicer inlays.


Mark
You can do 24 slot rings, with the right slitting saw ....on certain diameter of pens ....

Pm me if you want the info on where to get the .018 slitting saw and the mandrel .
 
Last edited:

mark james

IAP Collection, Curator
Joined
Sep 6, 2012
Messages
12,750
Location
Medina, Ohio
I thought I had previously described it.

I traded some PM's with "Farmer" (IAP), last year and he was very helpful in my search for how to make these rings. I tried to make a sled like JT uses, but could not get the accuracy.

So... Mike (Farmer) let me know when one of his billiards friends was selling this machine.

It is an Atlas Clausing Metal Lathe, that has lost its motor long ago, and has an indexing plate welded into the headstock. Its only purpose now is to make these rings, or slots, flutes, etc. I suppose how creative one wants to be with the jigs, it can be useful in other ways (i.e., drilling indexed holes for patterned inlays). I'm just beginning to play with it, and see many design possibilities.

These are more of my glue-ups. As you can see, getting the inlays to fit also has a learning curve. The gray one I may not use, but the black one and the black-red-black look pretty good.

Hi Mark

Way cool looking pen , glade to see you getting it figured out .
I had faith in you .
You still need a metal lathe or the right cue lathe .
Double red veneers and Gaboon ebony .......

Yup! those are what I wanted to make! (Hi Mike.) The learning curve is getting better. I now have about 9 more blanks cut with 12 slot, .070" slots. So by the time I get those inserts sanded to size and glued-up I suspect my technique will be much better. I'll then try some with thinner slitting blades; I have down to .050". The last two I did are much better fits into the slots.

These are fun!. And as I said - I appreciate your help - (even for a cue-Guy!!!:wink:). And NO - I don't need no metal lathe! :biggrin: Too many tools already.
 

farmer

Member
Joined
Jun 16, 2012
Messages
807
Location
NV
I thought I had previously described it.


Yup! those are what I wanted to make! (Hi Mike.) The learning curve is getting better. I now have about 9 more blanks cut with 12 slot, .070" slots. So by the time I get those inserts sanded to size and glued-up I suspect my technique will be much better. I'll then try some with thinner slitting blades; I have down to .050". The last two I did are much better fits into the slots.

These are fun!. And as I said - I appreciate your help - (even for a cue-Guy!!!:wink:). And NO - I don't need no metal lathe! :biggrin: Too many tools already.

The good book says don't lead your brother into temptation.
I guess I have no morals .
 

farmer

Member
Joined
Jun 16, 2012
Messages
807
Location
NV
Hank and John:

No, I did not use a table saw for these slots. For this pen, there are 12 slots, with a slitting blade of (.07"). I do have thinner blades, so it might be possible to get a 16 slot blank.

I feel the slots are very even and accurate as long as it is set up for the center of the blade to be in line to the points on my centers. After that I can cut the 12 slots in about 3-4 minutes. For this blank, I actually cut 4 blanks, and am working on some nicer inlays.

Mark
I would like to see a better picture of you router mounting bracket .

If you kick your tail stock to one side .200 you can cut points !!!!!!!!!
https://www.cuesmith.com/vertical-v-bit-5-8.html
razor sharp points.
https://www.cuesmith.com/off-setting-live-center-2-or-3-morse-taper.html


mark james

IAP Collection, Curator
Joined
Sep 6, 2012
Messages
12,750
Location
Medina, Ohio
Slots, billets, etc...

Hank and John:

No, I did not use a table saw for these slots. For this pen, there are 12 slots, with a slitting blade of (.07"). I do have thinner blades, so it might be possible to get a 16 slot blank.

I feel the slots are very even and accurate as long as it is set up for the center of the blade to be in line to the points on my centers. After that I can cut the 12 slots in about 3-4 minutes. For this blank, I actually cut 4 blanks, and am working on some nicer inlays.

Mark
I would like to see a better picture of you router mounting bracket .

If you kick your tail stock to one side .200 you can cut points !!!!!!!!!

https://www.cuesmith.com/vertical-v-bit-5-8.html
razor sharp points.
https://www.cuesmith.com/off-setting-live-center-2-or-3-morse-taper.html


Been reading my mind... Yes, my eventual goal is to make pool cue inlays on pen blank size. I follow your questions. I will take more pics tomorrow.

Since I bought the machine, I have switched the router from the front to the back side, and have re-tapped a bottom bracket (I am not sure of the terms for a metal lathe, but will take a picture). I have also modified a back plate to allow the slitting blade to have a larger cutting area.

For the pool cue points. I have hesitated to do cuts on the lathe (YES, I know I need a metal lathe with all the bells and whistles...). My wild-as. thought was to have an inclined sled on my router. Use a 90 degree/45 degree bit and cut the inclined slot with a squared blank on the router. Not sure if this is a clear explanation.

But yes, your thoughts of where I am heading are accurate. I would like to make the rounded points and the sharp points... Eventually. 2, 3, 4 ply.
 

mark james

IAP Collection, Curator
Joined
Sep 6, 2012
Messages
12,750
Location
Medina, Ohio
Mike, Thanks for the links! I also got the previous, and will follow up. Just need more than 24 hrs in a day...
 

jttheclockman

Member
Joined
Feb 22, 2005
Messages
19,132
Location
NJ, USA.
Mark check out some of Skiprats posts and he shows how easy it is to make points and other cool designs. He actually shows the process in some of his threads.
 

farmer

Member
Joined
Jun 16, 2012
Messages
807
Location
NV
Hank and John:


For the pool cue points. I have hesitated to do cuts on the lathe (YES, I know I need a metal lathe with all the bells and whistles...). My wild-as. thought was to have an inclined sled on my router. Use a 90 degree/45 degree bit and cut the inclined slot with a squared blank on the router. Not sure if this is a clear explanation.

But yes, your thoughts of where I am heading are accurate. I would like to make the rounded points and the sharp points... Eventually. 2, 3, 4 ply.

I took you out in left field with the picture of the points in that cue .
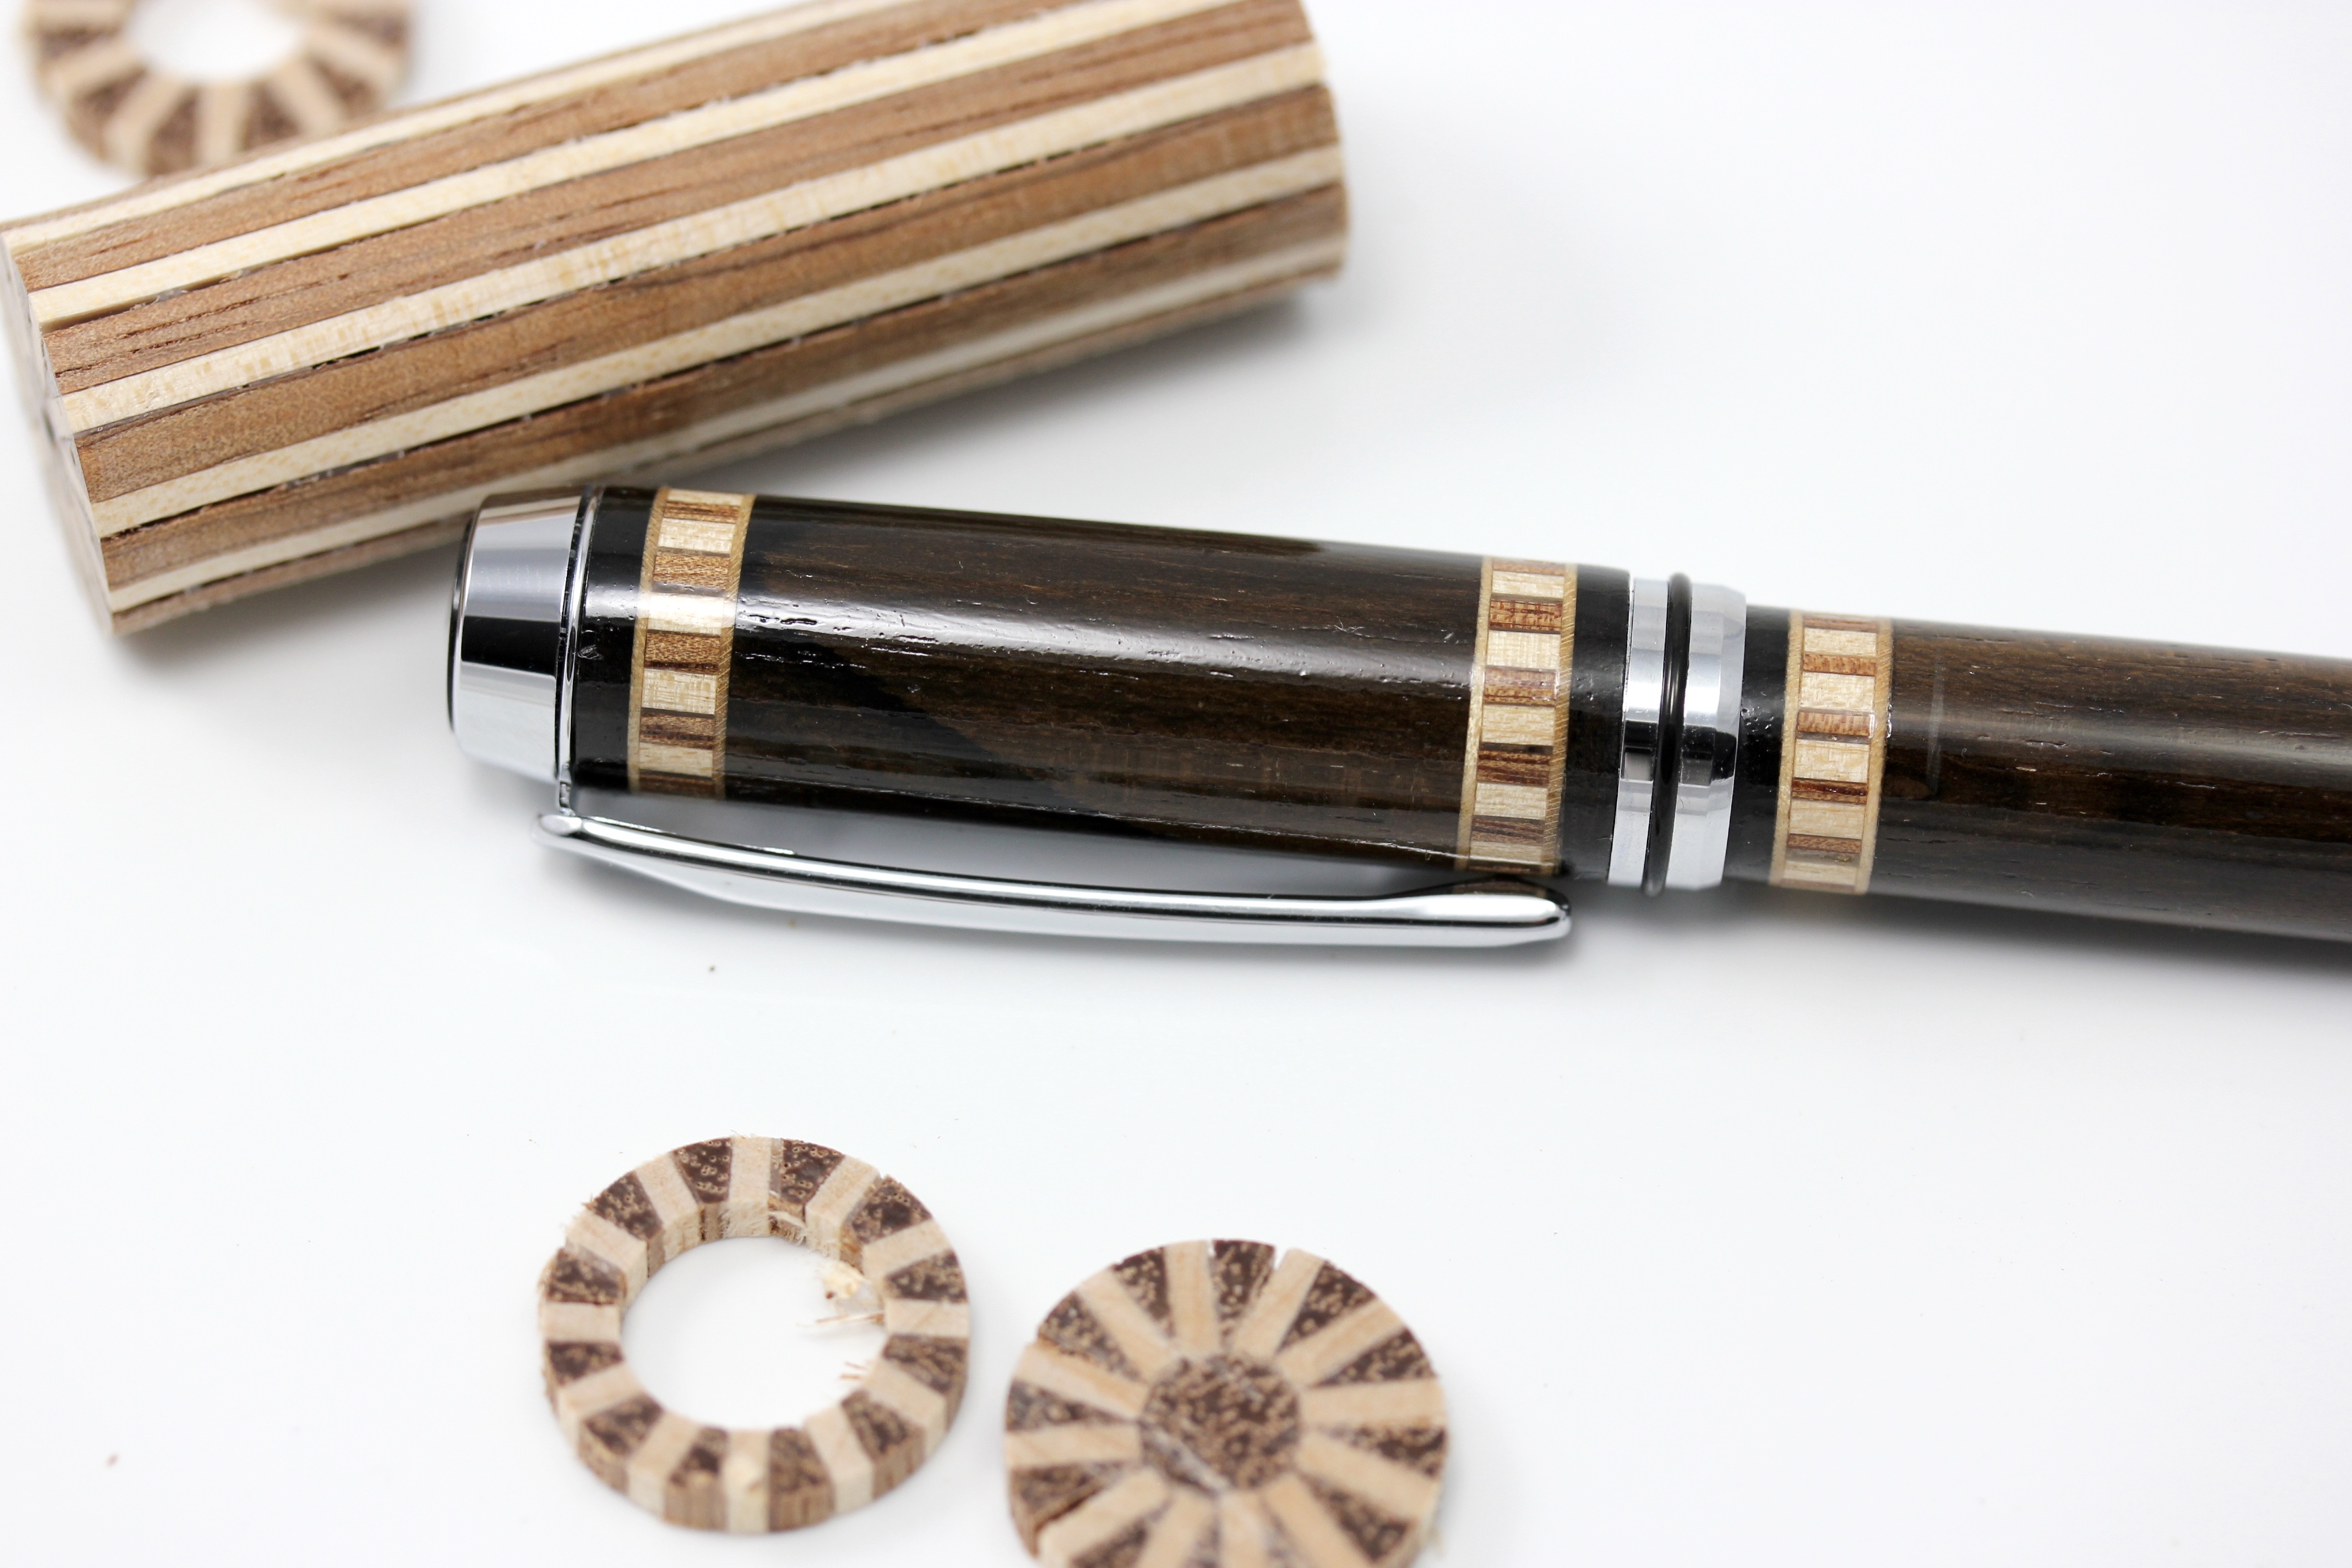
Those are veneered points , If you are wanting to make Hi end pens then you want to cut in full spice points .........

You use your billet/lathe with the tail stock kicked over with a winged cutter in your live cutter mounted on your tool post
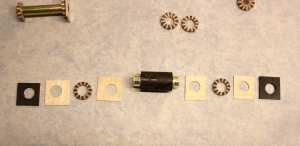
Cut 6 points , glue in 6 small square pieces of wood .
Back you live cutter away .015 and recut the points.
Then just keep backing out .015 .
Do 3 or 4 layers depending on the OD the pen.
You can recut points thinner then they make veneers.
If you call me I can tell you how measure everything out so the base of the points are the same width and ho to make the points where there are the same length.
You can do staggered points or Hi Low points.
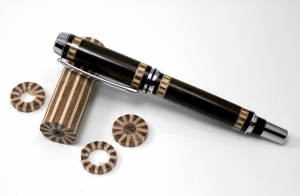
You can see the difference between the different style of points....
 

mark james

IAP Collection, Curator
Joined
Sep 6, 2012
Messages
12,750
Location
Medina, Ohio
Mark check out some of Skiprats posts and he shows how easy it is to make points and other cool designs. He actually shows the process in some of his threads.

Yup, viewed it 5-6 times over the last year. I'm well familiar with his website and previous threads. I just don't have the time to incorporate all the suggestions so quickly :biggrin:.

I have a bunch of blanks cut (12 slot) so I will be playing with the veneers. I have assempled another pen and will post it as soon as I have time to take a picture. (I'll be at my Mom's for 4-5 hrs today), was at our in-laws all Saturday and Sunday. 86, 91 and 92... JT - You know exactly what we are going through with our parents. So this set of skills and techniques are a great source of relaxation.

I do appreciate the suggestions - a group project is perfectly fine with me. I'm not into this for profit, so a it can be an "open source" refinement.
 

jttheclockman

Member
Joined
Feb 22, 2005
Messages
19,132
Location
NJ, USA.
Mark check out some of Skiprats posts and he shows how easy it is to make points and other cool designs. He actually shows the process in some of his threads.

Yup, viewed it 5-6 times over the last year. I'm well familiar with his website and previous threads. I just don't have the time to incorporate all the suggestions so quickly :biggrin:.

I have a bunch of blanks cut (12 slot) so I will be playing with the veneers. I have assempled another pen and will post it as soon as I have time to take a picture. (I'll be at my Mom's for 4-5 hrs today), was at our in-laws all Saturday and Sunday. 86, 91 and 92... JT - You know exactly what we are going through with our parents. So this set of skills and techniques are a great source of relaxation.

I do appreciate the suggestions - a group project is perfectly fine with me. I'm not into this for profit, so a it can be an "open source" refinement.

Mark I sure do. Enjoy every minute you can with your parents and loved ones. There is no pen that needs to be made before spending quality time with them. Family always come first. Take care.
 

mark james

IAP Collection, Curator
Joined
Sep 6, 2012
Messages
12,750
Location
Medina, Ohio
Mark
I would like to see a better picture of you router mounting bracket .

As indicated in the picture captions, two of my dials are sloppy. I have taken them apart, cleaned, etc, but I was not able to get them tight.

I also made a stop plate for the greatest depth I wanted my cut; this can be adjusted.

After I got the machine last summer, I tweaked the mounting plate, and reversed it from the front to the back of the lathe, and ground out more on the bottom section to allow more room for the slitting blades. I would like to simply redo the entire mounting bracket and use 4 screws instead of 2. While it is accurate now, I suspect it can be better.
 

Attachments

  • IMG_3494.jpg
    IMG_3494.jpg
    195.3 KB · Views: 224
  • IMG_3492.jpg
    IMG_3492.jpg
    190.8 KB · Views: 220
  • IMG_3495.jpg
    IMG_3495.jpg
    148.8 KB · Views: 199

farmer

Member
Joined
Jun 16, 2012
Messages
807
Location
NV
Mounting bracket

Mark
I would like to see a better picture of you router mounting bracket .

As indicated in the picture captions, two of my dials are sloppy. I have taken them apart, cleaned, etc, but I was not able to get them tight.

I also made a stop plate for the greatest depth I wanted my cut; this can be adjusted.

After I got the machine last summer, I tweaked the mounting plate, and reversed it from the front to the back of the lathe, and ground out more on the bottom section to allow more room for the slitting blades. I would like to simply redo the entire mounting bracket and use 4 screws instead of 2. While it is accurate now, I suspect it can be better.


I seen what I needed to see thank you for posting photos .

When you get ready I can tell you how to make pedals on your billet machine/lathe .
You will be cutting on top the wood .
 

farmer

Member
Joined
Jun 16, 2012
Messages
807
Location
NV
Sloppy dials

Mark
I would like to see a better picture of you router mounting bracket .

As indicated in the picture captions, two of my dials are sloppy. I have taken them apart, cleaned, etc, but I was not able to get them tight.

I also made a stop plate for the greatest depth I wanted my cut; this can be adjusted.

After I got the machine last summer, I tweaked the mounting plate, and reversed it from the front to the back of the lathe, and ground out more on the bottom section to allow more room for the slitting blades. I would like to simply redo the entire mounting bracket and use 4 screws instead of 2. While it is accurate now, I suspect it can be better.


Is the dials sloppy or the cross slide.

I put a dial indicator on my cross slide .........
 
Signed-In Members Don't See This Ad

mark james

IAP Collection, Curator
Joined
Sep 6, 2012
Messages
12,750
Location
Medina, Ohio
Mark
I would like to see a better picture of you router mounting bracket .

As indicated in the picture captions, two of my dials are sloppy. I have taken them apart, cleaned, etc, but I was not able to get them tight.

I also made a stop plate for the greatest depth I wanted my cut; this can be adjusted.

After I got the machine last summer, I tweaked the mounting plate, and reversed it from the front to the back of the lathe, and ground out more on the bottom section to allow more room for the slitting blades. I would like to simply redo the entire mounting bracket and use 4 screws instead of 2. While it is accurate now, I suspect it can be better.


Is the dials sloppy or the cross slide.

I put a dial indicator on my cross slide .........

Both dials are sloppy, the cross slide is very solid IMO. When I took it all apart to clean it and learn how it all fit, it had 2 white plastic shims to keep it tight. These went back in easily and I believe it is fine.

On the bottom dial, the slop is not an issue as it will not move on it's own.

On the top dial, I have to hold it against the stop block I made. When the router is on, the vibrations are enough to move the cross slide. For the first several pen blanks, I simply held the dial firmly, but I am more confident that the cuts are the same depth with the stop block.

I had the aluminum plates already, but I will eventually incorporate a dial indicator also.
 
Top Bottom