Casting It "SEAMS" to be

Signed-In Members Don't See This Ad

jttheclockman

Member
Joined
Feb 22, 2005
Messages
19,139
Location
NJ, USA.
This is one of those threads that will have dual purposes. One is to try Jeff's new system of tags out:)

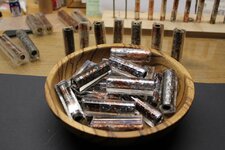
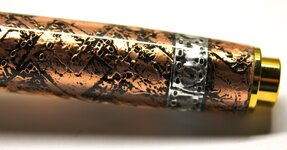
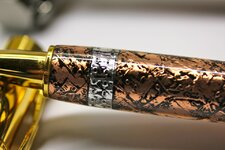
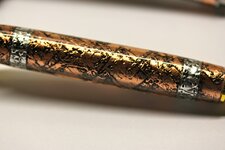
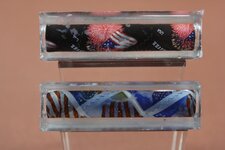
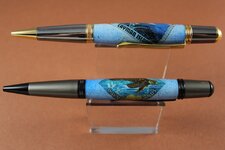
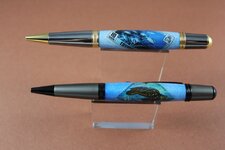
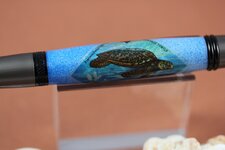
The second is to supply information both words and photos for those that do casting using various materials such a snake skins, photos, paper, foils, veneers and other things that will have a seam when wrapped around a tube. The point is to explain how we hide these seams. maybe you can show us examples of your methods and a little explanation. If you do these type casting blanks maybe you can tell us some of the do's and don'ts when doing this. Photos is always a great teacher. Thanks for taking the time to share.

Happy turning
 
Signed-In Members Don't See This Ad

mark james

IAP Collection, Curator
Joined
Sep 6, 2012
Messages
12,751
Location
Medina, Ohio
Hi John.. I'll throw your thread a lifeline :wink:

First: Foil Blanks. Very easy to work with the seam - because you don't try to hide it typically.
 

Attachments

  • IMG_0760.jpg
    IMG_0760.jpg
    197 KB · Views: 260
  • IMG_0763.jpg
    IMG_0763.jpg
    159.9 KB · Views: 272
  • IMG_0764.jpg
    IMG_0764.jpg
    172.8 KB · Views: 231
  • IMG_0767.jpg
    IMG_0767.jpg
    142.8 KB · Views: 211

mark james

IAP Collection, Curator
Joined
Sep 6, 2012
Messages
12,751
Location
Medina, Ohio
Second: Stamps with perforated edges. You can cut the perforations off, or try to match the perforations. With a slightly rounded blank, this will result in a slight mismatch. If you turn a straight blank, it will look much cleaner.
 

Attachments

  • IMG_0921.jpg
    IMG_0921.jpg
    143.9 KB · Views: 253

mark james

IAP Collection, Curator
Joined
Sep 6, 2012
Messages
12,751
Location
Medina, Ohio
Third: Stamps again. Here, the background was painted to blend in with the stamp background colors. A two-tone paint: (1) Basic Blue; (2) speckled white. Both from an ordinary enamel spray can.
The "seams"/edges are pretty faint. So, try to use the background paint at times.
 

Attachments

  • IMG_0772.jpg
    IMG_0772.jpg
    128.3 KB · Views: 231
  • IMG_0771.jpg
    IMG_0771.jpg
    116.3 KB · Views: 197
  • IMG_0770.jpg
    IMG_0770.jpg
    110.4 KB · Views: 189

Cwalker935

Member
Joined
May 18, 2014
Messages
3,506
Location
Richmond, Va
For labels or photos, create a border, size so that the border overlaps, and color the white cut edge with with a sharpie that matches the border. See:

content.penturners.org/library/pen_blanks/label_casting.pdf
 

jttheclockman

Member
Joined
Feb 22, 2005
Messages
19,139
Location
NJ, USA.
Your a life saver Mark. Thanks and thanks for the photos too. It is so much better when you can actually see what you are talking about.
 

jttheclockman

Member
Joined
Feb 22, 2005
Messages
19,139
Location
NJ, USA.
For labels or photos, create a border, size so that the border overlaps, and color the white cut edge with with a sharpie that matches the border. See:

content.penturners.org/library/pen_blanks/label_casting.pdf


This is a very good tip. I have been doing the butt joint and sometimes it works well and others it does not. Depends on the material.
 

CREID

Member
Joined
Jul 23, 2008
Messages
3,009
Location
Vancouver, wa
Thanks for the post and the answers, I have been wondering what people do and this has answered some of my questions.

Curt
 

wouldentu2?

Member
Joined
Jan 27, 2011
Messages
899
Location
Oak Creek WI
Sometimes you can overlap the ends and cut them both with one pass of a razor blade, remove the ends and glue their edges down.
 

mark james

IAP Collection, Curator
Joined
Sep 6, 2012
Messages
12,751
Location
Medina, Ohio
Hi Dave:

..."Sometimes you can overlap the ends and cut them both with one pass of a razor blade, remove the ends and glue their edges down"....

For what application? Foil, stamps, etc... ?? Any possible pics?
 
Last edited:

jttheclockman

Member
Joined
Feb 22, 2005
Messages
19,139
Location
NJ, USA.
Yes this is what I mentioned i do when I make butt joints. Have done this with the imitation carbon fiber but being it is vinyl it shrunk with time. Not sure what would have happened if i would have casted right away because that is when I had my health issues and was unable to follow up. Sorry I have no photos at this time.
 
Top Bottom