Chatoyance galore...!

Signed-In Members Don't See This Ad

robutacion

Member
Joined
Aug 6, 2009
Messages
6,514
Location
Australia - SA Adelaide Hills
Hi peoples,

Before we go any further, some people will be asking, what in heck is chatoyance...??? there many explanations but, the one I like the most is this "Chatoyance is the property of some materials to exhibit a wavy, luminous band with a silky lustre, reminiscent of the eye of a cat". A good example of this in wood is shown here,Woodworking - Creating chatoyance, vibrancy, 'popping the grain' - YouTube

There are plenty of wood types that have this natural ability and I have plenty of them but, some woods only show its chatoyance when enhanced with a darker colouration and a very shiny finish, this is what I found out of my Tortuosa Willow tree wood that produces a bark burl that most people love but also a great deal of chatoyance that is not visible in its light colour and natural raw stage.

Apart from the burl wood, the inner part of the tree wood is pretty average, light in colour, light in weight and little visible grain however, certain parts of the tree produces wood that is extremely dense, impermeable but still light in weight.

I've noticed that, not every blanks stains/stabilises well, even in the burl category but, the softest the wood the better it receives any foreign liquids. I have been doing some work/testing on different pieces of wood from different parts of the tree and I realise that, they all behave differently, as if they weren't part of the same tree species, much less part of the same tree, sometimes the same log.

I was able to recognise the parts of the wood that accepts dying/stabilising however the failure rate is still about 20%, as I just confirmed with my last dying/stabilisation batch, some simply don't soak and float like cork.

I'm using the Alumilite dyes supplied by Curtis, together with his Cactus Juice and while very concentrated stuff, I find that colours like the blue don't come up as blue as I would like, more like a green(ish) even tough I use 55 drops per litre of Juice.

This was the case with the batch I'm working on, they were under vacuum for 6 hours and then soaking all night, the next day I drain, wrapped them in foil (3 in each piece of foil) and cooked them for the 90 minutes at 90° Celsius.

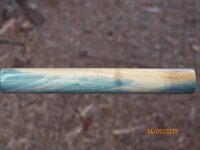
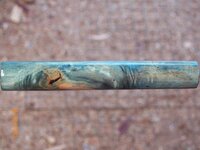
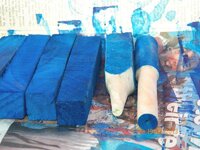
I could see the ones that didn't soak (not much blue) and even if I had my eyes closed, I would be able to tell as the soaked ones were very heavy while the others were very light. I got them all out of the foil and proceed to turn one into a normal sample, as I do with any other blanks, what I noticed was that, while the blanks after unwrapped from the foil looked quite dark blue, as soon as I turn that surface away, the light blueish/greenish colour appears, and seems to be like that all though the wood.

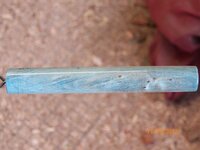
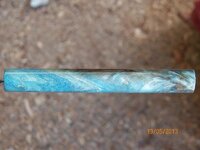
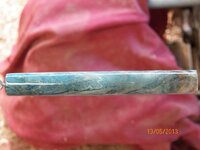
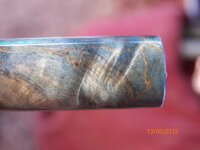
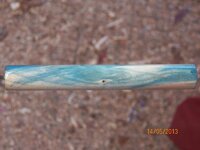
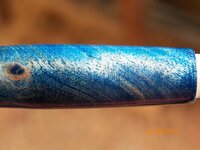
It may not be as dark blue as I wanted but, the chatoyance is just amazing, I know that the blank I selected to turn isn't a third as pretty as many others (grain wise), I couldn't tell them apart with that dark blue skin of dry blue Juice covering the wood however, I think the blank looks pretty good...!

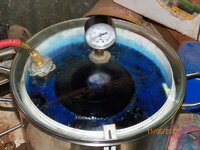
In an attempt to darken the blanks done, I decided to use all the blue dye I had (about 3/5 of the bottle capacity) into a 1 x gallon (3,7 lt) of juice, stir the heck out of it, put all be blanks back in the stabilisation chamber and pour the whole think on, it just covered the blanks, about 3/4" over, put the lid and fire the pump.
018.JPG

It started at 2:00pm afternoon and I turn the pump off at 9:00pm evening, they will be soaking again overnight so in the morning I will drain and cook then again. I could have done a double colour dye but I want a darker blue so, will see how they come up, sometime tomorrow.

I have my doubts that they will show much darker, the reason being is that, the first time around, the blanks soaked about 2.5lt of juice, this time, and looking at the amount of juice over the blanks when I turned the pump off, it didn't seem to have soaked anything at all so, will see if the overnight soaking alone will allow the wood to soak some more juice...!

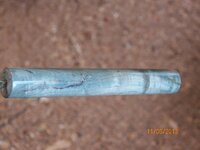
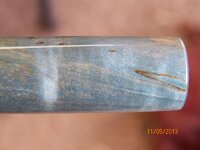
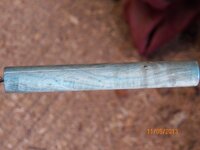
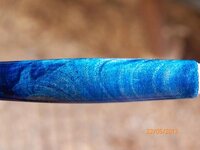
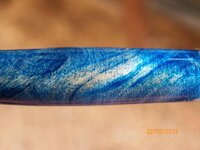
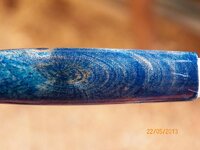
For now, I can show you how the first sample come out from the first run, is this is it;

PS: I have tried to capture the chatoyance in the pics but, is almost an impossible task, I may have to put it inside the microwave, and see if I can get the table to turn without the heat and then use the video camera to record a couple of rotations, that should work, all the background is white so, I should have plenty of light for it. Hummm...! maybe the table will turn too fast...!:confused:

010.JPG 012.JPG 013.JPG 015.JPG
016.JPG

To be continued...
Cheers
George
 
Last edited:
Signed-In Members Don't See This Ad
Joined
Feb 24, 2012
Messages
4,368
Location
Claremont NH
It takes a lot more dye than it seems like it should. I have just added and added dye into Cactus Juice until it finally gets that color in. You could more than double your dye and probably more like Mannie does. Try tripling it and see what happens.
 

robutacion

Member
Joined
Aug 6, 2009
Messages
6,514
Location
Australia - SA Adelaide Hills
you really have to add dye - I've seen Monty (Mannie) put 300 drops of red into a quart (about 1L) of juice.

Yeah, that may explain it, its "only" 6 times more of what I'm using damn...!:eek::frown:

I don't know how many drops you get out of one of those dye bottles but, I should be getting a small box full of them, as soon as Curtis read my message, I reckon I pour one whole bottle in one of those gallon drums, that should fix it...!

Hell, this is getting more expensive by the minute...!:mad:

Thanks guys...!

Cheers
George
 

robutacion

Member
Joined
Aug 6, 2009
Messages
6,514
Location
Australia - SA Adelaide Hills
Continued...!

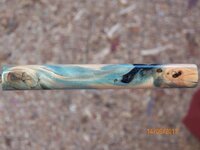
Well, not as dark as I would like/wanted but a little better than the ones from the first run with the juice and blue dye.

I don't know (yet) how much dye I have to use to get the blue I want but, the double stabilising didn't work as good as I was expecting, after the normal 90 minutes on 90° Celsius, the juice wasn't set/hard, lots of liquid still, when I unwrapped 4 "bunch's" of 3 blanks each so, I give it another 90 minutes with the temp up to 120°C. It did dry out a little better not still not as set/dry as always come from the first cooking...!:mad:

012.jpg

That will do for now, as I have no more blue dye, Curtis is away for the next fortnight so, it will be while before I get some of the dye to try on another batch, this time I will dump a whole dye bottle into the 3.7lt juice container, if it doesn't do it, I will be buggered...!:eek::)

So here is another blank, a much better one and a lot closer to what the other should be (well, I hope) so, enjoy...!:wink:

Cheers
George

001.JPG 003.JPG 007.JPG 009.JPG 011.JPG
 
Last edited:
Joined
Feb 24, 2012
Messages
4,368
Location
Claremont NH
Just beautiful George it is hard to figure out how much of the dye to put in all you can really do is experiment. The wood will be beautiful every time you add more dye so it isn't like it is any sort of loss.
 

BSea

Member
Joined
Dec 28, 2009
Messages
4,628
Location
Little Rock, Arkansas
Very good info and the last blank looks outstanding. But having used alumilite dye for alumilite blanks, I'm also surprised that you didn't get a darker blue. Cactus Juice is in my future, so thanks for doing the lab work. :wink:
 

robutacion

Member
Joined
Aug 6, 2009
Messages
6,514
Location
Australia - SA Adelaide Hills
The experimentations are far from over with this wood, I have 2 other small lots soaking with different type of dyes, all in blue to see which one will provided the true blue I want instead of the green(ish)

Most of these blanks don't really need stabilisation so, I will be saving hundreds of dollars in achieving the dying without using the juice.

I'm using Methylated Spirits to dissolve the dyes, it still goes under vacuum to force the dye in but, it would dry very quickly when they are drained and put on top of news paper, in the sun in possible.

I need to know if the MS "burns" the colour when dry, making it lose its sharpness and vivacity so, we soon will find out...!

As for the blanks I made with the Alumilite blue dye and stabilised twice, is evident that the second stabilisation did not penetrated sufficiently throughout the blanks body, some are "patchy" like a 2 tone blank, as if the blanks was composed of 2 different woods and joined at the centre, interesting stuff, really...!

Others show a very smooth/suave transition from the dyed surface to the un-dyed wood, other show full penetration and are heavy as hell, a bit of everything, really..!

I turned a few more blanks to see its effects when finished (CA), some are really "funky" with lots of reflections, others show some wood characteristics that took the dye in a different way, given some beautiful effects that will look very "Porsh" in some pen kits...!

Here are some more samples;

The 2 tone blanks with suave transition, 005.JPG 007 (2).JPG


Another blank with some interesting wood detail, 002.JPG 003 (2).JPG

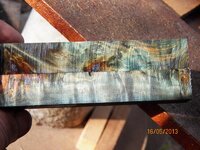
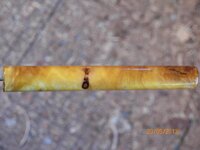
And finally from the same batch, some blanks that do not need turning and CA finish to show what they will look like, stunning...!
014.JPG


Cheers
George
 

jyreene

Member
Joined
Feb 17, 2009
Messages
1,476
Location
Overseas location
The last two pics of the turned one and the unturned ones have some awesome colors. Makes me want to try and soak some blanks and buy a vacuum setup...
 

robutacion

Member
Joined
Aug 6, 2009
Messages
6,514
Location
Australia - SA Adelaide Hills
The last two pics of the turned one and the unturned ones have some awesome colors. Makes me want to try and soak some blanks and buy a vacuum setup...

Thanks for your words but, if you want to produce dyed wood pens, you need no vacuum pump, pressure pot, none that stuff, you only need a piece of paper towel, and 1 (one) very small drop of most concentrated dyes such as the Alumilite ones.

There is so much work and expense to dye a full pen blank when 70% is wastage, if you are using what you making, you can achieve the same the dying results by simply dying the pen barrel when turned and sanded to size, it takes 30 seconds and you are done.

Most of the wood/dye drying is achieved with one many ways, I like to "burnish" the pad/paper piece used to dye, into the wood until the blanks gets got but not too hot. Another quick way is to use a hot air gun, either way, it doesn't take more that 5 minutes to dry and give it the first application of thin CA.

No sanding for the first solid 5 CA coats, then a gentle rub with 400 grit sandpaper and you are ready for another 5 coats of CA and then finish as per normal.

I may endup making a video clip showing how its done, as there are many effects that can be given to the wood, this way, some would look like burl...! Its called wood imitations.:wink:

How to you think the Chinese make furniture with a local white wood and sell it as Mahogany, Walnut, and others well known and sourced woods in furniture...??? They are pretty good at it, indeed...!

Cheers
George
 

jyreene

Member
Joined
Feb 17, 2009
Messages
1,476
Location
Overseas location
The last two pics of the turned one and the unturned ones have some awesome colors. Makes me want to try and soak some blanks and buy a vacuum setup...

Thanks for your words but, if you want to produce dyed wood pens, you need no vacuum pump, pressure pot, none that stuff, you only need a piece of paper towel, and 1 (one) very small drop of most concentrated dyes such as the Alumilite ones.

There is so much work and expense to dye a full pen blank when 70% is wastage, if you are using what you making, you can achieve the same the dying results by simply dying the pen barrel when turned and sanded to size, it takes 30 seconds and you are done.

Most of the wood/dye drying is achieved with one many ways, I like to "burnish" the pad/paper piece used to dye, into the wood until the blanks gets got but not too hot. Another quick way is to use a hot air gun, either way, it doesn't take more that 5 minutes to dry and give it the first application of thin CA.

No sanding for the first solid 5 CA coats, then a gentle rub with 400 grit sandpaper and you are ready for another 5 coats of CA and then finish as per normal.

I may endup making a video clip showing how its done, as there are many effects that can be given to the wood, this way, some would look like burl...! Its called wood imitations.:wink:

How to you think the Chinese make furniture with a local white wood and sell it as Mahogany, Walnut, and others well known and sourced woods in furniture...??? They are pretty good at it, indeed...!

Cheers
George

Awesome. Thanks! I've now added the dyes to my wish list!
 

robutacion

Member
Joined
Aug 6, 2009
Messages
6,514
Location
Australia - SA Adelaide Hills
My third go at this wood using different type of dyes from my Polyester resin supplier and the planned Methylated Spirits for quick evaporation but the whole thing turned into a nightmare and complete waste of money and time as the wood just never soaked, I had to dismantle the Vacuum pump again to clean it all up, lost a change of oil and some other stuff that I wasn't that happy about it...!

I had some apprehension about using the Methylated Spirits due to its alcohol concentration and evaporation characteristics, I couldn't use water as the dyes wouldn't dissolve on it and water would be bad news for the pump oil. Acetone was also another possibility but costs were the deterrent, I didn't wanted to stabilised the wood as the wood doesn't necessarily need stabilising , even though is not a hard wood but very workable stuff so, I was trying to void the horrendous cost to me of using the Cactus juice, shipping these gallons kills me...!

So, as a dying process only, this process can possible work with other woods but not with the Tortuosa Willow, no Sir...! In fact, and after what I just went through, I'm very surprised that the Alumilite dye with the Cactus Juice, still done the job it did even though they were stabilised twice however, considering the last results I think the first lot didn't come out that bad, huh...???:wink::biggrin:

This lot, I first used 2 different dyes, one a translucent one I use on the PR and then I order another type of dye that come in past form but seem to be the closest blue I wanted. That did indeed prove correct as when I mixed enough of both dyes with the MS, I could see that the translucent blue dye was very identical to the Alumilite one (slightly greenish on the wood), while the other one seem to maintain a nice blue throughout as seen here. 008.JPG


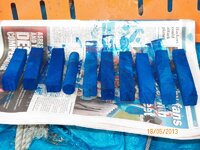
This is the blue I wanted to get, the first lot was never under vacuum as I had already something else stabilising so, I let it soak overnight and almost all day the next day, dried them quickly in the oven (30 minutes) and they were bone dry so I turned one of each mix only to find that, none of them soaked at all, the dye may have went a couple of mm into the wood and that was it.

I then decided to mix some more of the better blue dye, make it even darker and put both lots (5 blanks on each lot) on a bigger container covered them well over with the solution and put them on the vacuum chambers for some hours.

Well, I was watching it and made no foam but huge bubbles come up to the surface and then blow, I could see the spray of those bubbles hitting the glass lid so I knew that I had just started something that I would regret, as I knew that the pump was in constant suction so, any vapors inside the chamber would be sucked straight in and endup in the oil reservoir.

About 15 minutes into the process I could see a water type buble showing on the oil reservoir level window, I knew then that my fears have realised and that, I would have to change the oil that had little use since replaced.

It took about 3 hours for the bubbles to stop, by then I already had to drain some of the contaminated oil from the pump as the reservoir was over full, the oil was already lost so I decided to let it finish even though was/is a big chance that I damaged some O'rings inside the pump, if was acetone I would say, they would be stuffed but being Methylated Spirits is also a chance that it didn't affect them, apart from contaminating the oil and leave a heavy sluggish stuff at the reservoir bottom that had to be dismantled to be cleaned up.:mad:

After getting the blanks outside to dry, I fixed the pump and change the oil, got everything cleaned and ready for the next lot.
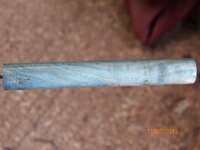
Let the blanks dry all day, the sun was out and temps were fair so, by the end of the day (yesterday) I got 2 blanks from the pile, one that I had rounded the first time and another that I just started rounding on one end and realised that was a waste of time to go any further so, mount them on the lathe, the round first, when I realise the results of all my efforts. I turn the other one in a conic shape to see how much penetration it had, the results are obvious and shown in this next pic, 001.JPG

Great colour but, what a disappointing result after all my troubles, there is just no penetration at all...!:mad:

OK so, the Methylated Spirits and resin dyes did not work at all however, The most important lesson of this test is, DO NOT USE METHYLATED SPIRITS IN YOUR VACUUM CHAMBER< EVER>...!

I'm not done yet with this wood and my colouring attempts to bring that chatoyance out good an proper, but for now, I may give it a little break...!:frown:

Cheers
George
 

robutacion

Member
Joined
Aug 6, 2009
Messages
6,514
Location
Australia - SA Adelaide Hills
Well, did I say, "but for now, I may give it a little break...!"???

I obviously lied...!:) not that was intentional but, those that know me, should have been very surprised with such statement so, to get things to "normality" I decided to give a little example of how you can save a lot of money and time by simply doing your own dying/colouring in woods/blanks that you see appropriate.

As I mention before, if the wood doesn't need stabilising, is a little light in colour or simply you want to make it look different, dyeing the wood just before you are ready to apply the CA or other finish, is the way to go. There are many effects you can achieve, including the burl look alike, like this piece of pine stained as a mirror frame here, http://www.penturners.org/forum/f45/treasure-found-odd-shop-au%244-88802/.

Keeping thing easy, the only thing you need to do is to "rub" the wood with a little bit of the dye/colourant, let it dry or accelerate the drying with a hot hair gun/hair dryer, buff if with some fine steel wood and there you are ready for the final finishing coating...!

In my case, and after the disappointment of my last try, I wanted to see how blue, the blue past I got that is the blue I wanted, would look like rubbed in the wood, using the method above explained. I wanted to enhance the chatoyance of some parts of this wood, and blue is a good colour for that but, not only...!

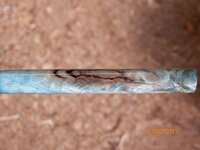
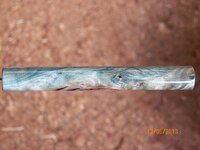
I used one of the previous turned blanks to do this test and as you can see, it come out quite good, in my view 002.JPG 003.JPG004.JPG 005.JPG


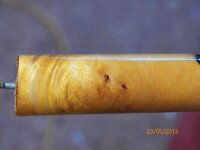
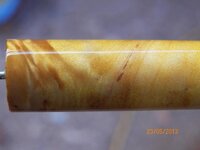
After this blue dye test, I decided to used a different colour on a blank from the same wood and cut, as the 2 blanks used in these tests were cut in diagonal which compromise's some of the chatoyance but enhances the grain considerably. This time I went for the Golden Oak, a proper wood stain bought at the hardware store and the result is quite good also 001a.JPG 002a.JPG 003a.JPG so, the possibilities are limited only by your imagination...!

You can also transform inexpensive woods with not a lot going for them, into something really pretty and the cost, if you do it yourself, 5 to 10cts max.

Give it a try...!:wink::biggrin:

Cheers
George
 
Last edited:
Top Bottom