Modifications I have made

Signed-In Members Don't See This Ad

Texatdurango

Member
Joined
Apr 23, 2007
Messages
4,649
Location
Show Low, Arizona
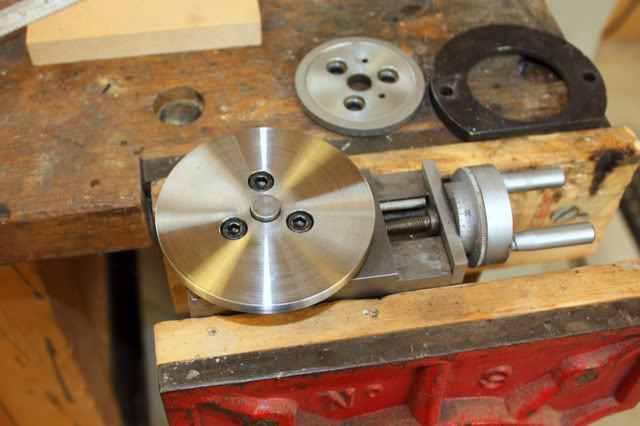
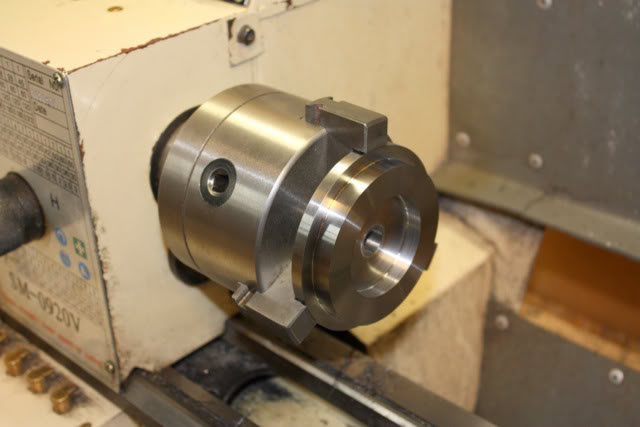
After reading several posts in the few threads we have so far it's obvious we have some pretty sharp members and I think it would be a great idea if we started a thread (this one) for members to take a photo or two of their modifications they have done to their lathes.

It doesn't have to be your own idea, it could be something you made from plans you got somewhere.

As far as I'm concerned, this is the most beneficial aspect of these discussions since I already have a lathe. Now I want to tweak, poke and prod the thing until it's just cluttered with mods and gadgets. :)

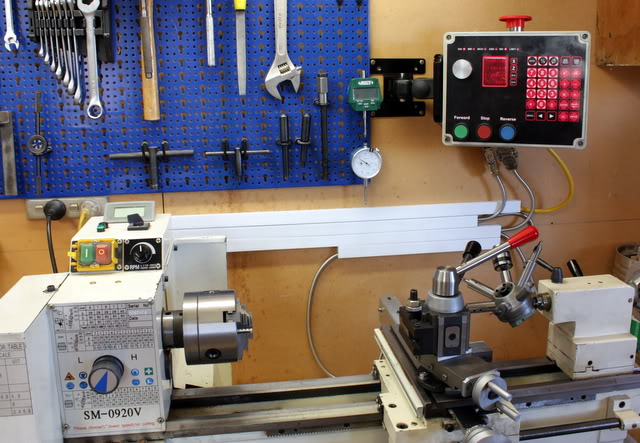
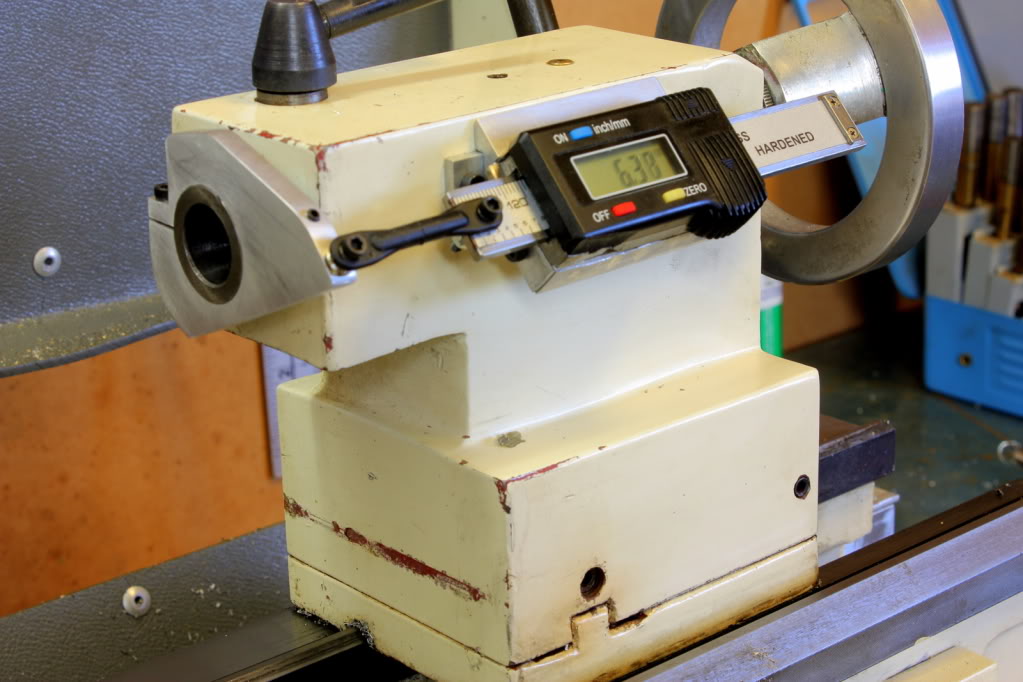
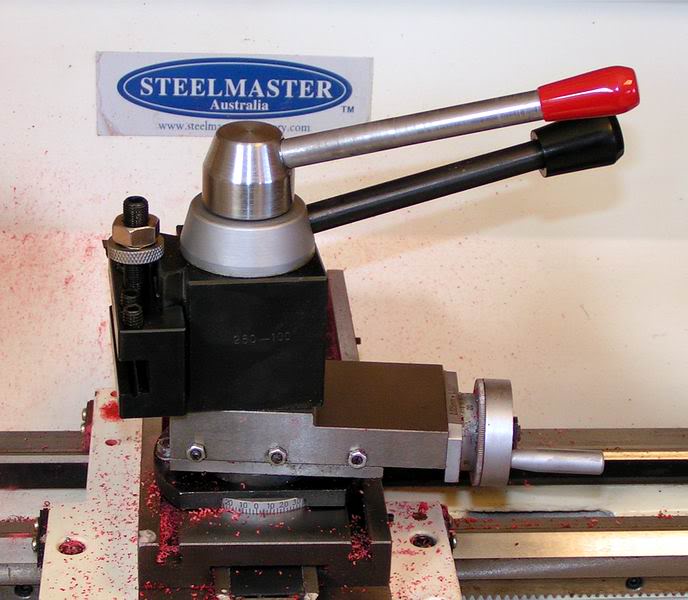
Bluwolf mentioned DRO's the other day and Dgscott just mentioned a DRO he added but no description or photos.

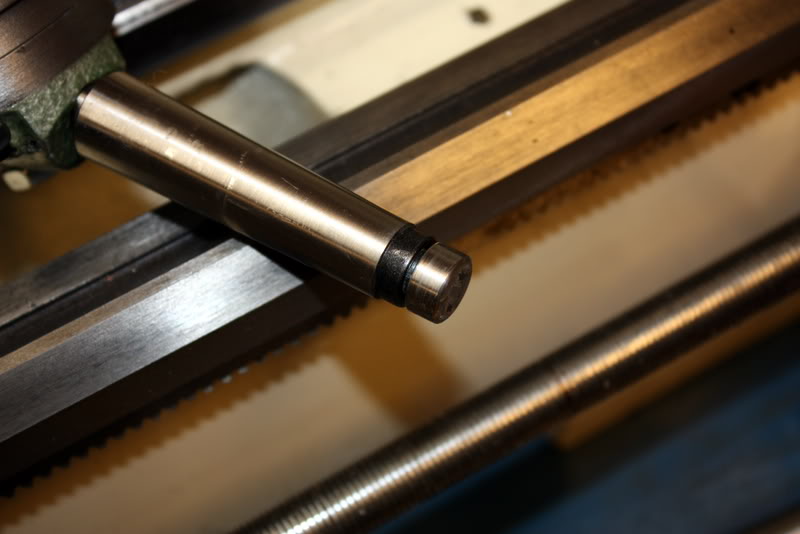
One DRO I wish I had was to show how far I'm cutting in towards the center of a rod. Having accidentally turned off to much a few times, I am always stopping and checking with calipers.

Sure would love to see some photos and ideas! :biggrin:
 
Signed-In Members Don't See This Ad

mredburn

IAP Activities Manager
Staff member
Joined
Jul 5, 2009
Messages
8,752
Location
Fort Myers FL
I would post some of my mods but they are specific to the sherline lathes. I dont think it would help those who use a different lathe.
 

bluwolf

Member
Joined
Oct 2, 2008
Messages
995
Location
SW Florida
I wonder if anything like this still around. lathes.co.uk/delta/index.html

I really don't think that's going to give you the results you're looking for. It doesn't have very much travel for starters. It's sort of the same idea as modifying a drill press with a sliding table to do milling, not a good idea for several reasons.

But not wanting to be the one to squash someone else's creativity, you could always buy something like this and modify it. It's basically the same thing except the one you showed has a cheap toolpost on it.

http://www.grizzly.com/products/Cross-Sliding-Vises-3-/H0966
 

bluwolf

Member
Joined
Oct 2, 2008
Messages
995
Location
SW Florida
What is a DRO?

Digital Read Out. If you have a digital caliper it's the display you read for the measurement. In the context of lathes there are electronic scales mounted to the moving axis (left and right, and in and out) and wire cables run to a remote display.
 
Last edited:

glycerine

Member
Joined
Aug 7, 2009
Messages
3,462
Location
Fayetteville, NC
I'm assuming on a CNC machine, the DRO is right there on the computer monitor and there's no need for additional equipment, right?
 

Haynie

Member
Joined
May 20, 2011
Messages
3,516
Location
Page Arizona
Now that would make things easier on my lathe. I never even thought about it. I was just making due with the scales on the cranks and griping what a PIA it was. That thing Cris posted looks easy enough to build. I had been slowly working on a radius turning tool
 

bitshird

Member
Joined
Aug 27, 2007
Messages
10,236
Location
Adamsville, TN, USA.
I'm assuming on a CNC machine, the DRO is right there on the computer monitor and there's no need for additional equipment, right?

Yes the DRO is on the screen, but you will have to deal with tool offsets which is no big deal, consider that you lathe bit is hardly ever at the same extension from center when you change from tool to tool, plus you have to reset your zero point for stock size deviation, I've seen digital calipers also used on a cross slide as a dro, pretty easy to rig them up, and a lot cheaper than glass scale DRO's. About 90 % of the time we just use Dial indicators mounted on Mag Bases. I had to make a bracket for the tip of the indicator to touch , nothing but a small piece of Aluminum Angle bolted to my cross slide, with the mighty Mag abd Indicator magnetically mounted to the side of the apron.
 
Last edited:

bluwolf

Member
Joined
Oct 2, 2008
Messages
995
Location
SW Florida

Paul, the ones in your second link are the exact ones that I use. Except that Grizzly only charges $25.50 for the 6" with the remote display. If you scroll down the same page you see they have 12" and 24" long scales with remote displays also. But again, they want twice the price as Grizzly.

I'm probably stating the obvious here but the advantage of the ones with the remote displays means you can mount them anyway you want and not have to worry about whether you can see the display when it's finished.

The other not so obvious advantage is the batteries are in the remote display so you son't have to disturb your mounting system you so carefully aligned every time you change the batteries.
 

BigShed

Member
Joined
Feb 14, 2008
Messages
1,068
Location
Adelaide, SA, Australia.
I was lucky enough to pick up a 2 axis DRO with glass scales on Ebay, it also came with a 3 phase motor controlled through a VFD which in turn is controlled through the DRO controls. Very nifty bit of equipment built from scratch by a very clever bloke.
You can read about it here if you are interested.

http://www.franksworkshop.com.au/Workshop/LatheDro/lathedro.htm

I haven't installed the 3 phase motor and VFD as my lathe already has EVS

Here is a shot of the DRO display mounted above the lathe

IMG_1555.jpg


And a view of the glass scales installed on the X and Y axis.

IMG_1479.jpg


I can switch from MM to Inch readouts at the press of a button, also whether it measures diameter or radius.
 
Last edited:

BigShed

Member
Joined
Feb 14, 2008
Messages
1,068
Location
Adelaide, SA, Australia.
Once yu het used to working with a DRO on the lathe (or mill) you sort of get rather used to it.

The graduations on my tailstock quill are rather hard to read, particularly the mm ones.

I adapted a standard digital caliper to fit on the tailstock so I can drill to a precise depth.

IMG_3331.jpg
 

Dalecamino

Local Chapter Leader
Joined
Jan 2, 2008
Messages
14,569
Location
Indianapolis, In.
Woah!! Fred great contribution to the thread. Pictures are always great to have. Great set up there. Your multi function tail stock blew me out of the water. Thanks friend!
 

RogerH

Member
Joined
Jul 28, 2011
Messages
307
Location
Illinois
What a beautiful set up. Makes my reeves drive wood lathe look like something from the 19th century. Sweet-thx for sharing, even if the explanation of the DRO etc. was mostly over my head !
 

BigShed

Member
Joined
Feb 14, 2008
Messages
1,068
Location
Adelaide, SA, Australia.
Woah!! Fred great contribution to the thread. Pictures are always great to have. Great set up there. Your multi function tail stock blew me out of the water. Thanks friend!

Use that a lot, bought it from Little Machine Shop, made up several 5/8" stubs to hold various size centre drills and othe drills. Mainly used when I make a batch of bullet kits as most of the drilling operations are at least 2 steps, centre dril then normal drill.

IMG_0752.jpg


Only thing I had to change was lengthening the MT2 tail as my tailstock wouldn't eject it, so took a 3/8 bolt and turned it to size.

IMG_0753.jpg
 

BigShed

Member
Joined
Feb 14, 2008
Messages
1,068
Location
Adelaide, SA, Australia.
One of the first modfications I made to my 9x20 lathe was adding a QCTP (Quick Change Toolpost)

20080926_113_small.jpg


This enables you to quickly change to another tool and these can be pre-set to correct cutting height in the tool holders, rather than having to use a number of shims in the standard 4 way toolpost.

It comes with 5 different tool holders and additional ones can be purchased, including special ones for parting tools and boring bars, as well as a knurling one (which I don't like but more on that later).

At last count I had about 15 of these, at about $8-$9 each they get added to an order from CDCO to "fill up" space left in the Flat Rate box.

Another mod made was to make up a bigger base for the compound slide, the standard one being rather puny and prone to flexing.

Here is a size comparison between the origina base (laying on the bench) and the new one (mounted on the compound slide)

IMG_2407.jpg


A work in progress shot

IMG_2399.jpg


and mounted on the lathe with the QCTP and boring bar in holder

IMG_2408.jpg
 

Dalecamino

Local Chapter Leader
Joined
Jan 2, 2008
Messages
14,569
Location
Indianapolis, In.
Great stuff Fred. I now have to go out to the shed and, take a look at my lathe.:redface: Thanks again for the pictures. Priceless.
 

spilperson

Member
Joined
Aug 24, 2010
Messages
57
Location
Laplace, Louisiana
I also have a quick change post.

One tool I have not made yet, since I am still dragging butt about getting my milling machine up on its stand, is a ball (or knob) turner. I really like the work those do.
 

lorbay

Member
Joined
Jul 2, 2009
Messages
3,378
Location
BC. Canada
One of the first modfications I made to my 9x20 lathe was adding a QCTP (Quick Change Toolpost)

20080926_113_small.jpg


This enables you to quickly change to another tool and these can be pre-set to correct cutting height in the tool holders, rather than having to use a number of shims in the standard 4 way toolpost.

It comes with 5 different tool holders and additional ones can be purchased, including special ones for parting tools and boring bars, as well as a knurling one (which I don't like but more on that later).

At last count I had about 15 of these, at about $8-$9 each they get added to an order from CDCO to "fill up" space left in the Flat Rate box.

Another mod made was to make up a bigger base for the compound slide, the standard one being rather puny and prone to flexing.

Here is a size comparison between the origina base (laying on the bench) and the new one (mounted on the compound slide)

IMG_2407.jpg


A work in progress shot

IMG_2399.jpg


and mounted on the lathe with the QCTP and boring bar in holder

IMG_2408.jpg
Fred can you send me a picture of that boring bar holder in this last picture.

Thanks. Lin.
 

randyrls

Member
Joined
Feb 2, 2006
Messages
4,821
Location
Harrisburg, PA 17112
Another mod made was to make up a bigger base for the compound slide, the standard one being rather puny and prone to flexing.

Here is a size comparison between the origina base (laying on the bench) and the new one (mounted on the compound slide)

IMG_2407.jpg


Fred; Good piece of work!

Fred and All; This is a John Pitkin Donut Mount. It makes the compound MUCH STIFFER.

There is a wealth of information in the YAHOO Group "9x20Lathe"
 

BigShed

Member
Joined
Feb 14, 2008
Messages
1,068
Location
Adelaide, SA, Australia.
Fred; Good piece of work!

Fred and All; This is a John Pitkin Donut Mount. It makes the compound MUCH STIFFER.

There is a wealth of information in the YAHOO Group "9x20Lathe"

Correct Randy, there are several designs for improved mounts floating around the various internet forums.

The Yahoo 9x20 group is quite good, just wish that Yahoo could get their seurity up to scratch, lots of Yahoo members have their contact list hi-jacked.

Another good forum for metal working is Home Shop Machinist (HSM).

There are numerous internet sites with good mods and additions for the 9x20 lathe.

Be cautious though, this stuff is very addictive (DAMHIKT:biggrin:)
 
Last edited:

rherrell

Member
Joined
Aug 22, 2006
Messages
6,333
Location
Pilot Mountain, NC
I was giving my lathe a good cleaning when I remembered this thread and thought that since I had it apart I'd show you my mods.
HOWEVER, after seeing Freds stuff I'm a little embarrassed to show you what I've done!

First, here's my little cubby hole where I work on all my metal lathe stuff...

This is my carriage lock mod and part of my Lever Operated Compound Lock mod.


I use this Compound Lock mod ALOT when I put chamfers on the ends of my Custom Made Tool Rests. We all know what a PITA it is to rotate the compound, you have to move it all the way to get to those two screws. Then when you move it and it's not right you have to do it all over again! With this mod you just loosen it with the lever. move it, and re-tighten....REALLY slick!


Here's my top adjusting brass saddle plates and to the left you can see a plastic cover to keep chips out of the carriage handle gears.
This is a lock I made to keep my tailstock from moving when drilling or any time I need a little extra pressure on it.


Here is a dial indicator that I mounted on a piece of aluminum and put in a QCTP insert. This little guy is INDISPENSIBLE and everyone with a metal lathe should have one. I use it to check runout and to check the squareness of my compound to the part I'm working on.


Here's a grinding jig I made for grinding my cutters. The grooves are at 10 degrees and the table is at 10 degrees, that gives me a standard 10 degree compound grind.


Here is a handle I use for threading....VERY handy!


Lasty, here is a photo of my chuck. Notice how I marked it with blue dye? Every 3 jaw chuck has one adjusting hole that tightens down just a little straighter than the others. Check the runout at all three positions on yours and I'm pretty sure you'll find one that is better than the other two.
I used blue dye to mark mine so I can tighten it the same every time.


That's about it!:biggrin:
 
Last edited:

Dalecamino

Local Chapter Leader
Joined
Jan 2, 2008
Messages
14,569
Location
Indianapolis, In.
Good stuff Rick. Thanks for posting the photos. Mike Roux was kind enough to check the run out on my lathe and, used an engraver to put an astorick on the chuck for me. Priceless!
 

Chthulhu

Member
Joined
Oct 15, 2010
Messages
233
Location
Escondido, California
This is my carriage lock mod and part of my Lever Operated Compound Lock mod.


I use this Compound Lock mod ALOT when I put chamfers on the ends of my Custom Made Tool Rests. We all know what a PITA it is to rotate the compound, you have to move it all the way to get to those two screws. Then when you move it and it's not right you have to do it all over again! With this mod you just loosen it with the lever. move it, and re-tighten....REALLY slick!

Rick, is there a how-to somewhere on this compound lock mod? I could definitely use it!
 
Last edited:

rherrell

Member
Joined
Aug 22, 2006
Messages
6,333
Location
Pilot Mountain, NC
I got the compound lock mod from the "Premium Content" section at the mini-lathe.com website. It will cost you about $7 to be able to print it out.
 
Top Bottom