
You are using an out of date browser. It may not display this or other websites correctly.
You should upgrade or use an alternative browser.
You should upgrade or use an alternative browser.
Turning my first acrylic tonight. What do I need to know?
- Thread starter putnamm
- Start date
Signed-In Members Don't See This Ad
Signed-In Members Don't See This Ad
crokett
Member
Plastic is less forgiving than wood. Whatever tool you choose to use, you know you are cutting well when after it is rounded over you get a continuous ribbon of plastic coming off the tool. If you cut too fast you will get chipout that will need to be turned out. cut from the middle of the blank to the end especially when you are getting close to the end, to avoid catches and chipout at the end of the tube.
I prefer epoxy to CA to glue the tubes in, I seem to get better coverage on the tube. I've had breakage and seen where the acrylic was not adhered to the tube when using CA. I paint about 3/4 tube with epoxy, insert it into the blank then use what squeezes out to paint the remaining section before inserting it fully.
I prefer epoxy to CA to glue the tubes in, I seem to get better coverage on the tube. I've had breakage and seen where the acrylic was not adhered to the tube when using CA. I paint about 3/4 tube with epoxy, insert it into the blank then use what squeezes out to paint the remaining section before inserting it fully.
MTViper
Member
Sharp tools, light cuts, ride the bevel - all more important in acrylics than in wood because, like has already been said, acrylic is not as forgiving as wood. Don't rush because when you do, you'll get a catch and a chip.
randyrls
Member
Acrylic tends to break when the drill bit exits the blank. Cut the blanks long and drill them to the proper depth without the drill bit breaking out of the plastic. Then cut to the un-drilled ends off to the correct length.
Oh; And acrylic comes in many varieties just like the term "wood". Some is soft, some is harder than high speed steel!
Oh; And acrylic comes in many varieties just like the term "wood". Some is soft, some is harder than high speed steel!
Last edited:
ed4copies
Local Chapter Manager
Don't turn in a cold room. Keep the plastic warm and keep your lathe speed as high as you can and still feel comfortable.
The biggest factor is confidence, which comes with experience. If you fear you will make a mistake, you will.
Good luck!!
The biggest factor is confidence, which comes with experience. If you fear you will make a mistake, you will.
Good luck!!
What kind of acrylic are you using ?
Acrylic Acetate is much more finicky than many other types of acrylic ... heats, melts, drill bit gets stuck, chips, harder, etc. . Rhino plastic is much the same. . The "Pearl" plastics from PSI can be a real PITA.
Alumilite is much easier and smoother and more forgiving ... some say it turns like butter but I don't quite get that analogy !! . Even so, it can overheat, melt and stick to your drill. Alumilite is my "acrylic" of choice.
Drill all acrylics slowly, clearing the swarf frequently.
Use very sharp tools and turn more slowly than with wood; try for those lovely continuous ribbons shooting off. If you can get that, you'll be able to skip the first couple of sanding stages.
Sand lengthwise with the lathe off (turning the headstock by hand) ... 320 up to 2000. Micromesh if you wish (lengthwise motion) but you may not need to. . Polish with Novus 3 & Novus 2, or Huts Plastic Polish, or other plastic polish (Mequiar's automotive polish is very good) ... again the motion should be lengthwise.
I use Krylon spray paint - I shoot about 1-2 sec worth of paint into each end of the drilled blank. I also paint the tubes - some don't. Some folks use Testor's & other paints applied with a Q-tip. I let the paint cure at least 1-2 days then test fit the tube - sometimes redrilling is needed & maybe a little touch up paint. I generally try to match the dominant color of the blank.
+1 on Randy's drilling technique. I now use that method for all my blanks - wood & acrylic. For 2-tube pens, I drill then cut one blank then remount the remainder of the blank, drill, then cut the second one.
+1 on Randy's drilling technique. I now use that method for all my blanks - wood & acrylic. For 2-tube pens, I drill then cut one blank then remount the remainder of the blank, drill, then cut the second one.
Jack Parker
Member
Paint the hole and tube.
What kind of paint do you use for this? And what hole are you referring to painting? For a multi-colored blank, what color am I trying to match?
Mark, Ed Brown has a couple of videos regarding painting blanks that I found helpful.
Painting Pen Tubes - What Color? - https://www.youtube.com/watch?v=jbOb1UJnqdY
Reverse Painting an Acrylic Pen Blank https://www.youtube.com/watch?v=wdtZvq9A7nQ
Regarding turning acrylics, once you have done all your back painting, gluing in tubes, end trimming, etc, something that I like to do and haven't seen mentioned, is rounding off the sharp corners of the blanks on a disc sander before I go to the lathe. I've found that it helps with the more brittle acrylics such as Inlace Acrylester.
qquake
Member
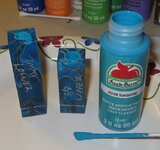
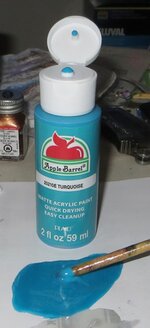
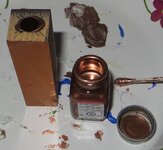
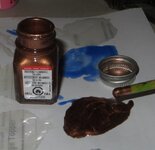
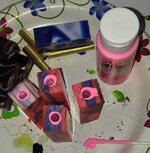
I use acrylic craft paint from WalMart or Michael's. It's 50 cents a bottle at WalMart, and comes in many different colors. I generally try to match the dominant color in the blank. I use a Q-Tip to apply it to the inside of the holes. I leave the blanks standing upright while the paint dries. So far, I haven't had a problem with the tube fitting into the painted holes. I don't paint the tube, but do use the same paint to color the epoxy. Just a drop is all it takes. I've used Testor's enamel paint, but it's more expensive and the acrylic paint seems to work just as well. I've tried just painting the tubes, but you can still see the epoxy through polished translucent blanks.
Attachments

mecompco
Member
All good advice. I might also add that squaring the blank with a disc sander works well--some are very brittle and a pen mill will tear them up.
Regards,
Michael
Regards,
Michael
I made a little trim router table. took a dremel router table and a 20.00 HF trim router. works great with a 5/8" roundover bit. got the idea from PSI's new trim router table. Amazon has rockler trim router table for 40.00. HF has trim router from time to time for 20.00. A great pen making tool for acrylics.
Good Luck
Good Luck