You are using an out of date browser. It may not display this or other websites correctly.
You should upgrade or use an alternative browser.
You should upgrade or use an alternative browser.
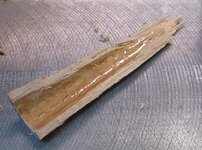
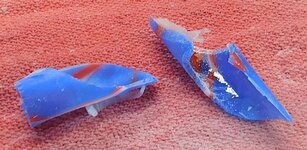
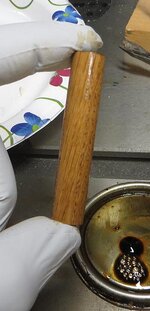
Sometimes this happens
- Thread starter qquake
- Start date
Signed-In Members Don't See This Ad
Signed-In Members Don't See This Ad
thewishman
Member
Yes, yes it does.
CREID
Member
This has only happened to me 1, 2, 15, or 37times. 
Curt
Curt
Skie_M
Member
Grab some CA and glue it back on?
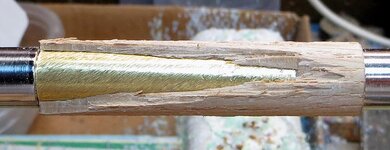
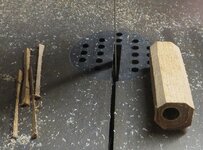
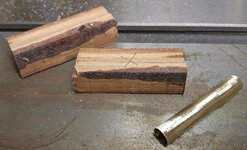
It looks like when you glued your barrels into the blanks, you didn't use enough CA... I see wet glue on the splinter, so I assume you decided to glue it back on and see how it would go.
Need to be careful with open grained woods like oak ... the grain pattern can mess you up like this. Did you get a catch with a skew? or was it a gouge? In either case, a very sharp tool and proper usage can help a lot (firm against toolrest, rub bevel, lift to cut), but roughing it with 80-grit sandpaper can do for really finicky woods.
qquake
Member
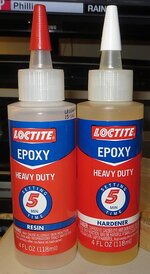
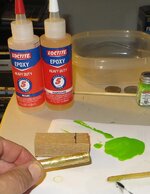
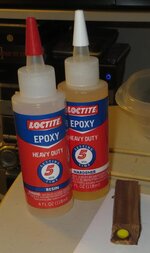
Actually, I used two-part epoxy, which is all I ever use. The epoxy in the photo is already set. Apparently, I didn't get enough epoxy on the tube.
qquake
Member
I know the experience .... gluing the tube in is an uncertain process.
I used to put epoxy on the tube and inside the blank, but it gets messy. So lately, I've only been putting epoxy in the blank, then turning the tube as I insert it. Looks like I should go back to the messy way.
qquake
Member
Need to be careful with open grained woods like oak ... the grain pattern can mess you up like this. Did you get a catch with a skew? or was it a gouge? In either case, a very sharp tool and proper usage can help a lot (firm against toolrest, rub bevel, lift to cut), but roughing it with 80-grit sandpaper can do for really finicky woods.
I was using a forged shallow gouge. Never did learn to use a skew.
KenV
Member
The surface of the blank suggests you were not using the bevel for support. Using the bevel will be a bit more controlled and less aggressive.
Mortalis
Member
It looks like your hole in the blank was either not round or way too large for the tube. You have evidence of glue/epoxy on the inside of the blank but no evidence that it ever contacted the tube.
That being said, yes I have had this happen to me also trying to rush cherry. I just grabbed the chunk and glued it back into place and then continued more cautiously. The pen ended up looking just fine and you had a hard time noticing the fix if you didnt know it was there. In fact, you had a hard time noticing even you knew it was there.
That being said, yes I have had this happen to me also trying to rush cherry. I just grabbed the chunk and glued it back into place and then continued more cautiously. The pen ended up looking just fine and you had a hard time noticing the fix if you didnt know it was there. In fact, you had a hard time noticing even you knew it was there.
Last edited:
qquake
Member
It looks like your hole in the blank was either not round or way too large for the tube. You have evidence of glue/epoxy on the inside of the blank but no evidence that it ever contacted the tube.
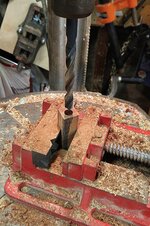
I used the recommended drill bit for the kit, 10.5mm.
csr67
Member
Been there and done that! I recently switched from 5 minute epoxy to Gorilla Poly glue. So far (knocks on wood) I have not had a blow out with Poly glue. I like how it expands to ensure a good tight bond. It's also 10x easier to clean up than epoxy. The over foam just pulls right off and my dental wax tube plugs pop out easily.
qquake
Member
Been there and done that! I recently switched from 5 minute epoxy to Gorilla Poly glue. So far (knocks on wood) I have not had a blow out with Poly glue. I like how it expands to ensure a good tight bond. It's also 10x easier to clean up than epoxy. The over foam just pulls right off and my dental wax tube plugs pop out easily.
I tried Gorilla polyurethane glue when I first started turning pens. I believe it was new at the time. It didn't work for me. I also tried CA, but got a tube stuck halfway in a blank. I've been using epoxy ever since.
It's not the glue, it's the turning technique. One drop of CA or a small dab of epoxy will hold a tube in place for turning if your cuts are smooth. No amount of any type of adhesive will prevent a breakout if you are too aggressive.
qquake
Member
It's not the glue, it's the turning technique. One drop of CA or a small dab of epoxy will hold a tube in place for turning if your cuts are smooth. No amount of any type of adhesive will prevent a breakout if you are too aggressive.
I'll be the first to admit I don't have the best lathe skills. I never attended any classes, nor had a mentor of any sort. I just kind of learned as I went, finding out what worked for me. And admittedly, I was being a little aggressive when it blew out. Live and learn. I did have an acrylic blank blow out recently, and it happened right before the turning was finished. I wasn't being aggressive at all, since I was sizing it to the bushing. The blank could have had a defect in it, and/or it could have been the epoxy or my gluing technique.
Attachments
Katya
Member
It's really helpful to others here when you post a failure like this and let everyone chime in. Thanks, Jim!
qquake
Member
It's really helpful to others here when you post a failure like this and let everyone chime in. Thanks, Jim!
Oh, no problem, Katya. I'm definitely not ashamed of my failures. If nothing else, it gets people thinking about it, and maybe they'll be more careful than I was.
qquake
Member
Sabaharr
Member
It looks like you have something in the tube to stop it from getting epoxy inside. That was going to be my suggestion to use sheet dental wax and apply the epoxy heavily, even putting a big glob inside and twisting the tube as it went in to spread it everywhere from both ends. A little epoxy left over dripping off the blank is much easier to handle and cheaper than ruining a blank. I haven't lost a blank since I started doing it that way. Now watch the first one will be this afternoon when I get home. I realize that you are most likely doing everything I said already but nubies reading this might pick up something from it. I have to say that pressing in dental wax is the single best improvement to my process of glue ups that I have made since I started and for the cost (about 5 pen kits for a penny) it is one of the best gadget investments I have made.
Kunk35
Member
Hate it when that happens. It always seems to happen to me just as I'm getting close to my final step of sanding/finishing. All that time and work, *poof*. And it seems no matter how careful you are, and how many times it works flawlessly, all of a sudden, Boom! Another one explodes.
Oak is such a hard wood, and the grain tears a lot. It puts a lot more shear pressure on the glue holding the blank to the tube. You just never know when it will give.
I'm just glad to know I'm not the only one this happens to....
Kory
Oak is such a hard wood, and the grain tears a lot. It puts a lot more shear pressure on the glue holding the blank to the tube. You just never know when it will give.
I'm just glad to know I'm not the only one this happens to....
Kory
qquake
Member
It looks like you have something in the tube to stop it from getting epoxy inside. That was going to be my suggestion to use sheet dental wax and apply the epoxy heavily, even putting a big glob inside and twisting the tube as it went in to spread it everywhere from both ends. A little epoxy left over dripping off the blank is much easier to handle and cheaper than ruining a blank. I haven't lost a blank since I started doing it that way. Now watch the first one will be this afternoon when I get home. I realize that you are most likely doing everything I said already but nubies reading this might pick up something from it. I have to say that pressing in dental wax is the single best improvement to my process of glue ups that I have made since I started and for the cost (about 5 pen kits for a penny) it is one of the best gadget investments I have made.
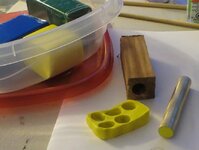
I used to use dental wax called "base wax" that I got from Arizona Silhouette. But now I use modelling clay that I get from Michael's.
qquake
Member
Mortalis
Member
I use Plumber's Putty to fill the ends.
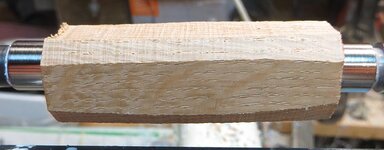
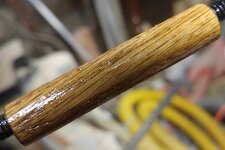
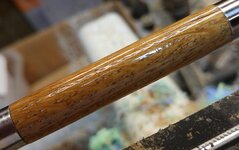
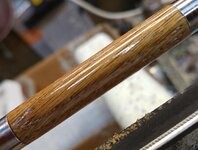
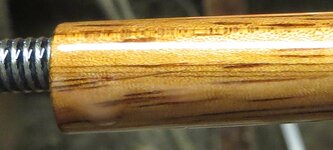
The blank came out really nice. I like the texture from the grain.
Sharp tools and easy does it.
The blank came out really nice. I like the texture from the grain.
Sharp tools and easy does it.
Last edited:
qquake
Member
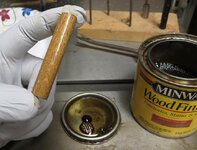
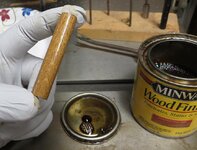
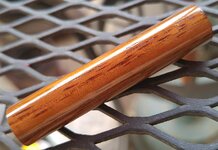
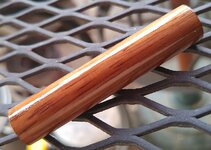
Boy, this is my weekend for mistakes. I decided to stain the sanded blank to hopefully accentuate the grain, which went fine. But when I sprayed on the lacquer, I noticed little red fuzzies from the staining rag I used. I should have blown it off with compressed air before I lacquered it. I don't know if you can see the fuzzies in the photos or not, but they're visible in person. I'll have to sand and respray it after the lacquer sets.
Attachments
qquake
Member
I use Plumber's Putty to fill the ends.
The blank came out really nice. I like the texture from the grain.
Sharp tools and easy does it.
Oak is one of my favorite woods. I love the "rays" in it.
qquake
Member
hcpens
Member
qquake, you weren't thinking, of the pen, maybe all the rain you have gotten over the last two weeks. 
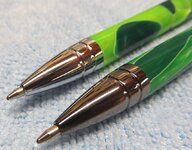
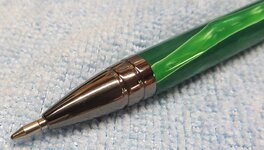
Good job on the pen though, I like the green blank with the pen.
Good job on the pen though, I like the green blank with the pen.
qquake
Member
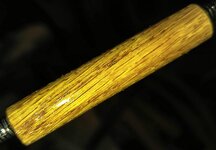
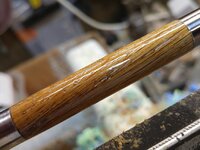
Okay, I'm giving up on oak for this pen. For some unknown reason, I decided to try polishing it with Novus. It made it shiny, but also got polish stuck in the oak. I tried blowing it out, but nope, didn't budge. I'm going to turn the blank off the tube, and use a different wood blank.
Attachments
qquake
Member
low_48
Member
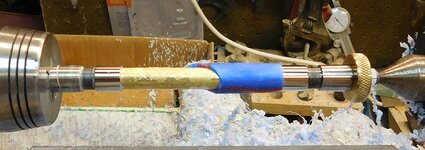
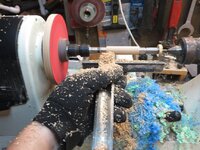
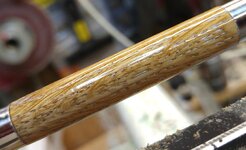
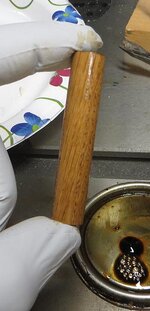
I wasn't taking any chances this time. I cut the corners off the blank to reduce the stresses when I roughed it round. I was also much less aggressive. Success!
Please be careful turning with a cloth glove! If that snags the threads on the lathe shaft, or a square edge, you are in big trouble! You would also be better off with a scraper tool, compared to using the gouge as a scraper.
qquake
Member
csr67
Member
I wasn't taking any chances this time. I cut the corners off the blank to reduce the stresses when I roughed it round. I was also much less aggressive. Success!
Please be careful turning with a cloth glove! If that snags the threads on the lathe shaft, or a square edge, you are in big trouble! You would also be better off with a scraper tool, compared to using the gouge as a scraper.
+1 to not wearing the heavy cloth gloves. Professional Safety Engineer here, and that's a quick shortcut to losing a digit.
Skie_M
Member
That glove was rubber .....
The "fuzzies" was from using a cloth applicator for the stain, which was still not that great an idea for something spinning on the lathe.
Use paper towels for application of anything to your spinning lathe projects .... paper towel will tear long before pulling your fingers into the spindle. I take a sheet of the blue shop towels you can get at the auto parts store (VERY strong stuff, and lint-free!) and fold it lengthwise 4 times to create a thick pad ... then I take a very sharp pair of cloth scissors and cut roughly 3/4 inch pads from it into a small clean container .... I usually cut up 2 or 3 sheets at a time so that I have a nice supply when I want it.
Before drilling your blanks, make sure that there are no checks and cracks in the ends. Double check after trimming .... if there is, you can seal that area with some thin CA and give it 20 minutes to cure before turning.
Last edited:
low_48
Member
That glove was rubber .....
The "fuzzies" was from using a cloth applicator for the stain, which was still not that great an idea for something spinning on the lathe.
Use paper towels for application of anything to your spinning lathe projects .... paper towel will tear long before pulling your fingers into the spindle. I take a sheet of the blue shop towels you can get at the auto parts store (VERY strong stuff, and lint-free!) and fold it lengthwise 4 times to create a thick pad ... then I take a very sharp pair of cloth scissors and cut roughly 3/4 inch pads from it into a small clean container .... I usually cut up 2 or 3 sheets at a time so that I have a nice supply when I want it.
Before drilling your blanks, make sure that there are no checks and cracks in the ends. Double check after trimming .... if there is, you can seal that area with some thin CA and give it 20 minutes to cure before turning.
The glove show in post 22 is rubber? That's even worse for grabbing on a spinning object.
Skie_M
Member
Actually, I was referring to the glove in post #24 ... 
But yes, I look at #22 and I see the cloth-backed leather reinforced glove and I cringe ....
But yes, I look at #22 and I see the cloth-backed leather reinforced glove and I cringe ....
qquake
Member
The glove is neither rubber nor cloth. It's a tight fitting mechanic's glove. Nothing loose to catch on the lathe. I started wearing it after I cut my thumb with my carbide chisel. I found that it's comfortable for other chisels as well, and allows my hand to slide along the tool rest easier. And I didn't apply the stain to the blank while it was on the lathe.
Attachments
qquake
Member
suefox51
Member
I feel your pain!
qquake
Member
Signed-In Members Don't See This Ad
Skie_M
Member
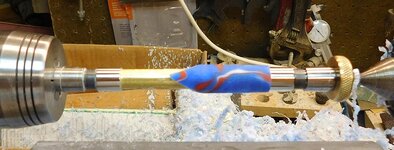
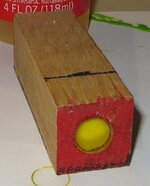
I see a glue seam right down the center of the left one .... That might be the cause of some issues, if you don't take care while turning, but it looks like this one might make it through ok. 

