
edstreet
Member
The last post in this series we looked at http://www.penturners.org/forum/f211/precision-end-trimming-tonis-blanks-k-lapping-116258/ This post we will look at pen disassembly using Toni's tubes.
In this case I was able to find a pen that needed some repair work done. As it turned out there was many issues that came up and after discussing them I decided to move forward with this post. We will not be discussing who made the pen or why the repair was needed or wanted, to satisfy any curiosity lets say that I made it.
Normally repair work would entail very little as most of the time it is easier to replace than repair. However, when you get higher up in cost then repair becomes an option. Not only for cost but in heirloom but memorial / sentimental value.
:glue/epoxy:
Many like to use bonding agents on the pressed in components like epoxy, loctite red, super glue and various other agents to help keep the parts from pulling off during operation. The heavier agents used the worse it becomes in repair/upgrade work and lower the % of a clean job.
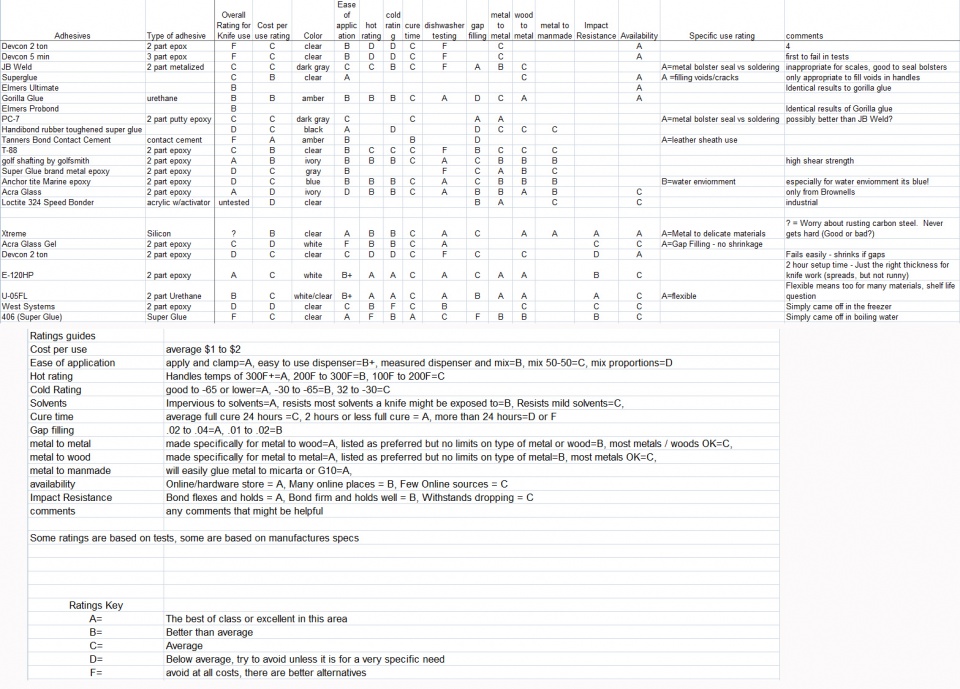
What I would like to see is some bonding agent that is easy to remove, does not damage or destroy the material when removed. This rules out your super strong bonds like E120HP, 324 speedbonder, loctite red and the like.
Here we have a chart of epoxy test results. Worth noting how things fared. I suggest a lower strength bonding agent.
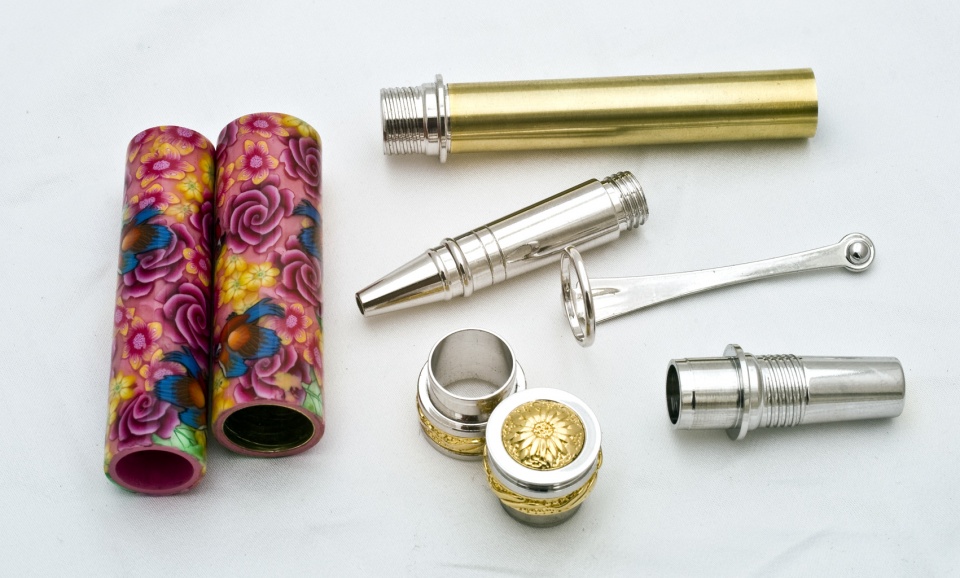
:breaking the pen down:
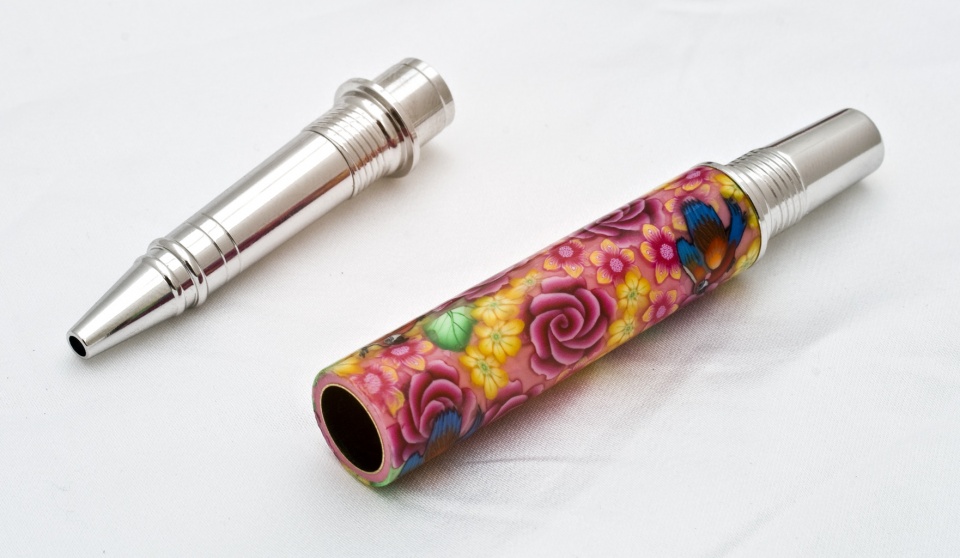
Here we have removing the lower barrel. I screwed the 2 sections together, somewhat over tightened it and gently rocked the lower tube. This dislodges the press fitting and if no bonding agents were used in this section it will come out easily.
Then reverse the lower barrel and repeat. In this case this is where problem #1 came into play. There was some bonding agent used on the fittings and it was very apparent by the residue.
I took a metal rod and inserted that into the tube and tapped the assembly onto my anvil which dislodged the fitting, or so I was hoping. What ended up was 2 hours later the brass tube broke loose from the clay instead of the press fitting coming out.

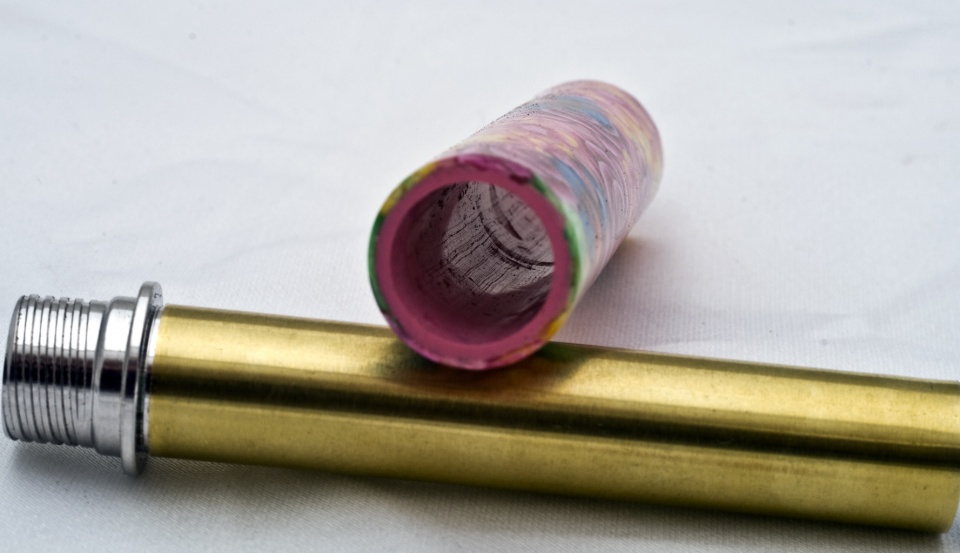
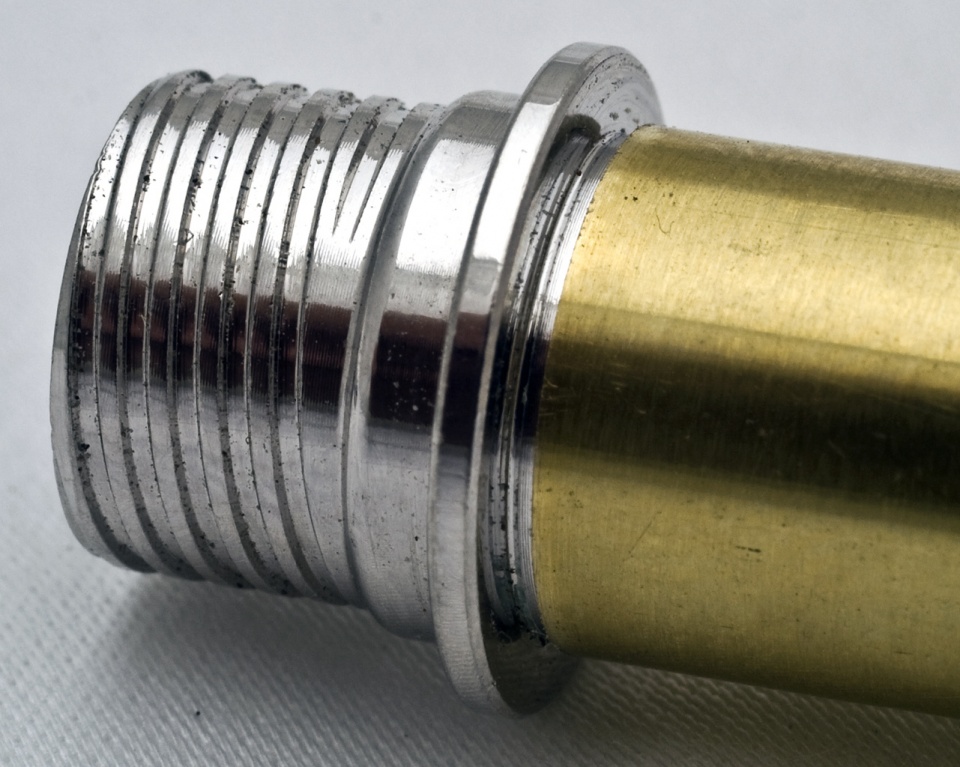
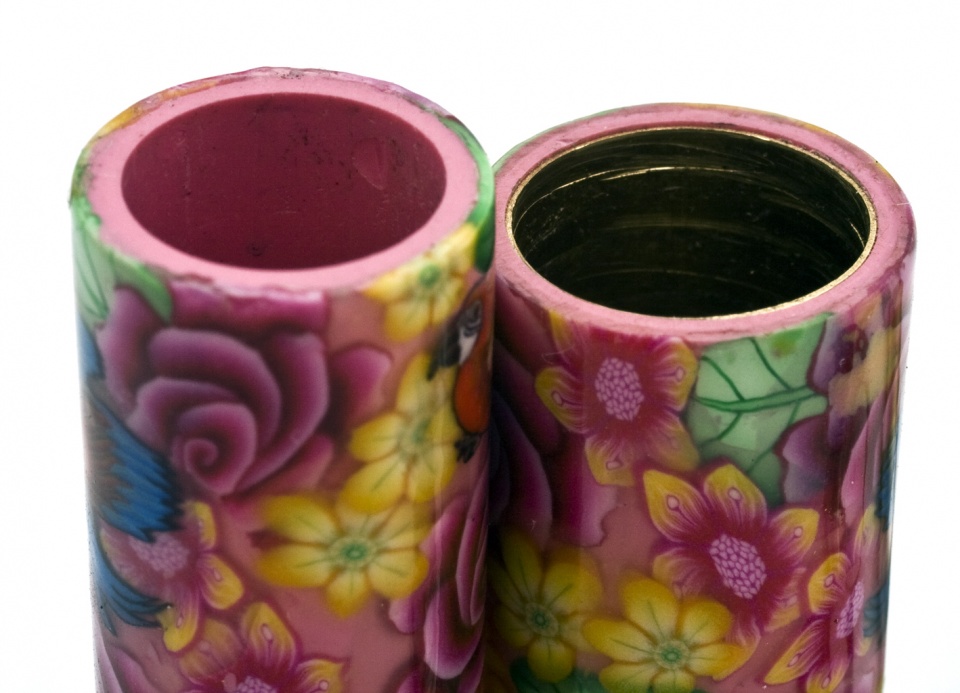
This clearly shows the bonding agent doing it's job. In this case it is excessive over kill and could easily have damaged the tube. For our purpose we can see that the tube slid off the brass tube. There was no damage or disfiguration to the clay tube.
:upper tube:
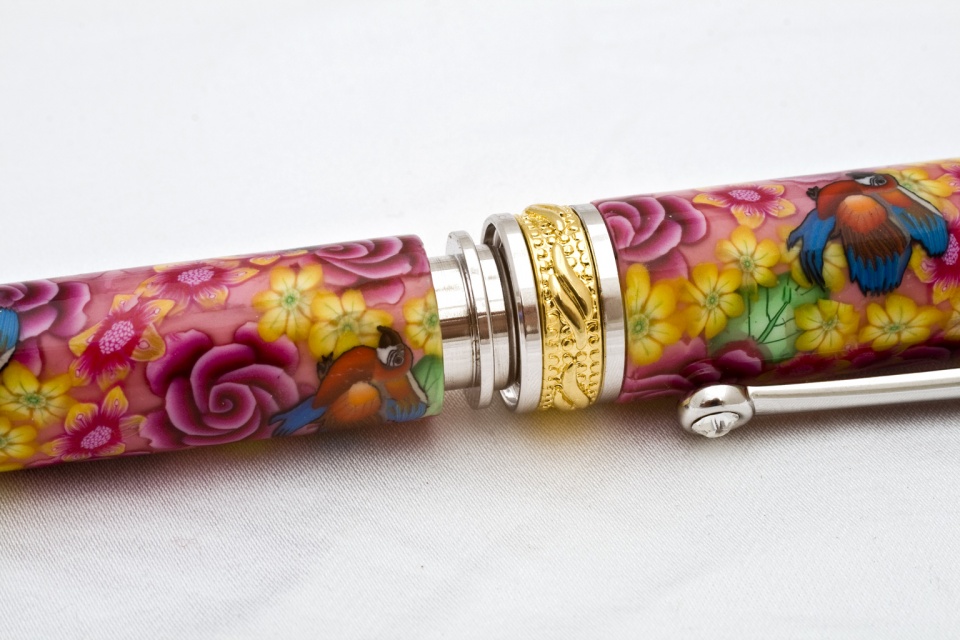
At this point I took pause to consider what would happen if I was unable to remove the upper tubes fittings or something was damaged. After careful consideration I pressed forward cautiously. I took a brass rod inserted into the cap, careful to not hit the center nub from the insert on the cap then tapped that on my anvil as well. To my surprise the end cap came off easily as well as the center band. Attention was then changed to removing the black plastic insert in the cap.
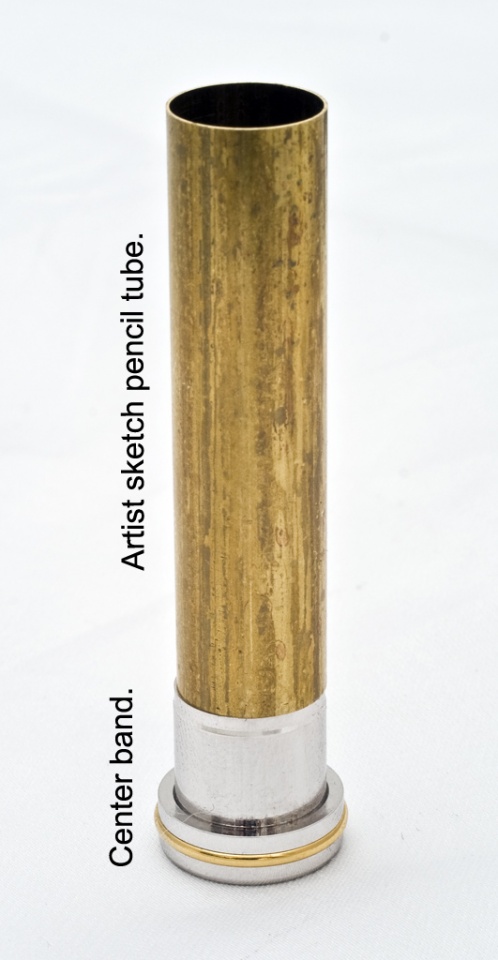
Typically once the cap is off and the black plastic insert is removed you can use an artist sketch pencil brass tube and punch out the center band.
That was not the case with this job
I took the lower nib, took a 5mm allen wrench inserted in that and screwed the nib into the black insert on the cap. This gave me something I could push out the black threaded insert with. Unfortunately for me it to was glued in place thus rendering clean removal impossible. After about 2 hours of attempts I drilled a hole in an ebonite block that matched the outside diameter of the brass tube and used that as a cradle supporting the clay tube and gently tapped out the brass tube. Again on this there was no damage or disfiguration on the clay tube.
I took a brass rod, wrapped it with sandpaper and sanded the inside of the tube evenly to allow the glue room to do it's thing next to the new tube set that I was using. Then a new tube set (both upper and lower tubes) was epoxied in place (I used loctite E-120 HP for this)
After that dried I sanded off the finish I redid the CA finish, flushed the ends like in the previous post and pressed everything back together.

:conclusions:
As we can see from this experiment polymer clay is not the fragile easy to damage material that we all think it is at first. At the point where we get the tubes we basically have a section of PVC PIPE.
Pen repair is very possible but only if it is constructed properly and not overkill used in assembly.
Clay tube set 1, destruction via anvil 0.
In this case I was able to find a pen that needed some repair work done. As it turned out there was many issues that came up and after discussing them I decided to move forward with this post. We will not be discussing who made the pen or why the repair was needed or wanted, to satisfy any curiosity lets say that I made it.
Normally repair work would entail very little as most of the time it is easier to replace than repair. However, when you get higher up in cost then repair becomes an option. Not only for cost but in heirloom but memorial / sentimental value.
:glue/epoxy:
Many like to use bonding agents on the pressed in components like epoxy, loctite red, super glue and various other agents to help keep the parts from pulling off during operation. The heavier agents used the worse it becomes in repair/upgrade work and lower the % of a clean job.
What I would like to see is some bonding agent that is easy to remove, does not damage or destroy the material when removed. This rules out your super strong bonds like E120HP, 324 speedbonder, loctite red and the like.
Here we have a chart of epoxy test results. Worth noting how things fared. I suggest a lower strength bonding agent.
:breaking the pen down:
Here we have removing the lower barrel. I screwed the 2 sections together, somewhat over tightened it and gently rocked the lower tube. This dislodges the press fitting and if no bonding agents were used in this section it will come out easily.
Then reverse the lower barrel and repeat. In this case this is where problem #1 came into play. There was some bonding agent used on the fittings and it was very apparent by the residue.
I took a metal rod and inserted that into the tube and tapped the assembly onto my anvil which dislodged the fitting, or so I was hoping. What ended up was 2 hours later the brass tube broke loose from the clay instead of the press fitting coming out.
This clearly shows the bonding agent doing it's job. In this case it is excessive over kill and could easily have damaged the tube. For our purpose we can see that the tube slid off the brass tube. There was no damage or disfiguration to the clay tube.
:upper tube:
At this point I took pause to consider what would happen if I was unable to remove the upper tubes fittings or something was damaged. After careful consideration I pressed forward cautiously. I took a brass rod inserted into the cap, careful to not hit the center nub from the insert on the cap then tapped that on my anvil as well. To my surprise the end cap came off easily as well as the center band. Attention was then changed to removing the black plastic insert in the cap.
Typically once the cap is off and the black plastic insert is removed you can use an artist sketch pencil brass tube and punch out the center band.
That was not the case with this job
I took the lower nib, took a 5mm allen wrench inserted in that and screwed the nib into the black insert on the cap. This gave me something I could push out the black threaded insert with. Unfortunately for me it to was glued in place thus rendering clean removal impossible. After about 2 hours of attempts I drilled a hole in an ebonite block that matched the outside diameter of the brass tube and used that as a cradle supporting the clay tube and gently tapped out the brass tube. Again on this there was no damage or disfiguration on the clay tube.
I took a brass rod, wrapped it with sandpaper and sanded the inside of the tube evenly to allow the glue room to do it's thing next to the new tube set that I was using. Then a new tube set (both upper and lower tubes) was epoxied in place (I used loctite E-120 HP for this)
After that dried I sanded off the finish I redid the CA finish, flushed the ends like in the previous post and pressed everything back together.
:conclusions:
As we can see from this experiment polymer clay is not the fragile easy to damage material that we all think it is at first. At the point where we get the tubes we basically have a section of PVC PIPE.
Pen repair is very possible but only if it is constructed properly and not overkill used in assembly.
Clay tube set 1, destruction via anvil 0.
Attachments
-
 IMG_8463.jpg96.9 KB · Views: 1,322
 -
 IMG_8478.jpg208.9 KB · Views: 1,374
 -
 IMG_8476.jpg113.3 KB · Views: 1,368
 -
 IMG_8466.jpg76.1 KB · Views: 1,066
 -
 IMG_8482.jpg158.5 KB · Views: 1,370
 -
 IMG_8484.jpg175.9 KB · Views: 1,410
 -
 IMG_8471.jpg178.1 KB · Views: 1,326
 -
 IMG_8473.jpg131.7 KB · Views: 1,444
 -
 epoxy-test-results.jpg246.2 KB · Views: 1,549
 -
 IMG_8532.jpg117 KB · Views: 2,213
 -
 IMG_8527.jpg99.8 KB · Views: 1,448
Last edited: