Pen with stamps step by step

Signed-In Members Don't See This Ad

Alfonso

Member
Joined
Jan 31, 2011
Messages
23
Location
Cehegin-Murcia-España
Hi all, according to the processes carried out in this case I will begin the detailed process step by step realization of a pen with stamps imported from America and I live in Spain I had to buy the stamps on ebay. If someone tells me where I can put a tutorial in the forum will be happy to do so.

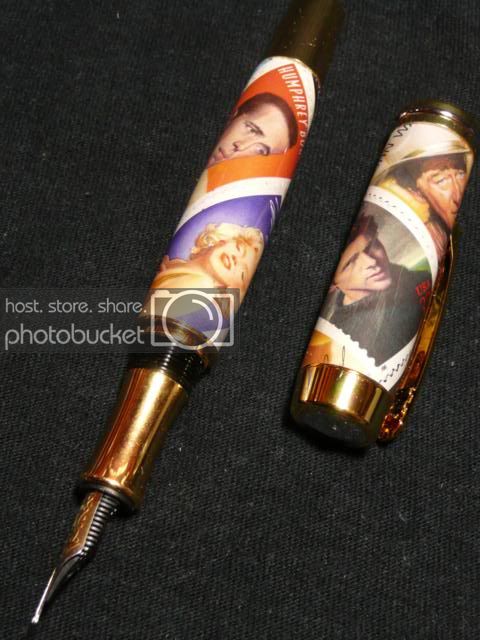
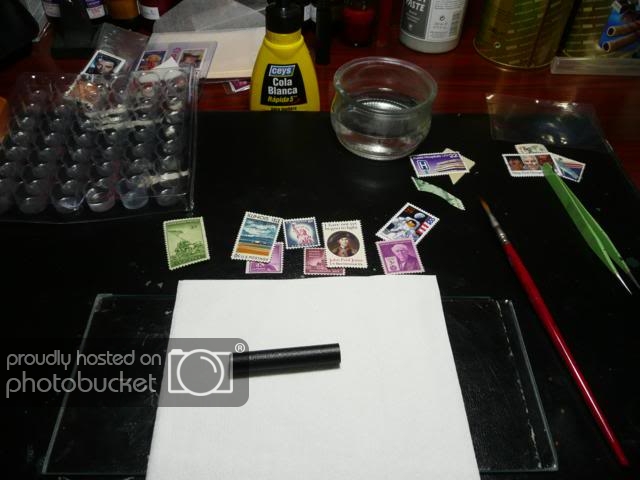
We begin by selecting the stamps for our pen

sellos1-1.jpg


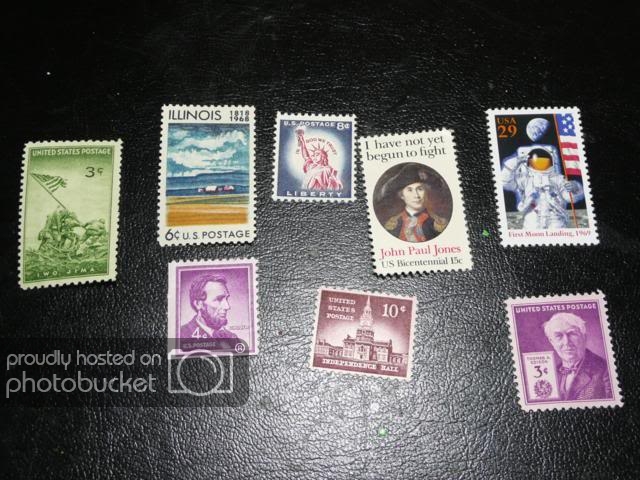
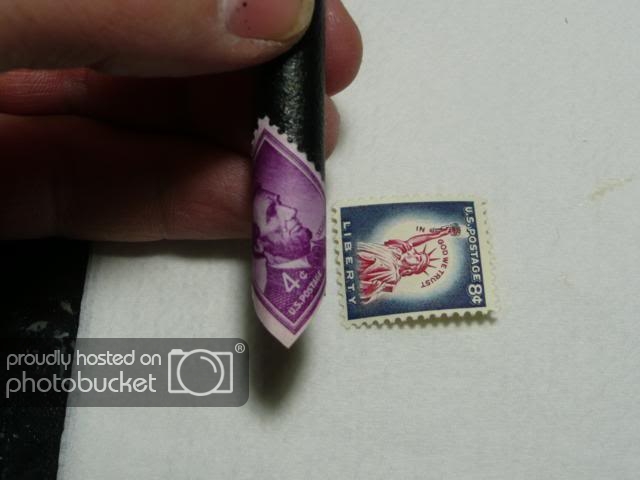
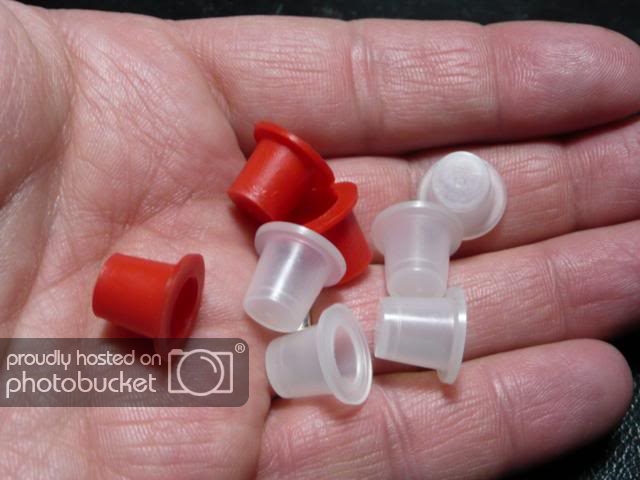
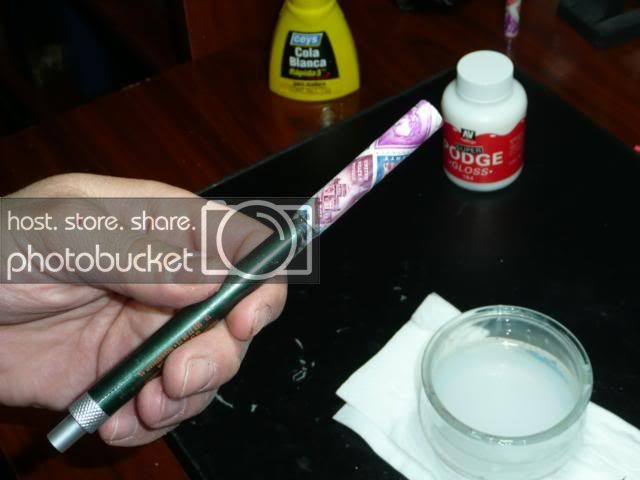
Once selected proceed to go sticking stamps one by one in the tube. The brass tube to be having problems with the glue, we solve painting the tube in my case I have painted black

sellos2-1.jpg


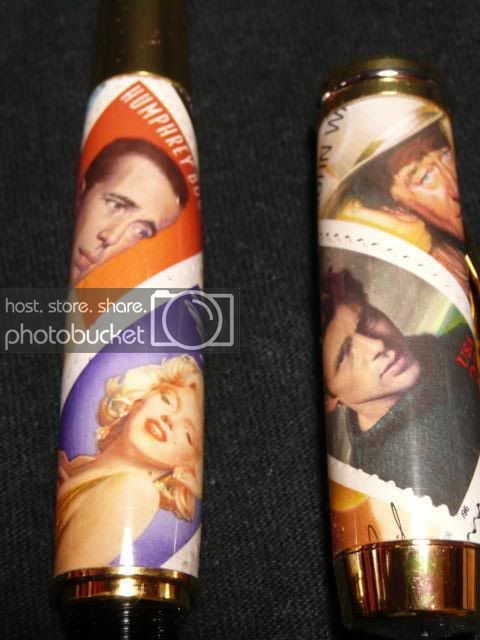
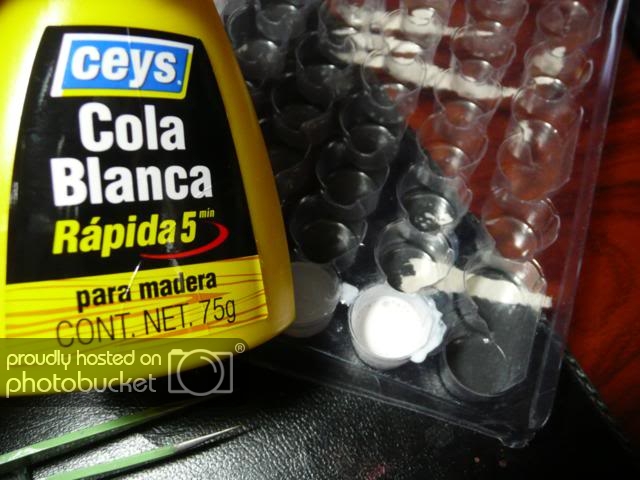
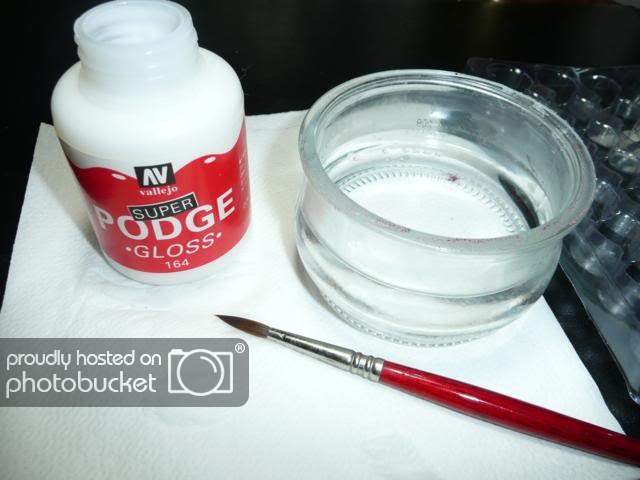
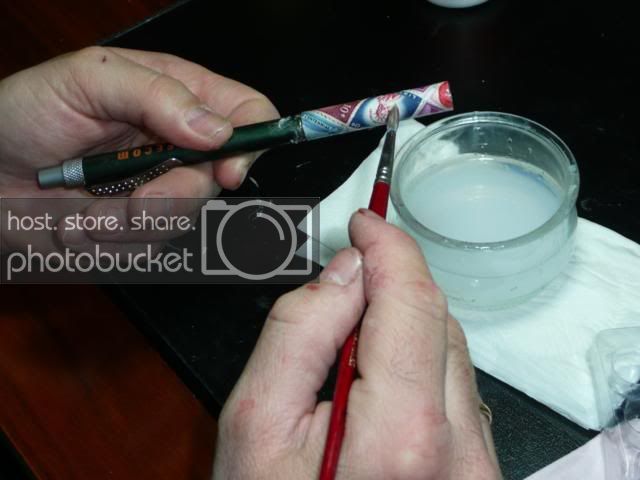
Make a mixture of white-tailed 80% and 20% water to affix stamps, adding a small amount of water ensures that the seal is not sticking instantly

sellos3.jpg


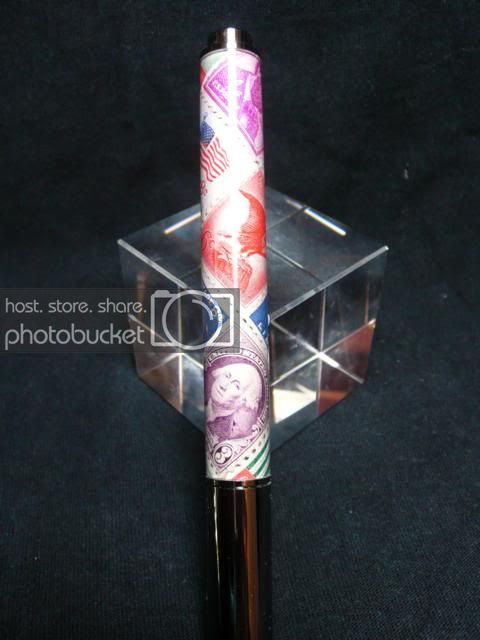
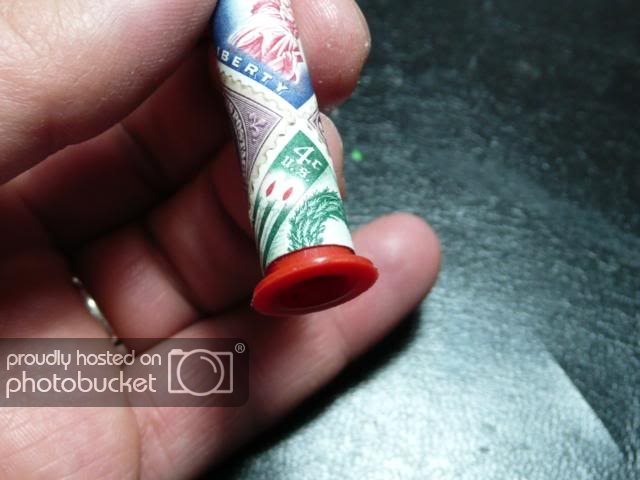
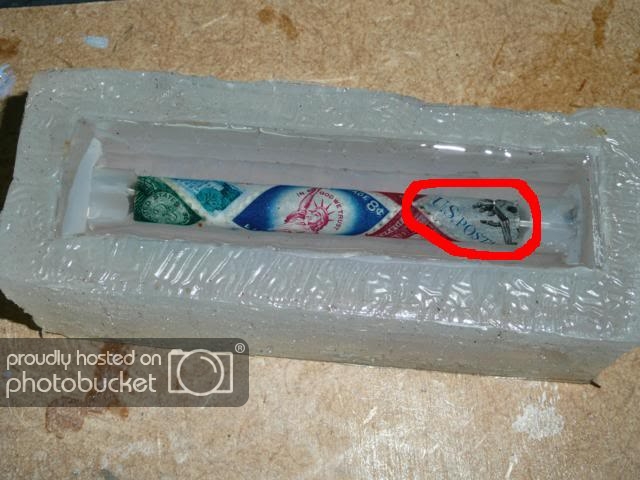
We started to hit all the stamps in my case I hit the diagonal and one must be careful to not see any black color space, we must have patience patience .....

sellos4-1.jpg

sellos4.jpg

sellos5.jpg


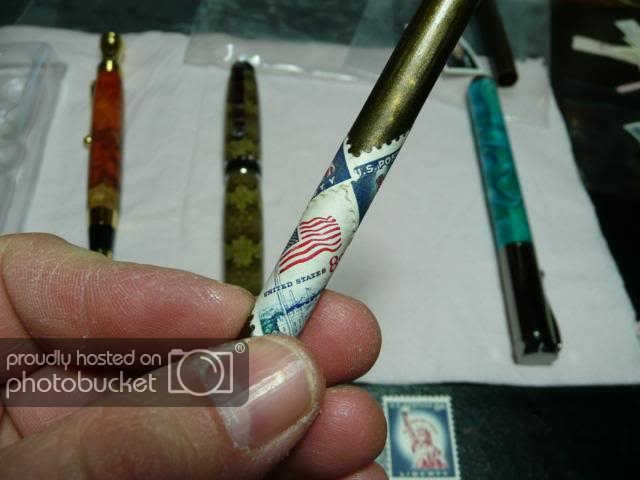
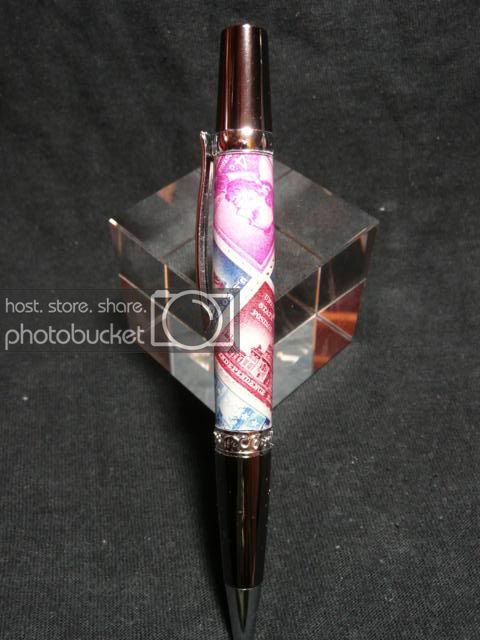
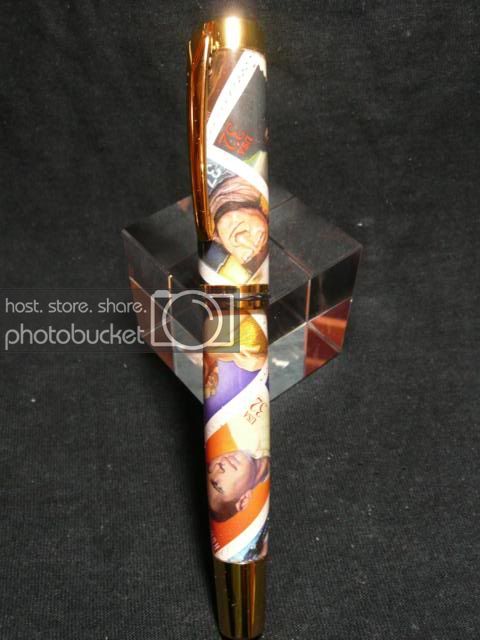
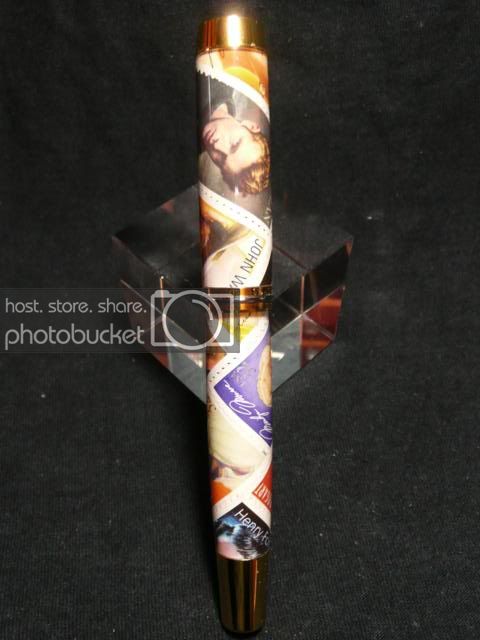
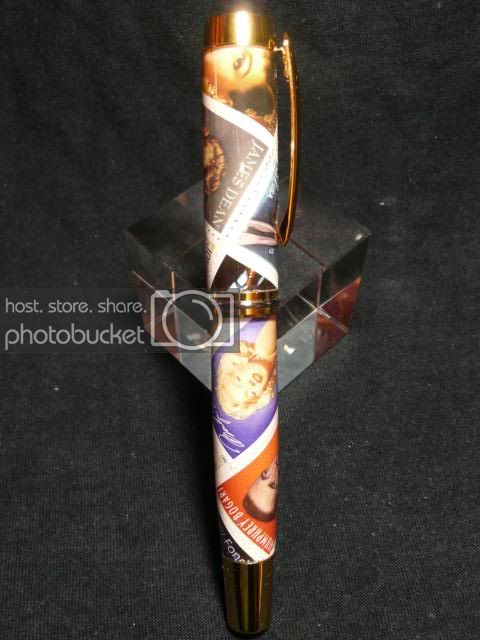
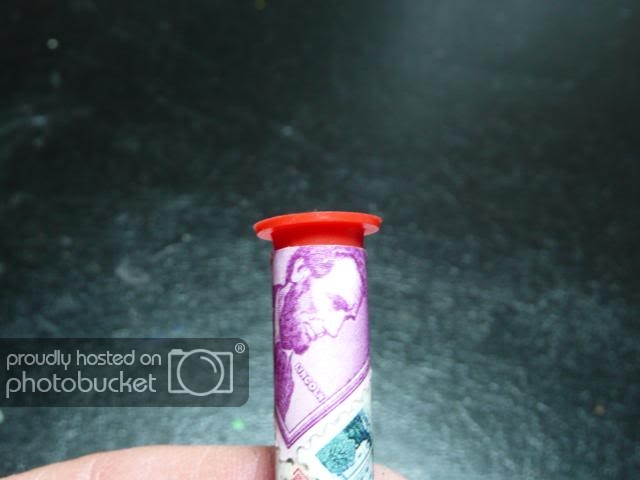
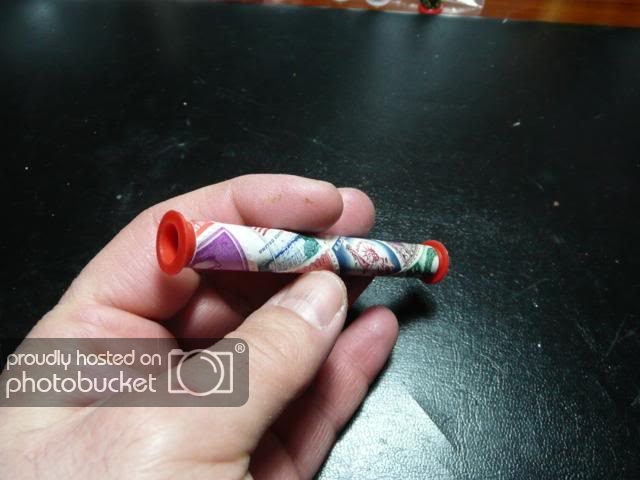
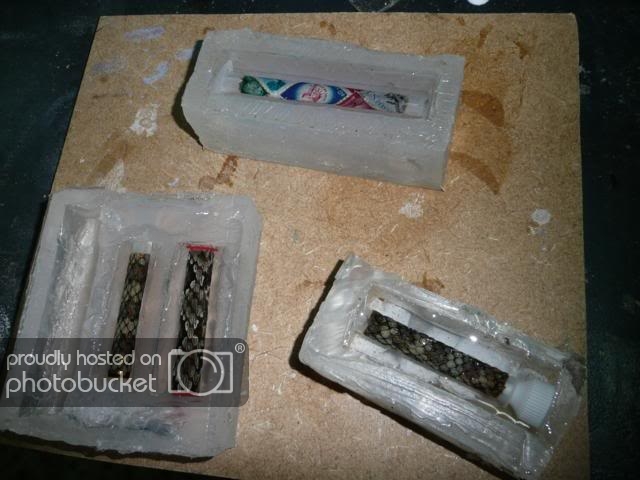
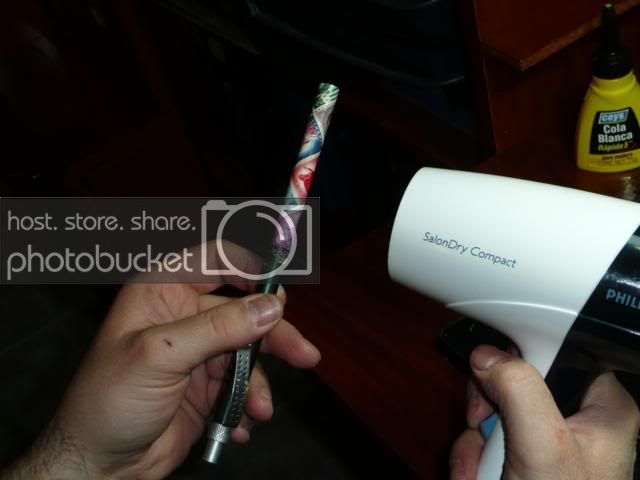
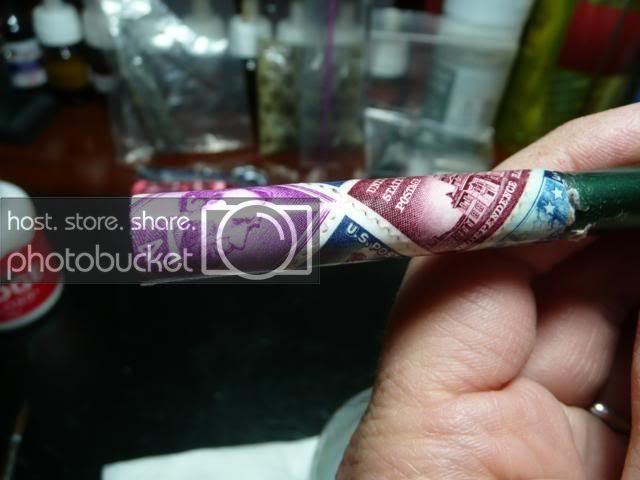
Little by little we are moving forward, until the final result

sellos6.jpg

sellos7.jpg

sellos9.jpg

sellos8.jpg


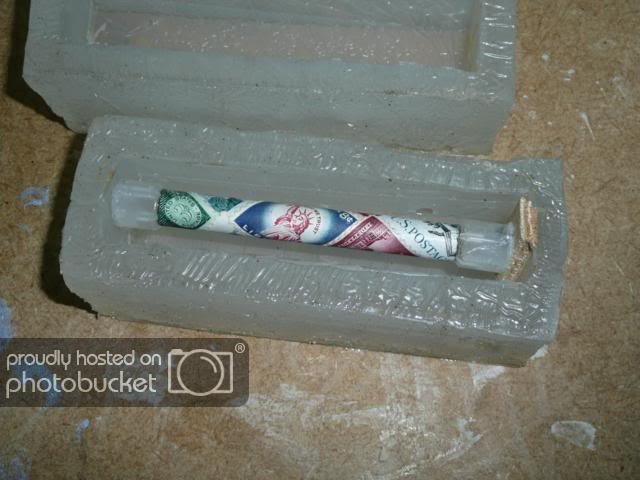
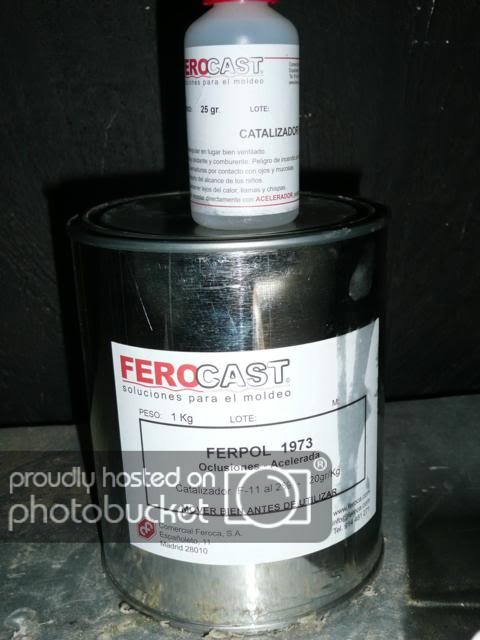
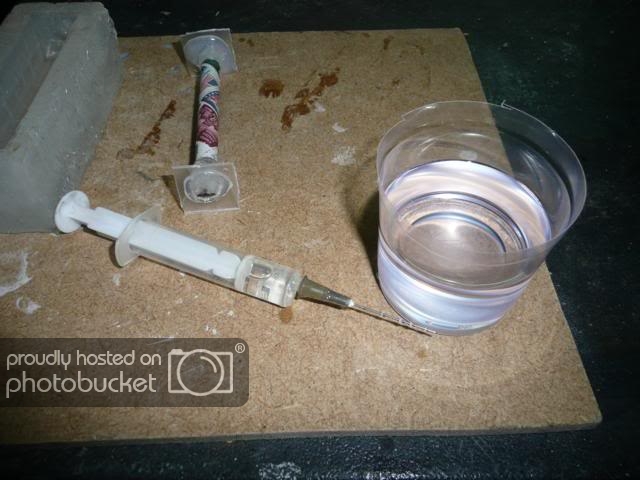
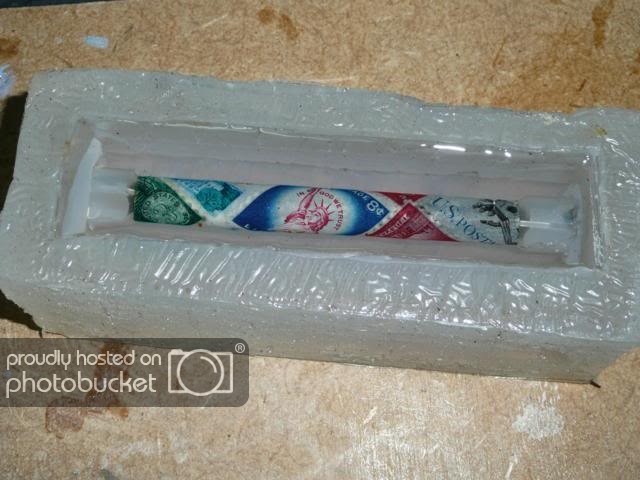
now our pen is ready for casting polyester resin, soon will put the rest of the pictures of the process, a greeting from the south of Spain

Alfonso Sanchez.
 
Signed-In Members Don't See This Ad

PenMan1

Member
Joined
Jul 8, 2009
Messages
6,380
Location
Eatonton, Georgia
Thanks for the tutorial. I have made stamp pens in much the same way, without casting in resin. Just add medium CA until you get to the required thickness and the polish with micro mesh, no turning or casting required.

Your stamp tubes look great!
 

its_virgil

Member
Joined
Jan 1, 2004
Messages
8,126
Location
Wichita Falls, TX, USA.
I look forward to seeing the rest of your tutorial. You blank looks nice so far. What "white tailed"? I'm assuming it is some kind of glue or gluing process. Maybe it is white liquid glue the we may know as Elmer's glue?

The IAP librarian is Tom Woolley,aka TomW. Send the finished article to him and he will get it posted in the library forum.

Thanks for the instructions.
Do a good turn daily!
Don
 

wouldentu2?

Member
Joined
Jan 27, 2011
Messages
899
Location
Oak Creek WI
Made about ten of these using the video on you tube, I left out the mod podge and went right to a quick swipe CA with the lathe turning to cover the stamps, wipe too slowly and the stamp ink might smear.

The older style of stamps which I believe are made by the engraving method versus the lithograph method are more striking.

Also when applying the stamps on the diagonal you will always have small areas that are not covered by whole stamps, save your cut off stamps to use in the small areas.

Since this is the 150th anniversary of the Civil War the civil war pens from PSI (and maybe others) might look sharp with the commemorative stamps coming out over the next few years.
 

Akula

Member
Joined
May 27, 2007
Messages
1,036
Location
seabrook, texas, USA.
Made about ten of these using the video on you tube, I left out the mod podge and went right to a quick swipe CA with the lathe turning to cover the stamps, wipe too slowly and the stamp ink might smear.

The older style of stamps which I believe are made by the engraving method versus the lithograph method are more striking.

Also when applying the stamps on the diagonal you will always have small areas that are not covered by whole stamps, save your cut off stamps to use in the small areas.

Since this is the 150th anniversary of the Civil War the civil war pens from PSI (and maybe others) might look sharp with the commemorative stamps coming out over the next few years.

I skipped the mod podge on the last ones I did. Mod podge would sometimes turn white or milky on me (not everytime but enough for me to just skip)
 

robutacion

Member
Joined
Aug 6, 2009
Messages
6,514
Location
Australia - SA Adelaide Hills
Great stuff...!

I wonder what would be the most effective sealer to protect a picture, either from the old type photos or if you just print some into glossy paper or any other paper that can be most appropriated to print into when the images are intended to be glue into a pen or box and then CA'd or varnished...???

Being in Australia, I have not yet found something that can protect the pic properly so, any brand names are handy so that I can search purchase locations.

Thank you

Cheers
George
 

its_virgil

Member
Joined
Jan 1, 2004
Messages
8,126
Location
Wichita Falls, TX, USA.
Is it just me or does anyone else think Alfonso's thread is getting hijacked? He is sharing what he is doing to make a pen using stamps and other methods of doing this is not needed here. Start a new thread on making stamp blanks and the you tube video from PSI and allow Alfonso to finish this thread. I'm not trying ruffle feathers. Let's just allow posters to share methods without offering other methods in the same thread. What a way to deflate someone's balloon!
Do a good turn daily!
Don
 

Alfonso

Member
Joined
Jan 31, 2011
Messages
23
Location
Cehegin-Murcia-España
Hi all again, as our friend its_virgil I will be putting the names of the products I use, remember that I live in Spain and almost all products are purchased in my country other than those which are imported. I also want to ask a little patience and I have not much time to make pens I work as a professional audio installer car audio and stage and am often working away from home.

The glue used to affix stamps white carpenter's glue is very good and totally transparent when dry, it is best that you can mix with water that is not as dense.

The process is to paste stamps one by one and if possible on the diagonal since it is much better, to avoid getting a stamp and other areas are where you see the color of the tube to that mix white glue with a little water With this we got the label does not stick right away and we can move it for about 10 seconds to put in place without problems.

I also tried the Mod Podge, I personally do not like much since it is not completely smooth and can sometimes be a little blank spaces, the best thing for me is d cyanoacrylate glue.

Reference COLA BRAND WHITE CEYS.
 

hdtran

Member
Joined
May 17, 2006
Messages
147
Location
Albuquerque, NM, USA.
Alfonso,

Thank you very much for posting, and I look forward to seeing a tutorial in the library!

You remind us that this is the International Association of Penturners, and when the rest of us who are not International post something, we ought to think about our audience. I appreciate the clarification that 'Cola Blanca' is white carpenter's glue (also known as PVA glue in the US), and you dilute it with water (80% glue, 20% water by volume) before gluing the stamps on the tube.

Please tell us (as you go) how you paint the tubes before putting the stamps on.

Again, 'muchas gracias!!!'
 

Alfonso

Member
Joined
Jan 31, 2011
Messages
23
Location
Cehegin-Murcia-España
Alfonso,

Thank you very much for posting, and I look forward to seeing a tutorial in the library!

You remind us that this is the International Association of Penturners, and when the rest of us who are not International post something, we ought to think about our audience. I appreciate the clarification that 'Cola Blanca' is white carpenter's glue (also known as PVA glue in the US), and you dilute it with water (80% glue, 20% water by volume) before gluing the stamps on the tube.

Please tell us (as you go) how you paint the tubes before putting the stamps on.

Again, 'muchas gracias!!!'


Hdtran Hi, how to paint the pipe is as follows, I use black spray paint for ease of application, with a very thin layer of paint to avoid unnecessary accumulations.

A good trick to avoid damaging the seals is as follows, apply a thin layer of white glue with water on the seal, the coating must be very very thin to prevent the seal when pasting white-tailed beast protrude and can stain the rest of stamps and glued.

Greetings from Spain.

Alfonso.
 

Alfonso

Member
Joined
Jan 31, 2011
Messages
23
Location
Cehegin-Murcia-España
continue .... once the bonding process seals the tube prepare for casting polyester resin.

To fill the holes in the tubes I use a conical plastic plugs that fit perfectly into the holes.

selos10.jpg


sellos11.jpg


sellos12.jpg


sellos13.jpg


sellos14.jpg


plugs to be of conical form not necessary to glue the tubes but I usually put some white glue it but this time without water to completely seal any small hole through which the resin can be filtered and so damage the tube.

I advise to never use caps to glue cyanoacrylate adhesive such as glue to dry I can bleach the area of contact, put a photograph shows the area where it can be bleached, cyanoacrylate, so I use white glue because it never whitening is completely transparent.

P1040502_640x480.jpg


greeting.

Alfonso.
 

Alfonso

Member
Joined
Jan 31, 2011
Messages
23
Location
Cehegin-Murcia-España
Once the tube tightly sealed with plugs prepared in silicone molds for casting polyester resin.

sellos11-1.jpg


The resin I use is Dow Corning brand, and is completely transparent, with the passage of time turns yellow and remains the same as the first day, the proportion of catalyst is 2% at room temperature of 20 degrees Celsius in 18 hours is manageable.

resina.jpg


In the picture you can see totally transparent resin and catalyst in the syringe ready for mixing

resina1.jpg


Very slowly pour the resin and to avoid creating air bubbles to avoid future surprises, once I put the resin poured into a mold lunchbox kitchen that has a valve at the top of the lunch box and extract a small air pump interior, it gets out all the little air bubbles that may contain the resin mold, the mold will keep it in the lunchbox for about 5 minutes.

After I put the silicone mold to air dry for about 18 hours. This is the look after the lunch out of cooking and remove air from the mold.

sellos12-1.jpg


sellos13-1.jpg


Greetings and see you tomorrow.

Alfonso.
 

Alfonso

Member
Joined
Jan 31, 2011
Messages
23
Location
Cehegin-Murcia-España
I find a problem by pouring polyester resin to filtering in the stamps and have been wet and evil.

Copiadesellos16.jpg


I've solved the problem by applying to the Super Podge gloss labels before applying the polyester resin

P1040512_640x480.jpg


podge made a mixture of water and 80% + 20% and give a pass with a brush around the base of the seals, to keep a little water does not dry as fast pogde thereby avoid small scratches that can come out, Once the entire surface with podge use a hair dryer to speed drying and prevent water from seeping into the seals and we will do the same.

P1040516_640x480.jpg


P1040517_640x480.jpg


P1040519_640x480.jpg


do 5 to 6 applications with the super podge, it is this aspect once the process, and ready to make a polyester resin casting without fear that the same thing happen to us.

P1040515_640x480.jpg


greeting.

Alfonso.
 

G1Pens

Member
Joined
Oct 4, 2010
Messages
1,859
Location
Atlanta, GA area (Dacula)
Nice tutorial. My only comment is that it looks like you did that with new stamps. I would recommend using cancelled stamps. They are a lot less expensive. You have a couple stamps there that may be worth more to a collector of stamps.

I picked up a packet of cancelled stamps at a local craft store for about $3. Got 12-15 stamps. They just have cancellation marks. I imagine with a little effort I could find them cheaper than that. Most cancelled stamps that you would find in a packet like that should be worth about 10-20 cents each.
 

KBs Pensnmore

Member
Joined
Oct 16, 2010
Messages
834
Location
Murray Bridge 5253 Australia
Alfonso, I personaly like the idea of using new stamps. Don't worry what other people think as long as you like it, that is what is MOST important. Thank you very much for the tutorial, I found it most enlightening.
Who would have thought of using Stamps, now where's my kids stamp collection!!!!!!
 

G1Pens

Member
Joined
Oct 4, 2010
Messages
1,859
Location
Atlanta, GA area (Dacula)
Hey Alfonso,

I wasn't criticizing. I honestly think the uncancelled stamps look better as well. I was just adding a "tip" for those who could not find uncancelled stamps or did not want spend the extra couple of bucks that they may cost.

Your tutorial and pictures are excellent.
 

wouldentu2?

Member
Joined
Jan 27, 2011
Messages
899
Location
Oak Creek WI
Having made some of the stamp pens I like his use of the new stamps since it shows the stamp much better than the cancelled stamp. I had found a stamp dealer that had so many cancelled stamps he was willing to sell them by the pound.

I also wonder about the lunchbox with the valve, I don't use the mold method only the CA.
 

Alfonso

Member
Joined
Jan 31, 2011
Messages
23
Location
Cehegin-Murcia-España
also usually put these caps on the ends of the tubes to prevent the polyester resin from within them, can be found in hospitals are used to measure the temperature in the ear.

P1040524_640x480.jpg


at the request of some members of the forum I put the pictures of the vacuum pump I use, it is a kitchen pail lid that contains a small valve used to extract air from inside with a small hand pump, the draw the air inside is perfect for the bubbles rise to the surface and avoid future surprises, it is practical, fast and very very affordable. Can be found in malls and supermarkets.

P1040525_640x480.jpg


P1040527_640x480.jpg


P1040526_640x480.jpg


P1040530_640x480.jpg


P1040528_640x480.jpg


P1040529_480x640.jpg


and this is how it looks once completely dry polyester resin and then using the vacuum pump lunchbox, you will see that it has no small air bubble.

P1040522_640x480.jpg


greeting.

Alfonso.
 

wouldentu2?

Member
Joined
Jan 27, 2011
Messages
899
Location
Oak Creek WI
Love the Lunch box idea, saves some money and I won't have money in it if I don't like it my wife will have more storage containers. Can't wait to see how the pen turns out. Kind of like watching Dallas to see who shot J.R. though. ;)
 

Alfonso

Member
Joined
Jan 31, 2011
Messages
23
Location
Cehegin-Murcia-España
We have prepared all cast polyester resin to start turning.

sellos28.jpg


sellos26.jpg


sellos27.jpg


On this occasion we pen turning ZEN model with U.S. stamps, purchased on ebay and imported to Spain.

sellos29.jpg


with great patience and go slowly turning the polyester resin with the gouge and giving the desired shape.

sellos30.jpg


Greeting.
 

Alfonso

Member
Joined
Jan 31, 2011
Messages
23
Location
Cehegin-Murcia-España
Well friends this comes to an end, once turning, sanding with sandpaper from 320 to 1200 and then with micro mesh of 1500 to 12000 dipped in water and then polished with HUT Ultra Gloss Plastic Polish, and this is the final aspect.

P1040554_480x640.jpg


P1040555_480x640.jpg


I hope this tutorial is helpful and you enjoyed with him.

These are the materials used:

- Polyester resin Dow Corning.
- cyanoacrylate glue Imedio
- stamps purchased on Ebay USA
- White glue transparent Ceys
- Silicone Moulds
- Vacuum pump Sonal (lunchbox cooking)
- Super podge gloss Vallejo Acrylics
- Hairdryer
- plastic caps for the tubes (caps tattoo ink)
- HUT Ultra Gloss Plastic Polish
- Sand 320, 600, 800 and 1200 in water
- Micro mesh 1500-12000
- Black paint

A greeting from Spain.

Alfonso Sanchez.
 

Grizz

Banned
Joined
Oct 26, 2007
Messages
917
I would like to see this in a PDF format so I can download just the instructions.

Excellent tutorial.
 

Alfonso

Member
Joined
Jan 31, 2011
Messages
23
Location
Cehegin-Murcia-España
Hello friends here send the latest pictures of pens and pen turned with seals.

saw models

P1040574_640x480.jpg


P1040573_640x480.jpg


Title Legends of Hollywood stamp made ​​with Hollywood actors

P1040582_640x480.jpg


P1040583_640x480.jpg


P1040584_640x480.jpg


P1040581_640x480.jpg


P1040580_640x480.jpg


P1040579_640x480.jpg


Greeting.

Alfonso.
 
Top Bottom