Newbie Help Needed

Signed-In Members Don't See This Ad

Dana Fish

Member
Joined
Jan 27, 2011
Messages
172
Location
Portland, ME
Hello all.....

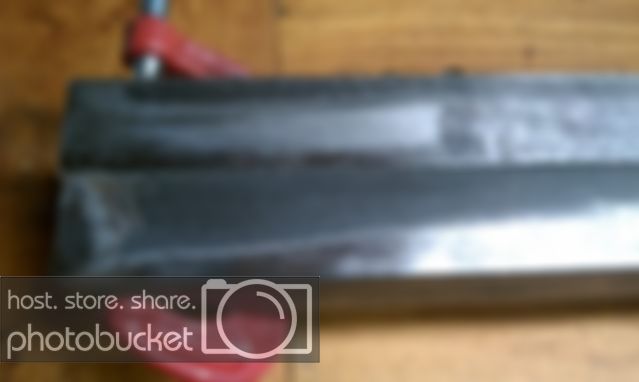
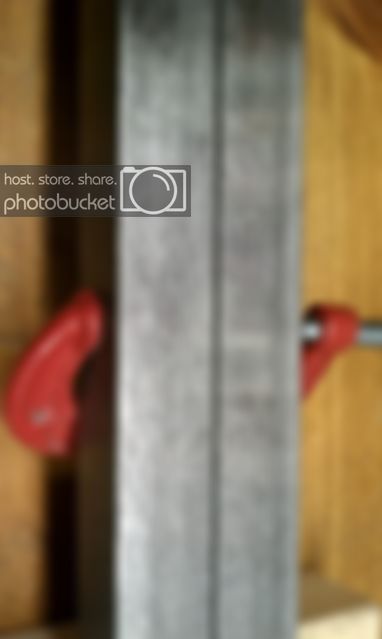
I have recently started to practice turning pens on the lathe, it fun and all but my frustration comes in when I get to the near end of the finishing the turning process and I blow out a chuck off the end off the blank. I have posted pics below of my situation this morning in hopes that someone may have an idea how to prevent this from happen in the future.

I question if I am using enough glue? Are my tools sharp enough? Or do I just have that much bad luck that I keep choosing weak blanks?

IMAG0056.jpg


IMAG0057.jpg


Any advice or pointers would be greatly appreciated.
 
Signed-In Members Don't See This Ad

seamus7227

Member
Joined
Mar 18, 2009
Messages
6,220
Location
Wichita Falls, TX
Well, first of all, it has been my experience that when working with burls, you should stabilize them with thin CA and that will help. Also, you may want to check how sharp your tools are and the technique with which you are using them. Are you involved in any local woodturning groups?
 

SGM Retired

Member
Joined
Dec 16, 2010
Messages
357
Location
Toney, AL , Limestone County
Looks like you did not get any CA down at that end of the tube. A good thing to do is once you square up the end take thin CA and give a couple of drops where it soaks into the wood near the tube. This will also happen when dealing with cross cut wood and splated wood so "doctor" up the ends and it should e OK.
Gary
 

IPD_Mrs

Member
Joined
Jun 27, 2007
Messages
2,048
Location
Zionsville, Indiana
Well yes, yes and yes. :)

You glue might be failing. Try two part epoxy if you are using CA to glue the tubes to the blank. It is hard to tell from the photo if there is any glue still on the tube. Did you sand your tubes?
Your tools may need to be sharpened, although the shavings in the photo indicates you are getting ribbons when turning.
Your blank is a burl which means the grain is going in several different directions. This will put stress on the blank as you turn. One way to combat that is to drizzle a little CA on the blank to help stablize it.
Base on the shavings It doesn't look like you are trying to remove too much material at once.
Do you feel a catch when the blank blows? What tool are you using? What direction is the feed of your tool?

These are just a few of the things to look at. Try the epoxy and I think you will be fine.

I hope some other will chime in here.
 

renowb

Member
Joined
May 27, 2009
Messages
2,241
It looks like the tube was not roughed up enough also. I agree that epoxy works better and make sure the drilled hole is not too small so the epoxy will grip.
 

seamus7227

Member
Joined
Mar 18, 2009
Messages
6,220
Location
Wichita Falls, TX
One more thing, It appears as though the piece that blew out is sitting on you lathe bed. Take that piece, loosen the mandrel, replace that broken piece where it belongs, and saturate with thin CA. That should save your blank. Then turn with a very light hand on the repaired section and have patience. Dont let this get you down, this is how you learn to get better. I'm sure most penturners experience this when they first start, Especially if you are new to turning and unfamiliar with the use of the tools!
 

David Keller

Member
Joined
Nov 30, 2009
Messages
1,618
Location
Enid,OK
It's happened to everybody, so you're not alone.

Cutting from the center of the tube toward the ends will reduce the risk quite a bit. Sanding the tubes before gluing helps. Epoxy is probably better than CA, but I continue to use thick CA because I find it more convenient. A little thin CA before final cuts will help as well especially with punky or difficult woods.
 

seamus7227

Member
Joined
Mar 18, 2009
Messages
6,220
Location
Wichita Falls, TX
Another idea would be to part off the broken section and get creative and add another type of material. For example: You could use a contrasting color wood, darker or lighter, or a piece of Corian, guitar pick guard, colored plexiglass, a piece of license plate(aluminum), the options are endless, and cut a section just a little longer than that section, drill it, and glue it onto the remaining section of brass tube. Then turn it down to match the rest of the wood. Now, if you were to do this, and wanted it to match, you could do the same to the opposite end of the same tube and use that for the upper barrel section of the pen. That way it looks as though you meant for it to look that way. Just my .02 worth
 
Last edited:

jttheclockman

Member
Joined
Feb 22, 2005
Messages
19,148
Location
NJ, USA.
All the above answers are good ideas and will help improve the chances of success in the future. If I may be allowed to throw another little tidbit out there. Whenever I see a blank blow out on the end as this did I feel it should be mentioned that one way to prevent this is to continue to roll the edges down toward the bushings first before attacking the center. The keep doing this as you get close to final shape. The ends should reach their destination before the center. Good luck.
 

robutacion

Member
Joined
Aug 6, 2009
Messages
6,514
Location
Australia - SA Adelaide Hills
Yeah, from what I can see from the bottom pic, it seems that the brass tube wasn't roughed-up, nor I can see any signs of glue on the brass, this mean that the failure may have resulted from that end of the barrel not have any glue to support/attach it to the brass tube.

I'm inclined to say that, the pic seems to show a "fair" gap between the wood and the brass tube, this indicate that the drill is a little oversized. This is perfect to epoxy gluing-ups, it needs a loose fit to allow some glue in between the 2 bonding materials but, if you used CA, that gap is excessive and making possible for the glue to cover the brass but not touch the wood, failing the bonding completely...!

I also think that, with the broken piece available to you, you can easily glue it back as advised above and if done right, you want the able to see the repair...!!!

I also don't think that your tools and sharpness are to blame in this case, all the evidence showing in the pics, demonstrates just that...!!!

Lets us know how you are going to tackle this repair.

Good luck.

Cheers
George
 

G1Pens

Member
Joined
Oct 4, 2010
Messages
1,859
Location
Atlanta, GA area (Dacula)
I just had the exact same thing happen...only worse....about 45 minutes ago. I called it a night and will tackle saving it tomorrow. Mine was on a burl and at the end just like yours, but it took out about 5 time more than yours. I have all the pieces. Examination revealed little or no CA on the tube or the blank at that location. I always rough up the blank...but...this time I didn't. So what everyone has said above validates what happened to me.
 

airrat

Member
Joined
May 17, 2005
Messages
2,585
Location
chandler, az, USA.
I agree I dont see the tube roughed up or any glue on it. I make sure I am getting glue inside the blank and on the tube, then insert it.


Don't throw it out. Part it off add a piece to it and expand your experience. Now you get to try something new.
 

Dana Fish

Member
Joined
Jan 27, 2011
Messages
172
Location
Portland, ME
Thanks for the quick responses. I was able to finish the pen after some pretty rough cosmetic work to the blanks. This is actually my first pen 100% completed. I stil have plenty to learn and plenty to practice to be done.

I did a lot with a gouge on this one, but have been practice skew. This will mos likely be my tool of chose going forward.

IMAG0060.jpg


Hope you enjoy ....
 

john l graham

Member
Joined
Aug 25, 2008
Messages
77
Location
Molokai, Hawaii
I agree with the others, rough up the tube with 220 grit, make sure your tube fits into the blank without forcing, use 2 part epoxy 5 or 30 min cure, put glue into both ends of the blank with dowel that fits, cover the tube with the epoxy and insert. Since I have used this method there have been few if any blow outs as compared to when I started. Good Luck and glue that small piece back on and turn turn turn.

Nice save!!!
 
Last edited:

Drstrangefart

Member
Joined
Sep 15, 2010
Messages
4,258
Location
Woodstock, Ga. U.S.A.
You did a good save there! I've had to do that quite a few times. I have a deer antler/bloodwood segment that happened to, mostly due to my tools being cheap and hard to use. I use my roughing gouge for almost all of my work. The skew is a nice alternative to sanding when you can't sand without damaging something. Keeping your tools as sharp as possible helps, as you have to bear down on them and apply way too much pressure to work properly. I use thick CA to glue my tubes in, and I just add a blob to the inside of the tube on the end before I put the tube in the other end. Tube's covered in thic CA, of course. You'll learn a LOT from the ones that require repair/salvage work, a lot more than from the pens where everything goes smoothly.
 

KenV

Member
Joined
Oct 28, 2005
Messages
4,720
Location
Juneau, Alaska.
Good save --

I turn some blanks for laser work that do not have the tube glued in - I float the tube to help center the blank and leave it a few thousand over size -- then send the naked turning to Ken for the laser work. He does thorugh cuts and inserts for me - and I then tube, glue and finish the pen.

I have learned very sharp skew and light light cuts.

I have 6-8 more of those to do for the next batch.

Need to examine the blanks carefully and proceed with some caution. Remember with high figure stuff, take your time because even with slow, a pen is pretty fast.

I like the statement from Robert Rosand -- "I resharpen when I notice that my tool could be sharper." A wise turner!! Do not wait for dull, sharpen when you notice that the tool could be sharper.
 

MorganGrafixx

Member
Joined
Jan 20, 2009
Messages
290
Location
Snelville, GA
Also the problem could be that your drill bit wandered on insertion or blew out a tiny bit on the exit. On certain drill sizes I had this problem quite often with the drill bit funneling out one end of the hole. To combat this, I chopped my blanks down so that the blank would be a good inch longer than the brass tube. This way I could rough up and glue in my tubes with a half inch of extra wood on either side. Either use a sanding disc or the blank squaring method of your choosing to get rid of the extra wood and you should end up without the gaps between the wood and the tube on the ends like that.
 

Dana Fish

Member
Joined
Jan 27, 2011
Messages
172
Location
Portland, ME
Also the problem could be that your drill bit wandered on insertion or blew out a tiny bit on the exit. On certain drill sizes I had this problem quite often with the drill bit funneling out one end of the hole. To combat this, I chopped my blanks down so that the blank would be a good inch longer than the brass tube. This way I could rough up and glue in my tubes with a half inch of extra wood on either side. Either use a sanding disc or the blank squaring method of your choosing to get rid of the extra wood and you should end up without the gaps between the wood and the tube on the ends like that.

I agree... I do the same things since my expereince is limited I give myself room for error and which allows me to cut or sand down to the actual length needed.

Thanks for the tip
 
Top Bottom