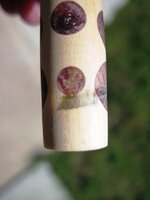
This a pen blank I recently made.
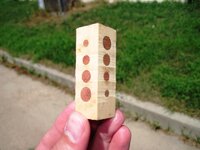
Well, I did to this blank what that raccoon did to the hunting dog a few days ago. I have been having some problems drilling perfectly straight holes as of late. It seems every forth or fifth hole is crooked ( I think the problem might be dull drill bits). I didn't want to chance a crooked hole on this blank so I first drilled the hole for the brass tube. I then laid out the pattern to align with the hole. I drilled all of the dowel holes on one side completely through the blank. I then glued the dowels into the blank. I then took the 27/64" brad point bit I used to drill the tube hole and driled out the dowels. I then drilled the dowel holes on the other side and again reamed the hole with the 27/64" drill bit. I then glued the tube in the put it on the lathe the started turning. When I started getting close to final diminsions this is what I had.
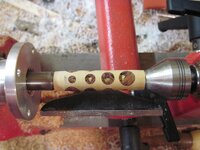
The brad point bit had broke the dowels rather than a clean cut. I thought maybe I could save it. I had ERC sawdust from turning the dowels.
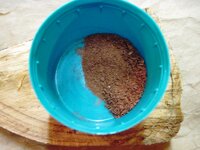
So I put a drop of Thick CA in the holes and tried to pack the sawdust into the holes. I then drenched everything in thin CA.
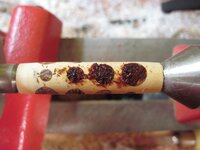
I let that dry and then used a skew and some sandpaper to clean it up.
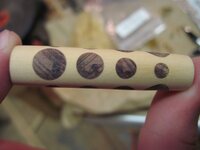
You could see exactly where the repairs were made. Not only that but I sanded through a spot wher the drill bit must have wandered a little during one of the reaming processes. I ended up tossing this one. I figured I'd share it with everyone so they could avoid mistakes like these. What I'm going to correct is that I'm going to drill the dowel holes first and then drill the tube hole so that the dowels are supported and won't snap off. I may have got away with doing it the way I did if I had a 27/64" standard twist drill bit. I don't think it would have snapped the dowels off like the brad point dit did. As for failed "save", I think I need finer filler material. As the old saying goes "I have too many of my own mistakes to be making anybody elses". Hopefully someone will find this useful. Thoughts anyone? What about the design. Thumbs up or down?

Well, I did to this blank what that raccoon did to the hunting dog a few days ago. I have been having some problems drilling perfectly straight holes as of late. It seems every forth or fifth hole is crooked ( I think the problem might be dull drill bits). I didn't want to chance a crooked hole on this blank so I first drilled the hole for the brass tube. I then laid out the pattern to align with the hole. I drilled all of the dowel holes on one side completely through the blank. I then glued the dowels into the blank. I then took the 27/64" brad point bit I used to drill the tube hole and driled out the dowels. I then drilled the dowel holes on the other side and again reamed the hole with the 27/64" drill bit. I then glued the tube in the put it on the lathe the started turning. When I started getting close to final diminsions this is what I had.

The brad point bit had broke the dowels rather than a clean cut. I thought maybe I could save it. I had ERC sawdust from turning the dowels.

So I put a drop of Thick CA in the holes and tried to pack the sawdust into the holes. I then drenched everything in thin CA.

I let that dry and then used a skew and some sandpaper to clean it up.

You could see exactly where the repairs were made. Not only that but I sanded through a spot wher the drill bit must have wandered a little during one of the reaming processes. I ended up tossing this one. I figured I'd share it with everyone so they could avoid mistakes like these. What I'm going to correct is that I'm going to drill the dowel holes first and then drill the tube hole so that the dowels are supported and won't snap off. I may have got away with doing it the way I did if I had a 27/64" standard twist drill bit. I don't think it would have snapped the dowels off like the brad point dit did. As for failed "save", I think I need finer filler material. As the old saying goes "I have too many of my own mistakes to be making anybody elses". Hopefully someone will find this useful. Thoughts anyone? What about the design. Thumbs up or down?

