Just starting

Signed-In Members Don't See This Ad

Ray1955

Member
Joined
Dec 25, 2016
Messages
33
Location
Myrtle Beach Sc
Ok well I have my lathe hooked up. Shop Fox mini.

I bought a few blanks at $1.50 each. I wanted to try turning last night and
I cut my length on blank and had a brand new bit from WoodCrafters. I made a quick frame to hold my piece and used a clamp to hold it in place. Found center and started to drill coming in and out of the blank and it was at the end it broke in half. I am drilling a larger hold as it is a single barrel pen. I am suspecting my piece got too hot and I need to go slower maybe....what should the drill speed be I have a variable drill press.

You know I can practice on making my own blanks out of pine and if there were barrels you could use just to go through the process one could practice the feel of turning on the lathe........hmmmm. Thoughts?

Ray
 
Signed-In Members Don't See This Ad

JimB

Member
Joined
Mar 18, 2008
Messages
4,682
Location
West Henrietta, NY, USA.
Welcome from western NY State!

If you have never turned nothing before I suggest practicing on scrap wood first. I used to cut 2x4 in half, mount between centers and practice.

As for your exploding blank, in may have gotten too hot. You need to clear chips frequently especially with the longer blanks. Drill slowly. You may have had a defective blank.
 

mecompco

Member
Joined
Apr 24, 2015
Messages
1,607
Location
Fairfield, Maine
Ray, welcome! I started the same way you are--with what I had for tools. Home made clamp for the drill press, etc. It can be done, but as you add tools, it will become easier (for instance drilling on the lathe, instead of the drill press).

As to your problem, I suggest NOT drilling all the way through your blank. Leave it long, mark your drill bit as to the proper depth, then drill to the mark. Now, mark the outside of your blank to the tube length, plus a smidge for squaring, and cut off the excess. If you don't drill through the end, you will never have tear out. If you get way to aggressive, you may still blow out a blank, so you do have to take it easy and clear out the chaff.

Don't worry, all this will get easier with practice.

Regards,
Michael

PS I drill on the lathe at around 450/500 RPMs.
 
Last edited:

jttheclockman

Member
Joined
Feb 22, 2005
Messages
19,148
Location
NJ, USA.
Drilling wood is 500 - 600 rpm. Using a drill press can present some problems. Is the table 90 degrees to the drill bit all around. Do you have runout on the chuck. What type bit are you using. (do not like brad points for pen blanks) Make sure you are clamped securly. Make sure you have a backer board so when you come through the blank the bit continues into another piece of wood. There needs to be no gap between them. You can use the method that was mentioned above only if the blank is long enough for your kit. Heat is your enemy to many operations of making a pen so keep the bit cool and clear the swarf from the hole many times as you drill. This will also help in keeping the bit cool. All this goes for any material you are going to drill. Good luck and have fun.:)
 

carlmorrell

Member
Joined
May 14, 2013
Messages
691
Location
Cary, NC
It bothers me that so many people on this forum think that that every operation should be done with a lathe. There is absolutely nothing wrong with using a drill press to bore a hole. That's what they are made for and they do it very well.

500 RPM is what I use. My biggest mistake was not investing in a good drill bit sharpener soon enough (Drill Dr.) My initial guess would be a dull drill bit and too much pressure. I also keep vacuum on everything I do for health reasons. It will help keep the chips clear and provide a little cooling. Don't drill for more than 20 seconds without backing the bit out and checking the heat.

Good luck. :biggrin:
 

Skie_M

Member
Joined
Aug 7, 2015
Messages
2,737
Location
Lawton, Ok
Drill slow, back out often to clear the wood chips ... doesn't matter where you're doing your drilling, on the lathe or the drill press, as long as you drill a nice clean straight hole.

The main advantage of drilling on the lathe is, it does have better chances at putting the hole exactly centered all the way through the blank.


Make certain you are using straight drill bits that are clean and sharp! :)
 

TonyL

Member
Joined
Mar 9, 2014
Messages
8,915
Location
Georgia
It bothers me that so many people on this forum think that that every operation should be done with a lathe. There is absolutely nothing wrong with using a drill press to bore a hole. That's what they are made for and they do it very well.

500 RPM is what I use. My biggest mistake was not investing in a good drill bit sharpener soon enough (Drill Dr.) My initial guess would be a dull drill bit and too much pressure. I also keep vacuum on everything I do for health reasons. It will help keep the chips clear and provide a little cooling. Don't drill for more than 20 seconds without backing the bit out and checking the heat.

Good luck. :biggrin:

Why does it bother you, if that is what works best for you?
I use both and a Dr. Doctor (excellent investment!).
 

carlmorrell

Member
Joined
May 14, 2013
Messages
691
Location
Cary, NC
The op is trying to figure out what went wrong with drilling on a press. Mentioning using another tool is not helpful especially when he is using the correct tool for the job.

You can use a screwdriver like a gouge, but would you? My opinion is use the drill press for drilling, and the lathe for turning.
 

jttheclockman

Member
Joined
Feb 22, 2005
Messages
19,148
Location
NJ, USA.
The op is trying to figure out what went wrong with drilling on a press. Mentioning using another tool is not helpful especially when he is using the correct tool for the job.

You can use a screwdriver like a gouge, but would you? My opinion is use the drill press for drilling, and the lathe for turning.


Read my post. Your point is valid but it has shortcomings too. A beginner may not see them right away either. I have a very good couple of drill presses but would not think of drilling a segmented blank on them. I have way more control drilling on a lathe.
 

mecompco

Member
Joined
Apr 24, 2015
Messages
1,607
Location
Fairfield, Maine
The op is trying to figure out what went wrong with drilling on a press. Mentioning using another tool is not helpful especially when he is using the correct tool for the job.

You can use a screwdriver like a gouge, but would you? My opinion is use the drill press for drilling, and the lathe for turning.

Well, I guess it all depends. I started making pens with a well abused, rattle-trap, POS $50.00 HF-type drill press with perhaps 2" of travel and a kludged together from scrap wood blank "vise". IF one has a decent drill press, then hey, use it!

I never said, and never would say one HAS to drill on the lathe--just that it works very, very well and is much less expensive than purchasing a large, quality drill press. If I'd known I could do it on the lathe when I was starting out, I would have saved myself much frustration (as well as knowing NOT to drill through a blank).

Regards,
Michael
 

ed4copies

Local Chapter Manager
Joined
Mar 25, 2005
Messages
24,528
Location
Racine, WI, USA.
Ok well I have my lathe hooked up. Shop Fox mini.

I bought a few blanks at $1.50 each. I wanted to try turning last night and
I cut my length on blank and had a brand new bit from WoodCrafters. I made a quick frame to hold my piece and used a clamp to hold it in place. Found center and started to drill coming in and out of the blank and it was at the end it broke in half. I am drilling a larger hold as it is a single barrel pen. I am suspecting my piece got too hot and I need to go slower maybe....what should the drill speed be I have a variable drill press.

You know I can practice on making my own blanks out of pine and if there were barrels you could use just to go through the process one could practice the feel of turning on the lathe........hmmmm. Thoughts?

Ray

To improve the quality of answer, can you give a few details:
What are the $1.50 blanks made of? If wood, what species? What size are they? What size hole are you drilling?

The combination of the above factors can make your job simple or very challenging. A 5/8" blank of ebony is a bear to drill a 10.5mm hole (or 27/64), pretty simple to drill a 7mm. Each factor contributes to the best path to success.

So, if you give a little more info, we can give better direction.

FWIW,
Ed
 

ed4copies

Local Chapter Manager
Joined
Mar 25, 2005
Messages
24,528
Location
Racine, WI, USA.
The 1.50 bin is usually odd size and "challenging" material--at least in the few WoodCraft stores I have visited. Cracked ebony, parallelogram blanks-not square, 5/8 cocobolo and bocote are frequent finds.
 

leehljp

Member Liaison
Joined
Feb 6, 2005
Messages
9,329
Location
Tunica, Mississippi,
Welcome Ray. It is obvious that you have some wood working experience, and that translates into some quick usage for pen turning. You learned what a "blowout" is.

Most people who do woodworking are not used to drilling into small narrow pieces of wood such as pen blanks. Small narrow pieces like pen blanks are very fragile, even if it is plain old common pine. Other woods are even more fragile. That is why we have different kinds of clamps and different methods of drilling. The entrance, exits, and segment joints are the most critical in general. Some woods, such as snake wood and a few others, don't take kindly to the heat build up generated when drilling from one end to the other.

Even on non-fragile woods in pen blanks, there is little lateral support to prevent it from blowing out. In drilling through a 2x4 on either side, rarely do you get a perfectly round cut exit. It looks like a chip or two on the exit side of a 2x4. That means that on the exit end of a narrow piece of wood such as in pen blanks blowouts will happen. Techniques and practice will help prevent many of these.

It is not uncommon to wrap a rare or delicate blank in thread, string or something else and coat it in CA or epoxy to drill it. These are situations when the blank is usually drilled on the lathe itself. On a drill press, simply having a pen drill centering device (clamp) helps a lot but still does not prevent blowouts. It usually a combination of tools and technique used and different techniques for different tools.

Others have spoken on the feed rate, the drill speed and the sharpness as well as alternative ways of drilling, so I won't reiterate on those.

WELCOME!
 
Last edited:

Skie_M

Member
Joined
Aug 7, 2015
Messages
2,737
Location
Lawton, Ok
Hank touched a bit on blank reinforcement ...

You can also glue strips of wood onto the 4 long faces of the blank for extra support, and simply turn them away afterwards... tape has also been used for the same purpose! :)


Last, but not least, spot stabilization or whole blank stabilization ... soaking the wood blank in CA (the entire exterior) will help keep things together for you. Soaking the wood in CA and then pulling a vacuum on it to remove air bubbles from inside the wood, and then releasing the vacuum to allow the CA to penetrate DEEP into the wood or bone is another method of stabilization that is more effective.

This method (vacuum CA stabilization) is something that works great on things like ivory and bone, as well as porous, spalted, or weaker woods.


There are plenty of methods for stabilization and blank modification that you can check out around here ... check the blank making forum and it's subforums for a LOT of great info.


In any case ... another possible reason for heat buildup and blowout can be the bit itself overheating. Usually, this is caused by a dull drill bit. A sharp bit will cut more cleanly and efficiently, with far less heat from friction. One of the major problems with this is that as the bit itself heats up, it EXPANDS ... this isn't nearly so bad on the smaller bits, as they will lose heat pretty fast, but it shows up in a big way the bigger your bit is, as they will retain heat and start drilling an oversized hole. As the bit expands, it also rubs against the sides of the hole, making it larger and causing even more heat.

If you haven't got a setup for sharpening your bits and cant do it right away, it can help to have a damp towel handy ... take the damp towel and wrap it round the drill bit to cool it down. If you can comfortably keep your hand on the bit without needing to move your fingers round to keep cool, that should be good. Stop every now and then to not only clear the chips out of the hole, but to check the bit for overheating and to cool it down.

Another thing that can generate a LOT of heat is to not clear the bit flutes ... if you have wood rubbing against the sides of the hole, it can heat up in a hurry. Ever started a fire by rubbing 2 sticks together? I'm sure you get the idea. Keep a small brush handy, and clean up the flutes with a few quick sweeps every time you clear the bit.
 

Ray1955

Member
Joined
Dec 25, 2016
Messages
33
Location
Myrtle Beach Sc
Thank you for all the comments. I will drill at a lower speed as suggested. I will also go very very slowly cleaning out the drill bit.
As I mentioned this bit is VERY sharp it was bought from WoodCrafters store in Georgia and is very very sharp. Trust it is true as well. I may have over heated it. Wood does seem soft though.
Can someone tell me about Bushings. Why do that packets that tell you what pen to use it all leave out the millimeters size?...just wondering.

Thanks again.
 

Ray1955

Member
Joined
Dec 25, 2016
Messages
33
Location
Myrtle Beach Sc
The wood blank was at Woodcrafters and is CHECHEN....when lining up the drill bit, I noticed it is soft as you can see it making an impression.
Drill press is a DELTA VS I am so excited I can finally use it.......it doesn't get used nearly enough for a few once in awhile jobs.
Making a WALLSTREET II pen.....with a barrel "drill bit 27/64.

Appreciate the help.
 

Skie_M

Member
Joined
Aug 7, 2015
Messages
2,737
Location
Lawton, Ok
Most pen kits are American Made or made to American manufacturer specifications (made in Taiwan or China, ect, but still made to American measurements). This means that for the most part, the measurements in their paperwork are all imperial (old standard) rather than metric (millimeters).

Roll your bit on a good flat surface (spare bit of window glass or a mirror) to see if it wobbles ... if it does, it's bent.


As for blow-out on the other end .... hard to avoid that. You could try liberally soaking the ends of your blanks in CA to help hold them together better, and use a good sharp jobber bit or an acrylic bullet-point bit. Those tend to blow out less than brad point bits. A split point bit is just a modified jobber bit, and should work just fine.

When drilling no matter what speed, keep track of how far you've gone through the bit ... a little bit of tape or some marker on the bit shank where it will be right at the entry of the hole when the bit approaches the other side would be good. This will tell you when to really back down on the PRESSURE .... you want to use very light pressure at the end of the drilling to avoid blow-out.
 

jleiwig

Member
Joined
Jan 10, 2007
Messages
1,860
Location
Monroe, Ohio, USA.
Did you clean off the bit before using it? Woodcraft bits tend to come with some sticky substance that can really booger up things quickly.
 

Ray1955

Member
Joined
Dec 25, 2016
Messages
33
Location
Myrtle Beach Sc
When removed from the package, I rubbed it an didn't find anything foreign.

Think I will attempt again today and go really slow. I was wondering though lets say I get it drilled and then I glue my barrel into the blank.....and something happens......can you buy barrels separately?
 

mecompco

Member
Joined
Apr 24, 2015
Messages
1,607
Location
Fairfield, Maine
When removed from the package, I rubbed it an didn't find anything foreign.

Think I will attempt again today and go really slow. I was wondering though lets say I get it drilled and then I glue my barrel into the blank.....and something happens......can you buy barrels separately?

Brass tubes are commonly available. Also, if you have a mishap during turning (and they do happen!), simply turn off the remains of the blank and glue and re-use the tube.

Regards,
Michael
 

JimB

Member
Joined
Mar 18, 2008
Messages
4,682
Location
West Henrietta, NY, USA.
Woodcraft sells spare tubes so you should be able to pick them up at the store. I believe them come in packs of 5. The size of the bushings is usually listed in the pen kit instructions not on the bushings themselves.

It is also a good idea to test drill in a piece of scrap wood to test fit the tube. I have found, for the Sierra and Wall Street II I am usually better off using a letter Z bit than the 27/64 they recommend. The Z bit is just a tiny, tiny bit bigger.

The drill bit size that is listed in most kit directions is a good recommendation but not always the best size to use. Variations in bit size tolerances, accuracy of drilling, material being drilled and other factors can mean needing to use and slightly different size bit.
 

Ray1955

Member
Joined
Dec 25, 2016
Messages
33
Location
Myrtle Beach Sc
Well, I drilled once again and this time set the speed of the press on 500rpm.
no smoke and did it slower and also since I had enough wood, I didn't go through the entire piece. and used scroll saw to cut off the end....so success on not blowing the blank out.
But the top looked perfect as far as center was concerned but noticed turning the blank over the hole is not centered on the bottom....I am hoping this is going to work.....will practice on a scrap piece before putting this piece on the mandrel....any thoughts?
 

mecompco

Member
Joined
Apr 24, 2015
Messages
1,607
Location
Fairfield, Maine
Well, I drilled once again and this time set the speed of the press on 500rpm.
no smoke and did it slower and also since I had enough wood, I didn't go through the entire piece. and used scroll saw to cut off the end....so success on not blowing the blank out.
But the top looked perfect as far as center was concerned but noticed turning the blank over the hole is not centered on the bottom....I am hoping this is going to work.....will practice on a scrap piece before putting this piece on the mandrel....any thoughts?

As long as the blank is regular wood or a random pattern/one color acrylic, it makes no difference if the drilling is straight or not, as long as you've got meat enough left (check with a bushing). If you're turning more complex blanks, then having a straight hole becomes more important.

Regards,
Michael
 

jttheclockman

Member
Joined
Feb 22, 2005
Messages
19,148
Location
NJ, USA.
Well, I drilled once again and this time set the speed of the press on 500rpm.
no smoke and did it slower and also since I had enough wood, I didn't go through the entire piece. and used scroll saw to cut off the end....so success on not blowing the blank out.
But the top looked perfect as far as center was concerned but noticed turning the blank over the hole is not centered on the bottom....I am hoping this is going to work.....will practice on a scrap piece before putting this piece on the mandrel....any thoughts?


You can reread my post #4:)
 

Ray1955

Member
Joined
Dec 25, 2016
Messages
33
Location
Myrtle Beach Sc
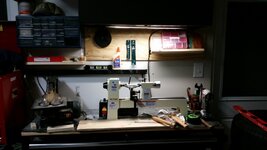
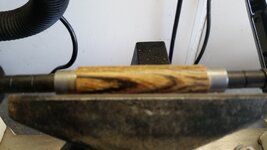
Thanks Mike, sounds good I plan to turn it in the morning. But tonight I made a blank out of pine and set it up in the lathe without the mandrill......and frankly it turned out. My turning tools are not carbide and were cheap....but they did the job.....I will get most of the finishing from sand paper. Here is my work area and the piece I was turning.....using low speed did very well getting the edges off.
 

Ray1955

Member
Joined
Dec 25, 2016
Messages
33
Location
Myrtle Beach Sc
pictures

/Users/rayspoto/Downloads/20170101_215001.jpg
/Users/rayspoto/Downloads/20170101_215011.jpg
now I have to figure out how to get pictures uploaded here
 

Ray1955

Member
Joined
Dec 25, 2016
Messages
33
Location
Myrtle Beach Sc
test

test

testing how to insert image vs thumbnail.

attachment.php
 

Attachments

  • 20170101_215001.jpg
    20170101_215001.jpg
    131.4 KB · Views: 276

JimB

Member
Joined
Mar 18, 2008
Messages
4,682
Location
West Henrietta, NY, USA.
Thanks Mike, sounds good I plan to turn it in the morning. But tonight I made a blank out of pine and set it up in the lathe without the mandrill......and frankly it turned out. My turning tools are not carbide and were cheap....but they did the job.....I will get most of the finishing from sand paper. Here is my work area and the piece I was turning.....using low speed did very well getting the edges off.

You do not need carbide or expensive tools to turn. I own a set of 3 EWT (carbide) that retail for $120 for each tool but I rarely use them. When turning pens and other small items I use my inexpensive Harbor Freight tools that cost $60 for a set of 8 tools. My inexpensive PSI (Benjamine's Best) tools see as much time at the lathe as my more expensive Sorby tools.

BTW, you will find you get better cuts turning at a higher speed for something that small. Also, don't forget to sharpen your tools. New tools ar rarely properly sharpened even though they appear to be.
 

oldtoolsniper

Member
Joined
Mar 19, 2007
Messages
236
Location
Iowa.
Thanks Mike, sounds good I plan to turn it in the morning. But tonight I made a blank out of pine and set it up in the lathe without the mandrill......and frankly it turned out. My turning tools are not carbide and were cheap....but they did the job.....I will get most of the finishing from sand paper. Here is my work area and the piece I was turning.....using low speed did very well getting the edges off.


In my opinion learning to sharpen your tools will go a long ways towards making woodworking a more enjoyable hobby. I use a lot of tools from the very early 1900's and they do a great job providing they are sharp. All of the different tool steels we have today just did not exist back then. I for one believe that sharpening tools is a fundamental skill that anyone can learn.

To me a good tool is a sharp tool. If the steel is tempered correctly, of reasonable quality, and able to hold an edge without rolling over it will do the job.

I have carbide tools and I personally don't really care for them. In my opinion the only advantage seems to be not having to sharpen them.

I'm not saying there is anything wrong with the advances that have been made in steel and in using it to its full advantage. I like the fact that the HSS stuff doesn't really care if it gets a little blue. Most of the ads for them tell you how much longer you can go without sharpening. Once you are set up and can sharpen reasonably well that selling point becomes less intriguing.

There are three basic shapes in the carbide tools out there. In HSS there are a lot and then a few more.


Sent from my iPad using Penturners.org mobile app
 
Last edited:

Ray1955

Member
Joined
Dec 25, 2016
Messages
33
Location
Myrtle Beach Sc
Thanks for your response

I am planning on learning to sharpen my tools.....they are harbor freight.

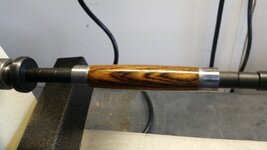
First thing that happened was my tail stock I couldn't get tight enough...I was able to knock off the corners but after rereading my lame manual it did say I may need to reset the tail stock which I did and now it is tighter....good.

Next I noticed the little hang over on the ends was chipping off yikes turn it off and walk back to it and start again going ever so slow on turning.....now we are good I think I need to start sanding.....I don't have the paper I see displayed any thoughts if I were to need say 3 grits which ones I should start with that can be bought at say LOWES?....later would like to get the box that has like 7 different grits.

:hypnotized:
 

Attachments

  • 20170102_121459.jpg
    20170102_121459.jpg
    112.9 KB · Views: 161

oldtoolsniper

Member
Joined
Mar 19, 2007
Messages
236
Location
Iowa.
Any sandpaper will work. I spend more on mine and mostly only use 3M brand. That's just a personal thing with me. I've never bought harbor freight sandpaper so I don't know about its quality.

Look in your automotive stores that sell paint for automobiles, they have grits up to 5000 and rubbing compounds beyond that for clear coats on cars.

You can rip the sheets of any grit you desire into whatever size strips you want.

When you go to Lowes look in the plumbing section, those 3/4" rolls are usually cloth backed emory paper rolls. Plumbers use it to clean up copper pipe before they solder the joints.


Sent from my iPad using Penturners.org mobile app
 

Skie_M

Member
Joined
Aug 7, 2015
Messages
2,737
Location
Lawton, Ok
Whoa, hold up there, partner ...

You said you got Harbor Freight tools ... I use those a lot, myself, and they're quite fine, though pretty dull right out of the box.

If you have a belt sander or a grinder of some type, touching up those edges will be your best investment in time. Getting yourself a sanding disc setup for your LATHE so that you can control the speed for putting the edges and finishing touches on your lathe chisels is an excellent idea. You can MAKE your own sanding discs - quite cheaply and they are very effective.

Get some metal nuts that fit your spindle arbor. Get some relatively flat material (countertop material that's being thrown out or off cuts ... particle board or MDF, perhaps some decent plywood). Double it up, using any decent wood glue or gorilla glue, perhaps epoxy. Drill a hole in that is large enough to sink the nut down into it (chisel out the corners). Make sure the hole is DEEP enough to clear the entire spindle thread. Epoxy the nut in place and let it cure. Once it's all set, put it on your lathe spindle, ensuring that the nut goes on far enough to lock against the spindle shoulder. If it doesn't, you didn't make the hole deep enough ... chisel it out and/or drill it out and try again. It's got to ride flush against the shoulder.

Once it's seated properly, get your tool rest set up safely and power on the lathe ... turn the outsides round and true up the face. Sand it down and finish it .... using a good CA finish helps, when working with bare wood. Use PSA discs or use some spray-on releasing adhesive on the back of the sandpaper you want to use and apply it. Repeat for as many grits as you want a dedicated wheel for, or just peel and swap sanding discs whenever you wish to change grits. (If using pre-finished countertop materials that have melamine on them, finishing isn't necessary ... the melamine releases PSA agents easily.)

When using these to sand/grind your lathe chisels ... pass your tool to the BACK OF THE WHEEL, so that the tool's cutting edge faces the same direction that the wheel is traveling. This ensures that you cannot catch the tool on the wheel or the paper, tearing it off and possibly causing injury.


Now .. as for where to get your sandpaper ... Harbor Freight has multipacks at a low price and they are of reasonable quality. In fact, I'ld go so far as to compare them to the 3M brand favorably, especially pricewise. You can get packs that start at around 220 grit and go up to 1500 grit (1 or 2 sheets of each).

Typically, when using sandpaper, you are only removing the marks left behind by the previous grit. The first grit you start with gets the heaviest use, as that one not only needs to remove all the tooling marks on the project, it also needs to reach your final ideal dimensions. The lowest grit you use most often will be the one you go through the most of ... Thus, if you plan to use 120 or 180 or 240 or something as your "starting grit" most often, buy yourself a full 10-sheet pack of it from Harbor Freight to start with. Everything else you use should only see light use.


To make it easier to use your sandpaper, you should prep it in strips or smaller pieces, so that you aren't tearing off irregular chunks all the time or folding and re-folding a big sheet so as not to waste it ... doing this is quite easy. Take an old hacksaw blade you don't need anymore and screw it down using the 2 mounting holes onto a flat board or a door frame or even a door ... a windowsill works, anyplace accessible. Leave it just loose enough to be able to slide a sheet of sandpaper under the blade ... using the toothed side of the blade, hold the paper in place by putting your hand on the blade and pressing it against the work surface, lining up the strip you want to take, take the corner of the paper with your free hand and tear a neat strip. Move the paper and work your way through it, making strips to use of whatever width you desire. It doesn't matter too much if your strips are a little angled, you're just making yourself smaller pieces to work with.

This is cheap and effective and dead simple, but once you decide you want to invest in "better quality" paper that lasts quite a bit longer, I suggest you save up your money and invest in some Mirka "Abranet". The variety pack offered by PSI is decent, though a little on the expensive side. It still works great. One multipack of that stuff lasts me through over 80 projects. The current offering at $19.99 sale (or around that price) from WoodCraft and some other vendors of the thin abranet variety pack rolls is an excellent deal.


The finish on the BACK of your lathe chisels is important. If it's rough, using the bevel may result in a rougher finish that you would expect or want. If it's very smooth, like mirror smooth, the bevel can assist in burnishing the wood fibers down, leaving a very smooth nearly finished surface. This doesn't accept a stain or finish especially well, however, so you'ld want to sand that off, but you could start with 400 grit or higher, rather than starting with 120 or 180. This saves you a lot of time, as well as money on sandpaper.


And finally, about finish sanding ... Many people have many different theories concerning the best sandpaper to end their project with. A lot of people STOP sanding at 220 or 240 grit and begin sealing and finishing their project right there. The higher grits are reserved for sanding the finish itself for the final shine, if at all.

Some people like to sand up to 400 grit, to further enhance the wood grain through their finish of choice, and again continue sanding after finishing to show off their beautiful wood grain.

I've lately been sanding bare wood all the way up to 1000 grit, and then sealing and finishing my wood in CA (Harbor Freight brand superglue). I feel that this best shows off all the hidden features and highlights within the wood ... I then sand the CA finish (6 to 9 coats of it) from 1000 grit all the way up to 12,000 grit (wet sanding), and then polishing with Meguair's Plast-X and giving it a coat of Turtle Wax Hard Coat (you can get these or similar products at an auto parts store). The results I get look like I encased the wood in silky smooth crystal clear glass.

Not everybody likes that look ... some people think it's too artificial, some people want to be able to feel the wood grain, ect ...


You'll find what works best for YOU. I won't judge, but I may suggest alternative methods that may work better for you ... it's up to you to try them and see if it helps or not.

Just let me end by reiterating that last comment one more time ... YOU are the final judge of your work. Don't let anybody tell you that you are doing it WRONG. If it works for you, then keep doing it, as long as you are working safely and getting the job done. :)
 

jttheclockman

Member
Joined
Feb 22, 2005
Messages
19,148
Location
NJ, USA.
Ray you are well on your way to an enjoyable hobby. There are a ton of videos on utube, some in the library here and from what I have heard that Ed from Exotics has a bunch on different subjects. I encourage you to seek these out and take bits and pieces of info from them and little by little you will develop your own style.

As far as tools and sandpaper go there are good quality and then not so good and alot in between. Harbor freight stuff falls in the middle to low end. The price will usually indicate what is good quality and not. But to get started you have good info to get you going so I am not going to repost the same things. There too are many videos out there that show how to sharpen tools of all kinds using anything from a sophisticated jig to something very simple. But the thing you want to develop is consistancy no matter what method you use. This will help in the long run. You will also be advised to get yourself a good honing stone and it will help save steps to the grinder. A good stone will put an edge right back on a tool without grinding off a lot of metal Tools are not cheap to buy.

The last thing I may suggest and being I can not see what your setup is on the lathe and if that is an adjustable mandrel or not. But if it is shorten it up as short as you can to accommodate the amount of blanks turning at one time. If it is not I suggest you get the blank as close to the headstock as you can and place all those spacer bushings or at least the majority on the tail stock side. I say this because if turning a single blank with that much space between solid support such as the tail stock or head stock will have a tendency to induce flex in the mandrel rod and cause chatter and all kinds of funny looking results. Also make sure your live center is a 60 degree one to accommodate the mandrel if that is what you are using.

But again I highly suggest checking out some videos or if at all possible taking a turning class at a Woodcraft if one is nearby. You learn so much more from visual than all the typying done here. Good luck and have fun.
 

Dale Lynch

Member
Joined
Dec 12, 2011
Messages
1,819
Location
Hastings,NE
I'm a little late to the party,but here is the info from WOOD magazines drill press speed chart.

twist drill bits / softwood / hardwood / acrylic / brass / alum / steel

1/16-3/16" 3000 3000 2500 3000 3000 3000

1/4-3/8" 3000 1500 2000 1200 2500 1000

7/16-5/8" 1500 750 1500 750 1500 600

11/16-1" 750 500 NR 400 1000 350

Lubricate drill with oil when cutting steel 1/8" or thicker.Use a center punch on all holes to prevent drill from wandering.


My personal experience from using a lathe that small to drill is not recomended because the tailstock has too much play in it to hold the bit firm.This produces out of round and misaligned holes.Some of that can be worked around but if precision is key you won't get it with that lathe.You will need a higher quality lathe or use a drill press with a pen blank vise.

Another thing that gets overlooked is the drill bit themselves.Higher quality bits will drill cleaner holes no matter which tool you use.I used to use Dewalt bits,freshly sharpened with a DD, and they would squeal something fierce when deep in a hole.I had to wax the bits to quiet them down.Now I use cro moly bits and the difference is night and day.These bits are still new to me,I don't have years of experience with them so I'll see how they hold up long term.
 
Last edited:
Signed-In Members Don't See This Ad

Skie_M

Member
Joined
Aug 7, 2015
Messages
2,737
Location
Lawton, Ok
Looks lovely ...


Easy ways to get round not having a pen press:

Bar clamp (Harbor Freight 12" bar clamp is trigger actuated, comes with silicone pads ... excellent and cheap!)
Lathe (put silicone or PVC padding on headstock and tailstock, lock tailstock in position, advance quill to apply pressure).

Drill Press Clamp (I got one cheap at Harbor Freight ... replaced the steel jaws with PVC/nylon jaws, this is my preferred method)
 
Top Bottom