How to sand Alumilite resin...

Signed-In Members Don't See This Ad

mikeschn

Member
Joined
Jan 6, 2016
Messages
250
Location
Lake Orion, MI
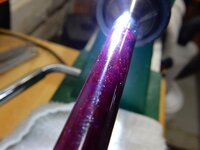
Well I turned my first Alumilite resin blank...
The description is:
Alumilite resin that is known for its beauty, resilience and durability. Alumilite also cuts like butter, holds threads readily and polishes up easily.

Apparently I did something wrong. I've got tons of circular scratches on the Alumilite and no amount of sanding seem to get rid of them. I'm using micromesh pads... I never have a problem with micromesh on Acrylic, or Rhino Plastics, or even Inlace Acrylester. But Alumilite... :confused:

Any suggestions?

Mike...
 
Signed-In Members Don't See This Ad

mecompco

Member
Joined
Apr 24, 2015
Messages
1,607
Location
Fairfield, Maine
I'm sure you are sanding laterally after sanding radially on the lathe. I make sure to sand laterally turning the lathe by hand in one direction, then the other. Check for radial scratches and continue sanding if any are noticed. Then move up to the next grit. Repeat.

If you do that, there will be none of those nasty radial scratches. I learned this the hard way. ;-)
 

Carl Fisher

Member
Joined
Jun 7, 2011
Messages
2,761
Location
Cape Coral, FL
ease up on the amount of pressure you apply and slow the lathe down. Alumilite is softer than many materials and when heated gets even more so. This will end up with a lot of bite to the paper for lack of a better way to describe it.

Slower speed and a light touch.
 

SkookumPens

Member
Joined
Nov 11, 2005
Messages
157
Location
Puyallup, WA, USA.
Make sure your pads are clean. I had problems with grit embedded in some of the pads. Using new ones took care of that problem.
Craig Chatterton
Puyallup
 

ElMostro

Member
Joined
Mar 17, 2007
Messages
1,940
Location
San Antonio, TX.
Wet sand and make sure that before you move do the next MM grit you have sanded all the scratches from the previous grit out, also don't skip grits.
 

jttheclockman

Member
Joined
Feb 22, 2005
Messages
19,148
Location
NJ, USA.
You did not say if you used other sandpaper before the MM. It is quite difficult to get deep radial scratches from MM. I too suggest using water to sand with MM. Wipe the blank off after each grit size.
 

mikeschn

Member
Joined
Jan 6, 2016
Messages
250
Location
Lake Orion, MI
While I did use a few dry grits out of the box of 5 before starting with MM, I worked those scratches out radially and axially with the first few grits of MM.

But the scratches came back when I was using the finer grits of MM.

I'm going to try again tonight, starting with the 1500 grit, and making sure the scratches are gone at each level before proceeding (if that's even possible)

I'll also try some newer MM pads...

Mike...
 

jttheclockman

Member
Joined
Feb 22, 2005
Messages
19,148
Location
NJ, USA.
Wet Sand, wet sand, wet sand. If you have to use sandpaper lower than MM use automotive wet sand paper. Using dry wood sandpaper is just asking for scratches in plastic. No other way to say it. :)
 

Carl Fisher

Member
Joined
Jun 7, 2011
Messages
2,761
Location
Cape Coral, FL
y'all might tell me I'm lying, but I dry sand and only use 3 grits of sand paper before turning to other media.

600/800/1000 of either Mirka Goldflex or Festool paper then EEE Ultrashine before hitting with the buffer. I know some will say it's going backwards or redundant to do 1000 then EEE then buffer, but it works for me.

Just shows that there are 100 ways to do a job and you have to find the method that works for you. It takes time but don't be afraid to experiment.
 
Last edited:

mikeschn

Member
Joined
Jan 6, 2016
Messages
250
Location
Lake Orion, MI
Okay, keep your fingers crossed... I'm going to try it again this evening, from scratch (pun).

This time a Wizards Mist blank. I plan on going right from the lathe to the MM.
I will stop after every grit to inspect it. I'll let you know how it goes later...

Mike...
 

mikeschn

Member
Joined
Jan 6, 2016
Messages
250
Location
Lake Orion, MI
Aw this ain't working...

I didn't use any dry sandpaper...

I started with MicroMesh, and as I went thru the 9 different grits, it seemed to leave more and more scratches behind.

I was not pressing hard. In fact, I was pressing very light.

By the time I was done I had 10 times as many scratches as when I started...

:confused: :crying: :crying: :crying:

It's kinda hard to show these fine scratches in regular light, so I back lit them with a flash light... you get the idea... what do I do next?

Mike...
 

Attachments

  • DSCN0420a.JPG
    DSCN0420a.JPG
    54.6 KB · Views: 309

Jim15

Member
Joined
Dec 20, 2005
Messages
21,005
Location
Hamilton, Ohio, USA.
Hi Mike,
It looks like you have radial scratches. What I do is turn off the lathe after every grit and sand from side to side (from bushing too bushing). That may help.

jim
 

jttheclockman

Member
Joined
Feb 22, 2005
Messages
19,148
Location
NJ, USA.
Did you wet sand??? How fast is the lathe spinning??? Are you moving the pad both sideways as you are sanding. Do not leave in one place. You have to vigorously move side to side. Do you have the ability to polish??? May want to skip to polishing with a 3 wheel polishing system.

You said you will stop and inspect after each grit so what happened and where did it go wrong???
 

drise

Member
Joined
Feb 27, 2014
Messages
103
Location
Northern MN
Are the MM pads in the correct order? The ones I have no grit marking of any kind so I have to put them in order by color. The older I get the more some of those colors look the same. Dropped them all on the floor once. Took a while to get them back in order.

Dave
 

mikeschn

Member
Joined
Jan 6, 2016
Messages
250
Location
Lake Orion, MI
@drise,

yep the pads are in the correct order. They come with a cute little color chart that shows the correct order...

@John,

Yep, wet sanded the whole way, only used MM, stopped after every grit, dried it off and looked closely. With the rough grits there were a few scratches... as I progressed to the finer grits, they left more scratches, albeit finer ones.

The lathe is running at medium speed.

I don't have a polishing setup, but I did find some CA Polish Gloss from Stick Fast. I did 3 rounds of that, and almost all of the scratches disappeared. See photo. So I am going to investigate polishes some more...

I did find that I am not the only one with this problem... mdwilliams999 from Penturners.org is having the same issue. See his post and the solutions here... http://www.penturners.org/forum/f178/alumilite-clear-polishing-112694/

I went to the auto parts store, but they didn't have Meguiar's Mag Wheel polish. The did have some Meguiar's Ultra Finishing Polish - Mirror Glaze. I wonder if that's any good? At $26.99 a bottle I wasn't ready to try it with out some more research.

Anyways, I'll keep pursuing the polishing idea, cause the MM isn't doing it.

Mike...

P.S. I ordered 10 more alumilite blanks... figuring I'll get a handle on this!!!
 

Attachments

  • DSCN0421a.JPG
    DSCN0421a.JPG
    61.1 KB · Views: 173
Last edited:

Dalecamino

Local Chapter Leader
Joined
Jan 2, 2008
Messages
14,572
Location
Indianapolis, In.
Mike, I'm beginning to feel sorry for you. You've been given plenty of good tips in this thread but yet, you still have problems with scratches. Your last photo shows radial scratches remain. No sense polishing scratches. You need to conquer sanding first. WET sanding with clean water. The MM pads should remove all the visible scratches if used properly. I suspect you may not be sanding long enough with each pad. If you can still see these scratches then, start over. Keep dipping your pad in the water to wash off any small chunks that may have been trapped between the pad and, blank. Try this. Make sure you're seeing a milky slurry as you're sanding with the coarser grits. The slurry will diminish as you progress thru the finer grits. Sanding lengthwise as has been mentioned. A friend of mine SHOWED me that this isn't necessary but, I still do it from habit. :redface: Then, you're ready for polish. There are many different ways to polish. Since you have no buffing wheels, you can do it by hand. There are many kinds of polish for plastics. I used the car polishes (for plastic) and, Novus II for years but, recently found 20/20 at Craft Supply (penturnersproducts.com). One buff with that followed by Swirl Remover, I'm done. Not sure the swirl remover is necessary but, I have plenty of it so, I'm trying to use it up :biggrin:

I didn't intend for this to be so long but, we all aim to help you solve your issues and, this is my contribution. :wink::biggrin: AND, I may have more. Hope it helps!
 

mecompco

Member
Joined
Apr 24, 2015
Messages
1,607
Location
Fairfield, Maine
My personal rule is that I absolutely CAN NOT have any radial scratches left before moving to the next grit of MM. Lateral scratches will come out with the next grit, radial scratches will not. It's very simple--with no radial scratches left before progressing grits, there won't be any left when you're done. If you do this religiously, it will work.
 

jttheclockman

Member
Joined
Feb 22, 2005
Messages
19,148
Location
NJ, USA.
Well Mike, please tell me your not thinking of CAing over the alumilite blanks??? That would surely be a waste. You might as well start using acrylic blanks instead and get away from the alumilite all together. That solution may work for one or two but people here get fine results MM and polishing these blanks. Maybe these blanks are way too soft to begin with and the person making them is not using the most recent mixture of Alumilite. I believe they have various formulas. The mixture is finicky also and takes one who knows what they are doing to get it right, not saying this is the case because we do not know who is making them. But there has to be answer to this dilemma.

As I said you may want to look into getting a setup for a 3 wheel polishing setup for your lathe. Good luck. I am out of suggestions.
 

mikeschn

Member
Joined
Jan 6, 2016
Messages
250
Location
Lake Orion, MI
John,

I have no intention of using CA.

But it was the only polish I had in the house.

I'm going to try Meguiars polish, and maybe one step polish, and experiment with how far to go with MM before switching to polish.

Alumimite is weird stuff, but I'll figure it out... Some of the colors can really knock your socks off!!! :hypnotized:

Mike...

Well Mike, please tell me your not thinking of CAing over the alumilite blanks??? That would surely be a waste. You might as well start using acrylic blanks instead and get away from the alumilite all together. That solution may work for one or two but people here get fine results MM and polishing these blanks. Maybe these blanks are way too soft to begin with and the person making them is not using the most recent mixture of Alumilite. I believe they have various formulas. The mixture is finicky also and takes one who knows what they are doing to get it right, not saying this is the case because we do not know who is making them. But there has to be answer to this dilemma.

As I said you may want to look into getting a setup for a 3 wheel polishing setup for your lathe. Good luck. I am out of suggestions.
 

Joey-Nieves

Member
Joined
Sep 5, 2012
Messages
362
Location
Vega Baja, Puerto Rico
I use Ca on aliminite when I want a very high shine, like glass.
What I do with all acrylics is I use a very sharp skew as my last gauge(like a Scarper).
I sand with 330 or 600 grit first, no need for a an aggressive sand paper if your work is already smooth. I remove all marks with steel wool with out powering the lathe, then I use Dr. Kirks or something similar at a high speed to get a nice shine so I can see if I missed any scratches.
If everything looks fine I start with wet MM and finish with Blue magic.

Just keep In mind that the scratches in your picture are to deep for MM to remove.
 

DMANTHEROCK

Member
Joined
Jul 30, 2014
Messages
25
Location
Idaho
I haven't fully read all of what you guys have suggested but I read most of it.
I've been working with Alumilte for awhile now, and while I'm not making pens anymore, I'm making rings, I still don't quit until my product is flawless.
This is how I finish.
I rough sand and shape with 220 grit, the. 400 grit. Dry sand. Alumilte white or clear, doesn't matter (though the white likes to load up the sand paper more than clear) then I go to 0000 steel wool, the. Wet sand at 1,000 and 1,500 grit paper. Then I CA finish and wet sand the two grits again. Never have radial scratches or issues. I'll add a pic if it lets me.
 

conandy

Member
Joined
Feb 18, 2015
Messages
102
Location
Denver, CO
Following this thread with interest.

I am finding that the alumilite blanks do tend to hold on to the scratches from the larger grits. I progress through the grits (220 dry, 320 dry, 400 wet, 600 wet, 1000 wet, them MM through 12,000) and I sand axially after each grit through 400, and I finish up with Hut Ultra Gloss.

At the end it looks perfect on the lathe. But when examining up close and under different lighting angles while assembling, it appears that I have put an extremely fine mirror gloss on top of a certain amount of scratches. It is like the finer grits are following the surfaces of the larger scratches rather than removing them. You can only tell if you look closely and with a raking light in the correct direction, and maybe most folks won't look that closely, but they are there.

I will try some of the following and report:
1. Start with higher grit 320 or 400.
2. Forgo dry sanding at all. May need to get some 220 and 320 wet paper.
3. Sanding at lower speed. I have been doing most of the wet sanding at around 1200 to 1600 rpm. Nothing feels like it is getting warm enough to be causing any issues, and the paper isn't clogging up, but maybe slower will help.
4. Sanding axially after every grit, and not stopping this at 400. 400 was just where it seemed to stop having a visible effect, but obviously it wasn't good enough.
5. Novus? Don't have any, but may try it. Been holding off because I plan on having a buffing wheel setup very soon.
6. Buffing with a buffing wheel setup. Have some buffs and polishes coming via mail order, and need to build a buffer stand. Hopefully in a few days….

For those who use buffing wheels (I know there are other threads….) what compound do you find works best after stopping with what grit of sandpaper?

I tried to photo one of my pieces, but it is hard to capture the scratches. Can't seem to focus close enough even with macro mode. Maybe if the scratches are too fine to capture on camera (DSLR with standard 18-55 lense), they are too fine to worry about?
 

BSea

Member
Joined
Dec 28, 2009
Messages
4,628
Location
Little Rock, Arkansas
Part of the problem may be with the age of your MM. MM that works well on other acrylic blanks, may not work so well with alumilite. When I had this issue, I went to new MM, and the problem was solved. Be sure and keep your MM clean. Even if it means cleaning the pad you are using before progressing to the next grit.

Currently, I use the 3 step buffing station after MM, and I'm very happy with the results.
 
Top Bottom