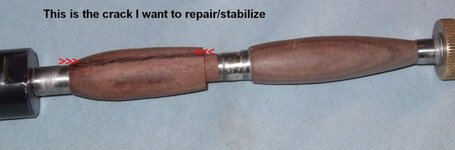
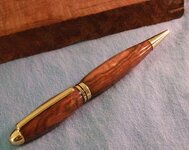
Many times, "blowouts" have one of two causes: improper application of glue holding the blank to the tube, or, dull tools which need to be sharpened.
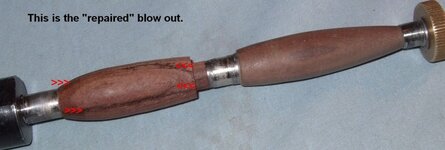
Thanks. Both are entirely possible. On this particular pen I managed to break both tubes loose while milling the ends of the blanks. Never had that particular problem happen before. But I have had to remove and reposition a tube once or twice, and my experience was that the C/A goes off extremely fast when there's already C/A in the hole. So when I remounted these tubes I didn't do the spinning and plunging I normally would. I just covered the tubes with C/A and slammed them in there *fast*.
On the tool side, I'm doing all this at the "TechShop". It's like a tool commune. So you're never sure what you'll encounter day-to-day, and I'm not sure I'm all that good at assessing when the tools need sharpening yet. There is a wheel right next to the lathe, so I do sharpen the tools, but I'm sure I wait too long sometimes. Also, I've got a big box of hardwood scraps, so I've generally been turning different wood each time. I'm coming to learn that they have significantly different properties when cutting, and different rates at which they dull the tools. All part of the fun.
If you are using carbide tools, then you have a continuing problem which will require that you change your technique.
These are not carbide tools, but there's no doubt my technique needs further improvement. Interestingly this was my first blowout though.

")