A "few" recent samples I've made...!

Signed-In Members Don't See This Ad

robutacion

Member
Joined
Aug 6, 2009
Messages
6,514
Location
Australia - SA Adelaide Hills
Hi everyone,

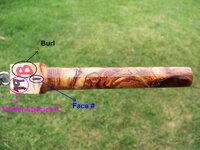
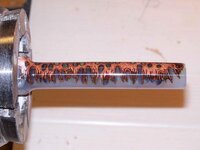
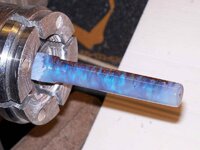
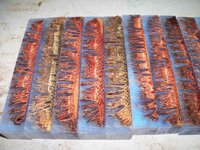
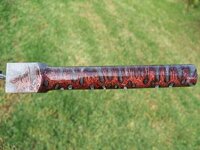
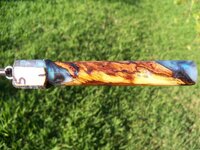
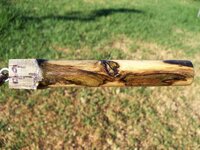
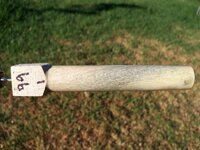
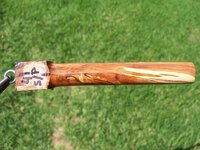
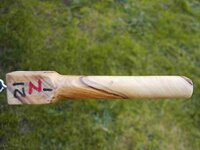
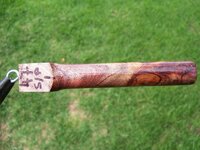
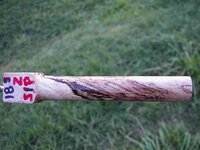
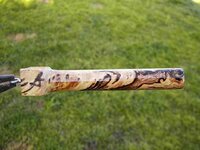
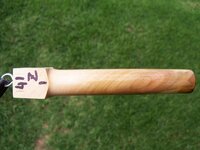
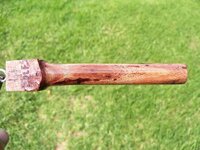
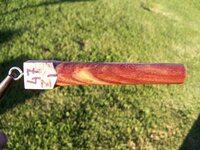
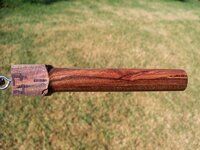
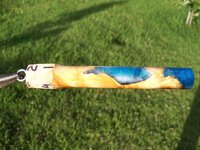
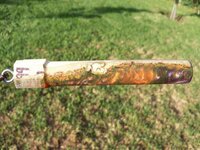
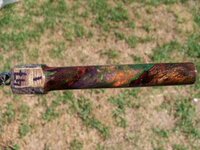
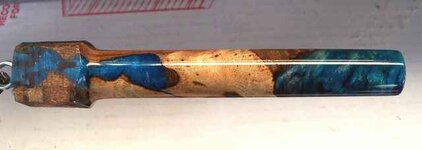
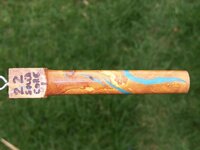
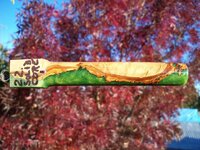
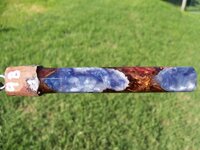
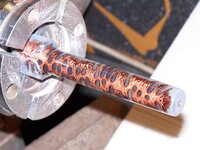
Everyone knows that I like to play with wood and PR, some products I put for sale here and on my eBay store, others I use myself but of all batches or new woods I come up with, a sample is cut, turned and finished with CA, no different as if it was in the barrel(s) of the best pen kit available.

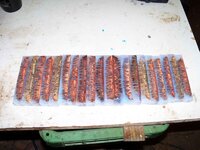
I take some pics of each face of the blank/sample and put it a side in my collection box, which is growing to a large size, indeed...!
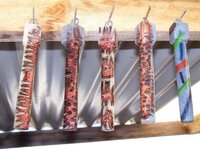
The idea was always make a display of these samples, in a rack where I could hang these samples side by side in a line or cable from wall to wall, sort of thing.

The original idea was to make this suspension rack in my computer room, where I could admire these samples, every time I want, instead of spend a lot of time, "shoveling" in the big box to find what I want...!:mad:

A few years ago, this was quite manageable but now, no way Jose...! I keep making too many of these.
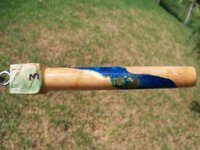
To me, is like making a pen from these blanks, really. The excitement to rip a log into a pen blank size, turn it and finish it so see how it comes up, is great stuff. No different or in fact worse when it come to the Resifills, as I never do the same thing twice, even if I try which is a pain sometimes when I make an exceptional mix, so in general, good or not so good, it happen in lots of 18 blanks ( 3 molds of 6 blanks each)...!:eek::biggrin:

I made it a rule to only make the Resifills only in late afternoon, the last thing for the day, sort of thing. Many times I'm pouring resin late at night if earlier on wasn't possible, the reason to this is that I like the "feeling" of having something to look forwards in the morning/next day, there is, see what I've done...!

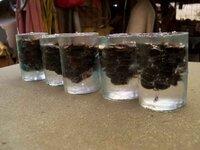
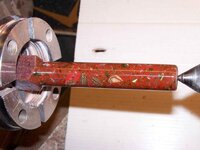
The first step is to get the molds off the pressure pot and put them in the sun to dry, then in the afternoon the serious work commences, the molds are dismantled, the blocks are sliced into pen blanks, and before the day is over, I have to have one of those blanks (totally random, as most times you can't see what is inside until it is polished and coated with some sort of liquid), turned and CA finished...!:wink::biggrin:

The pics are normally taken the next day or even immediately after the sample has been finished as, some of these samples are far from dry/set, they are still soft, some still bleeding, etc., etc. so, I know that the next day will be too late to take the pics as the finish will be spoiled, the one way or the other. I don't mind to re-do them later, as they will be hanging in the shed ceiling for a few weeks to cure properly before they go in the box.

Is that excitement to finish a sample to be able to see properly what I've done, what I like the most about making Resifills, the steps, process and poisoning fumes, not counting the horrendous smell of working with PR, are certainly not something that I enjoy that much...!
In between the negatives and positives of making Resifills, I do enjoy very much the excitement/expectation they give me...!:biggrin:

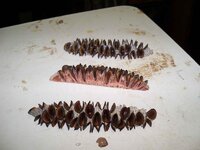
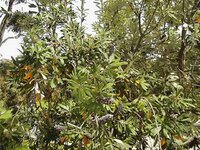
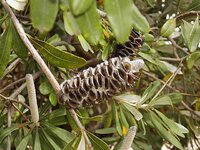
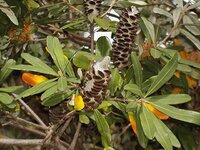
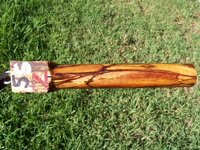
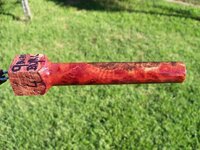
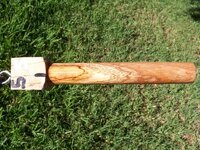
Turning and finishing samples from solid wood, is in no way less exciting, particularly woods that I never seen or worked with before. With wood, the samples take a few different shapes/cuts styles as wood will provide a totally different look, depending of how it is cut from the log and then the board...!
So, is not rare, in fact almost a requirement that the same wood is cut into 3 common cutting types, straight cut, diagonal and cross, therefore resulting in the making of 3 samples from the same wood.

Isn't difficult to understand why the samples box size at the moment is a very large one and why I'm getting concern about the weight and number of these samples require to be hang in that display I mention above. In fact, I look everyday to the only wall where this display can be built and I'm starting to wonder, if I have enough wall for what I have at the moment, already...!:eek:

I need to get them out of the box, that is no doubt, I may need to re-design my original drawings for this line/cable suspension samples display, the strength and support areas are now crucial, there are a "few" hundred" to hang...!:eek::wink::biggrin:

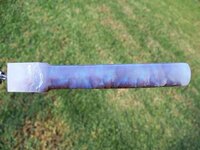
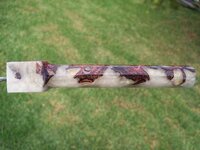
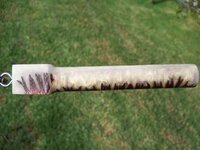
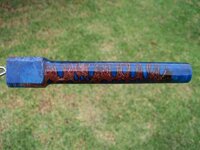
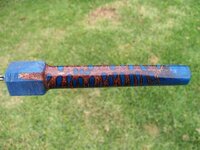
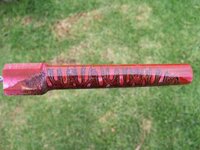
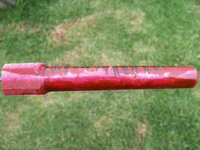
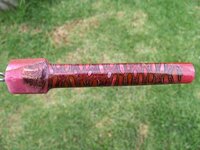
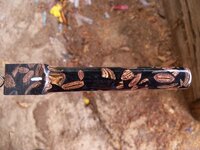
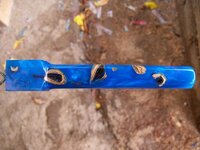
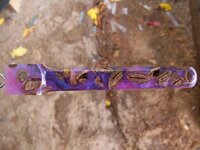
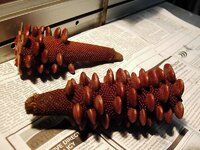
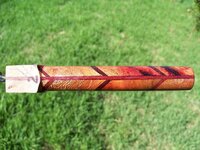
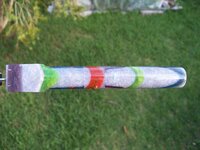
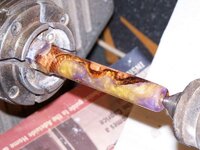
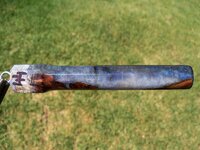
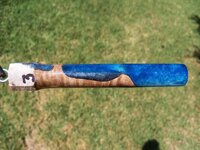
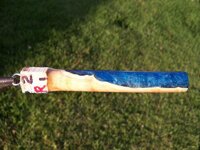
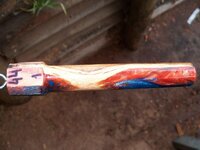
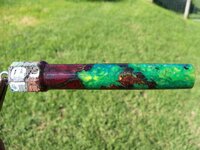
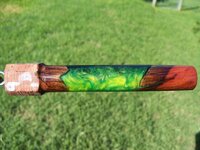
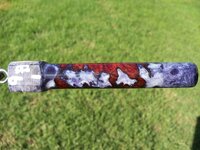
Well, the purpose of this tread is to share with you all, just some of the recent samples I've made, between solid/full wood, Resifills and some full PR resin. Lets say that they are what I've done in the last 3 months, that will be enough for now. Some of samples made prior to this lot has been displayed here, some on my classified adds.

Enjoy the ride...!:wink:

PS: The day that I get these samples display done, you will be the first ones to know/see it...!:wink::biggrin:

NOTE: In the beginning of this thread I didn't know how many pics I would end-up with, I have it reduced to 39 at about 3.2MB total size. It may take a little longer to download to those with very slow internet speeds, and I do not think that dividing the number of pics in various posts will make any difference, nevertheless, I apologize for that and if the Mods think that is a better way to do this, please let me know...!:)

Cheers
George
 

Attachments

  • 100_1991_(1).jpg
    100_1991_(1).jpg
    115.6 KB · Views: 304
  • 100_1482_(1).jpg
    100_1482_(1).jpg
    71.7 KB · Views: 383
  • 100_2068_(1).jpg
    100_2068_(1).jpg
    71.2 KB · Views: 233
  • 100_1995_(1).jpg
    100_1995_(1).jpg
    108.7 KB · Views: 158
  • 100_2001_(1).jpg
    100_2001_(1).jpg
    118.5 KB · Views: 133
  • 100_1471_(1).jpg
    100_1471_(1).jpg
    65 KB · Views: 199
  • 100_2208_(1).jpg
    100_2208_(1).jpg
    49.6 KB · Views: 232
  • 100_1285_(1).jpg
    100_1285_(1).jpg
    70.8 KB · Views: 182
  • 100_1290_(1).jpg
    100_1290_(1).jpg
    58.5 KB · Views: 121
  • 100_0536_(1).jpg
    100_0536_(1).jpg
    59.6 KB · Views: 122
  • PIC09132_(1).JPG
    PIC09132_(1).JPG
    38.7 KB · Views: 128
  • 100_0528_(1).jpg
    100_0528_(1).jpg
    57.4 KB · Views: 119
  • PIC09083_(1).JPG
    PIC09083_(1).JPG
    47.4 KB · Views: 162
  • PIC09063_(1).JPG
    PIC09063_(1).JPG
    45 KB · Views: 158
  • 100_0555_(1).jpg
    100_0555_(1).jpg
    43.5 KB · Views: 112
  • 100_0532_(1).jpg
    100_0532_(1).jpg
    62.9 KB · Views: 127
  • 100_0610_(1).jpg
    100_0610_(1).jpg
    72.2 KB · Views: 123
  • 100_1081_(1).jpg
    100_1081_(1).jpg
    59.4 KB · Views: 126
  • 100_1336_(1).jpg
    100_1336_(1).jpg
    49.9 KB · Views: 152
  • 100_0657_(1).jpg
    100_0657_(1).jpg
    56 KB · Views: 199
  • 100_0670_(1).jpg
    100_0670_(1).jpg
    60.4 KB · Views: 184
  • 100_0703_(1).jpg
    100_0703_(1).jpg
    58.6 KB · Views: 124
  • 100_0701_(1).jpg
    100_0701_(1).jpg
    59.1 KB · Views: 152
  • 100_0691_(1).jpg
    100_0691_(1).jpg
    58.4 KB · Views: 131
  • 100_0687_(1).jpg
    100_0687_(1).jpg
    59.7 KB · Views: 140
  • 100_1329_(1).jpg
    100_1329_(1).jpg
    65.2 KB · Views: 127
  • 100_1333_(1).jpg
    100_1333_(1).jpg
    278.4 KB · Views: 134
  • 100_1345_(1).jpg
    100_1345_(1).jpg
    284.8 KB · Views: 117
  • 100_1354a_(1).jpg
    100_1354a_(1).jpg
    282.7 KB · Views: 112
  • 100_1362a _(1).jpg
    100_1362a _(1).jpg
    68.8 KB · Views: 130
  • 100_1404_(1).jpg
    100_1404_(1).jpg
    265.2 KB · Views: 146
  • 100_1413_(1).jpg
    100_1413_(1).jpg
    44.4 KB · Views: 115
  • 100_1547_(1).jpg
    100_1547_(1).jpg
    60.7 KB · Views: 160
  • 100_1552_(1).jpg
    100_1552_(1).jpg
    55.2 KB · Views: 137
  • 100_1556_(1).jpg
    100_1556_(1).jpg
    60.2 KB · Views: 149
  • 100_2083_(1).jpg
    100_2083_(1).jpg
    42.3 KB · Views: 129
  • 100_2113_(1).jpg
    100_2113_(1).jpg
    75.9 KB · Views: 145
  • 100_1561_(1).jpg
    100_1561_(1).jpg
    57.9 KB · Views: 148
  • 100_1783_(1).jpg
    100_1783_(1).jpg
    52.4 KB · Views: 166
  • 100_2230_(1).jpg
    100_2230_(1).jpg
    63.4 KB · Views: 235
Last edited:
Signed-In Members Don't See This Ad

robutacion

Member
Joined
Aug 6, 2009
Messages
6,514
Location
Australia - SA Adelaide Hills
George, those first two are amazing! What are they?

Hi Chris,

I will answer your question in a minute, as I will add some information on how to read the info on the blanks.

Attached is my list of timbers, which are recognized/identified with numbers and letters. There are other info written on some of them, one is the number of each face of the blank.

In general, I try to use the best side of the blank to imprint the main info about the blank, sometimes and after the pics are taken, the side (1) where all the info is on, in not the best looking in the pics so I change to the one I think the best.

What this does is that, you can't the the blank identification number but only the face number which is always marked at the very end of the square part of the blank, as the round starts...!

Letters after the blank identification number, represent the cut type (St, Z,X) or the identification if the blank is s/c (solid core), S (spalted) or (special). Something like SS means Spalted-Special, etc, etc....!:wink:

Those with no number are always full mix acrylic and the one showing 99 is from a small log I swapped with another local (state) turner, a few years ago. It had no name and I forgot whatever he called it, I know that it is local to him but not enough of it (about 40 blanks in total) to add to my timbers list.

Attached is also a pic of one of the blanks with info on what is what...!

Sometimes is very difficult to read and I know that so, if is there any blank in particular that you can't work out, just let me know and I will tell you what it is...!:wink::biggrin:

OK Chris, you answer is, the first one says 9 Burl 1(face), this mean, it is the recent acquired Colonial Red Gum Old Burl, face 1 of the series and solid-core with some sapwood on it.
the second one, is from a series of blanks (5) that I just finished from a very rare Yellow Gum (#5 in the list, and S for Special) crotch log that I found half buried in the dirt in someones front yard, here in town. From these half spalted log I've made 5 different type of blanks, the #5S solid-core-Z, #5S solid-core-St, #5S Resifill, #5SS-st and #5SS-Z, which is the one showing. There is in fact 1 S missing on it, it should have been #5(Yellow Gum) S(Special) S(Spalted) Z(diagonal cut).

The blank showing is from the half log that was buried and very soft, due to its beautiful grain and colours I decided to play safe and cast them in pure clear PR with a "pinch" of golden dust, some as the mix for Resifills. Instead of stabilizing with a mix PR and acetone (70/30%) and no hardener, on the pressure pot under about 100PSI, and then let them dry slowly, I decide to fully soak them in pure PR with the normal 2% of hardener and let them stay in the pressure pot under the same 100PSI pressure, overnight. Each blank drunk half of its body size in pure PR, so they are very solid...!

I hope my answers were clear enough, otherwise let me know...!:wink:

Cheers
George
 

Attachments

  • 100_0707_(1).jpg
    100_0707_(1).jpg
    58.3 KB · Views: 179
  • The timber species at 28-12-10.doc
    31 KB · Views: 169

Old Lar

Member
Joined
Dec 26, 2009
Messages
732
Location
Sturgis, SD
Very nice samples, George, the problem now is what pen to put with each.
My wife will be glad we don't live nearby as you may become my new best friend. Thanks for sharing.
 

juteck

Member
Joined
Dec 10, 2008
Messages
861
Location
Charlotte, NC
Nice collection -- all are nice, and there are several that really jump out to my eye. With the screw eyes already on them, the first thing I thought of was hanging them vertically like a set of chimes....or many sets of chimes in your case. You'd have to put them on fishing snaps though, so you could change them out when you pick one to make a pen.

mn000589.jpg
 
Last edited:

robutacion

Member
Joined
Aug 6, 2009
Messages
6,514
Location
Australia - SA Adelaide Hills
Hahaha, thanks guys...!

Old Lar
Well, I have plenty to share around...! each of the Resifill samples means that I've made a minimum of 6 and a maximum of 21 of the same, when it comes to the fully woods ones, the number climb from a minimum of 40 to a maximum of 200 of the same wood/cut style.

They are not all the samples I've done in these last 3 months, there are a few woods ones that are quite plain that I didn't include. I'm certain that if you look in the right place, you may find that you can have some some of them, not upsetting your wife and still be my friend...!:wink::biggrin:

Juteck,
Your idea is excellent but, I reckon I've got far too many to do it that way, still something for me to consider, thanks...!:wink::biggrin:
How many...?, not sure, never counted them, the ones shown are about 3 months worth, I've been doing them for 5 years so, there are definitely a few...!:eek::biggrin:

I've just added one extra pic (last one) on the original post, from a lot that I had on the pot overnight. At the time I put this thread together, the molds were drying in the sun and only this evening I cut them down and turned one out (the sample).

This is the first time I used this other type of Banksia pods from a small tree at my auto-mechanics' property. I collected them not long after I got the big Platypus Gum Burl out but only now I decided to do something with them. I normally use only the clear PR to cast these natural pods but this time I decided to try a little of colour, nothing much...!

Half of these pods are too short to make full pen blanks so, some will be used to make some Bottle Stoppers, with the full pod casted in clear PR...! That's going to be fun...!
These pods are quite pretty and I'm certain that they will as much a success as the "hairy pods" are...!:wink::)

Cheers
George
 

Attachments

  • 100_2228_(1).jpg
    100_2228_(1).jpg
    44.5 KB · Views: 147
  • 100_2231_(1).jpg
    100_2231_(1).jpg
    53.4 KB · Views: 149
  • 100_2236_(1).jpg
    100_2236_(1).jpg
    74.4 KB · Views: 129
  • 100_2238_(1).jpg
    100_2238_(1).jpg
    115.4 KB · Views: 146
  • 100_2239_(1).jpg
    100_2239_(1).jpg
    55.5 KB · Views: 136
  • PIC09656_(1).JPG
    PIC09656_(1).JPG
    128 KB · Views: 114
  • PIC09662_(1).JPG
    PIC09662_(1).JPG
    79.9 KB · Views: 134
  • PIC09661_(1).JPG
    PIC09661_(1).JPG
    80.1 KB · Views: 98
Last edited:

robutacion

Member
Joined
Aug 6, 2009
Messages
6,514
Location
Australia - SA Adelaide Hills
What is this thread...???

do you do anything with shiraz vines? As in, just the vine itself, given adequate diameter of the wood.
russ

Hi Russ,

PM sent..!:wink:

NOTE: This thread, is not a classified nor it was ever intended to be. This thread is of informative nature, only and to share some of my recent work.:)

Any suggestions to how to make a display where I can display/hung, at least 1.000 of these samples and get them out of a cardboard box, would be appreciated...!:wink::biggrin:


Cheers
George
 
Last edited:

robutacion

Member
Joined
Aug 6, 2009
Messages
6,514
Location
Australia - SA Adelaide Hills
Hi George

what a brillant collection you have

the blanks with the smaller banksia pods look great and i'm sure will go on to make some very striking pens

Thanks George,

I really thing that if I can have a way to display at least 500 of these samples, selecting the better or more colorful ones, I would be happy. I may have about 1.000 if I count everything, which was my intention to display from the beginning but with the introduction of the Resifills, the numbers doubled/tripled very quickly.

I'm not complaining, in fact I couldn't be happier but I'm starting to feel a little sad to have to keep them in a box (large TV box) that I can no longer lift...!:frown:

The smaller Banksia pods, are quite "different" and I would like to be able to make its outer surface, the main focus/feature but, that may not be that easy...! Nevertheless, I reckon a little colours, as these ones or the totally clear resin, as the bigger brother, will make some interesting pens, for sure...!:wink::)

Cheers
George
 

robutacion

Member
Joined
Aug 6, 2009
Messages
6,514
Location
Australia - SA Adelaide Hills
A few more

Hi peoples,

From that last pic I added to the OP, which is the first blanks I made (the blueish) using the new Banksia pods (smaller ones and "bold"...!:eek:), I've made another 3 small batches (7 blanks, including the sample).

There is 1 silver, and 2 yellowish/goldish, only one of the 4 batches is done differently to the straight cut type blank. This was a experimentation to the cross cut version I made on the other bigger pods but, the little buggers decide to float when I pour the resin in so, the second batch of yellow blanks was my quick response to the "floating and all over the place" situation that I was confronted with.

I simple grabbed another mold and quickly put the straight cut pods (already cut from the day before, thanks goodness for that...!):rolleyes: into the mold and tipped 2/3 of the resin I had on the cross cut little buggers, just enough to keep them seated at the mold bottom.
I had to re-arrange the whole thing again, actually, removed them all into a containers and them put them back one by one in they respective order/position.

This was only possible as I always prefer to sacrifice the "curls/swirls" to the maximum adhesion as possible to the material I'm casting with and for that, the resin is poured as soon as the catalyst in added on...!

So, out of what I wanted, which was 1 test mold batch with these cross slices in the yellowish resin, I endup with another lot of the same colour but with the pods cut in straight orientation to the pod. The only thing that I had to do was to put these 2 incomplete molds into the pressure pot for an hour, and then get them out, mix another amount of resin with the same colour, add the hardener and fill the molds to their necessary level and put them back in the pressure pot for the overnight curing...!:biggrin:

The next morning, I got the molds in the sun as by afternoon I was turning these blanks into samples, which and once again was far too yearly as the resin was bleeding out from the blanks, considerably...!:frown: This explain why they look bent as they are in fact bent. The resin being so soft and with no support (brass tubes glued), the turning was less than exciting and any little heat added from friction, particularly the sanding, would make them go like rubber...!:eek:

I decided to leave them alone after finished with the CA, that evening, and only took the pics the next day, hopping that the sun would come out but, it did for a few seconds at the time, and I seem to never be ready when it did appear...!:mad:
The blanks had to be polished again with the polish compound just to remove the resin that bled through the night but the "perfect" flawless finish was spoiled but I didn't care as they will be hanging there for a few weeks and then re-finished before they are put away, by then the resin will be fully cured and very solid...!:biggrin:

No doubt, these blanks will require the tubes or the blanks reverse painted or both, unless the brass showing on some of them, is the right "backing" colour...???:confused:

I can see a bright yellow in the tubes of the silver ones to probably make an excellent combination but, until its done, is very difficult to be sure...!
While I like to use the natural colours of these pods as the main focus of the blanks, reason why I only use clear resin on the "hairy pods", I will make some with clear with these new pods but I reckon, due to they strange structure, a little colour goes well with them...!

There is not a lot of these pods available, an I will have to wait another 5 months or so before that little Banksia tree, dries the pods that were left from last year so, and while I have some, I will continue to try a few combinations.

I don't think that I will try any more cutting combinations than the 2 I have so far and I'm sure the straight cut ones will do well, I'm not so sure what to think of the cross cut ones...!:confused: I sort of like them and I would like to see them with different colours but I can't make my mind if a like them better than the straight ones or not...!
Maybe I will have this doubt until I make some more with different colours or see a pen made with each of the cut types and see what they look like, then...!:biggrin:

What do you reckon...???:rolleyes:

Cheers
George
 

Attachments

  • 100_2259_(1)_(1).jpg
    100_2259_(1)_(1).jpg
    60.3 KB · Views: 111
  • 100_2269_(1)_(1).jpg
    100_2269_(1)_(1).jpg
    63.8 KB · Views: 84
  • 100_2250_(1)_(1).jpg
    100_2250_(1)_(1).jpg
    67.3 KB · Views: 82
  • 100_2251_(1)_(1).jpg
    100_2251_(1)_(1).jpg
    58.2 KB · Views: 88
  • 100_2273_(1)_(1).jpg
    100_2273_(1)_(1).jpg
    73.5 KB · Views: 113
Joined
Apr 16, 2010
Messages
699
Location
Leicestershire, U.K
Hi George

More great looking blanks- I would like to see these smaller pods with a red or blue swirly resin. I like how the edge of the pods looks like fingers or a rib cage trying to wrap around the cylinder- is thee a small band of pure resin running vertically up one side of the blank
the experiment blank looks kinda like skull's!!! very weird.
 

robutacion

Member
Joined
Aug 6, 2009
Messages
6,514
Location
Australia - SA Adelaide Hills
Hi George

More great looking blanks- I would like to see these smaller pods with a red or blue swirly resin. I like how the edge of the pods looks like fingers or a rib cage trying to wrap around the cylinder- is thee a small band of pure resin running vertically up one side of the blank
the experiment blank looks kinda like skull's!!! very weird.

Tanks George,

There is already a light blue on them but I may try the heaviest colours.

Each blank has 4 pics, 1 of each face. The effects are interesting but you have to remember that the diameter these samples were turned and finished at is about 15 to 18mm, well above the average pen barrel, this will determine the final result of the blanks as it gets turned to the correct pen size. In this case, you would be losing a considerable amount of resin on the opaque(ish) side, making those pod edges to surround the pen barrel more, I believe...!.

The same with the cross experimental blank, the other side of it (more resin than pod) will change considerably as the diameter reduces so, is difficult to see/predict exactly how they will look as much will depend of the colour the tubes will be painted with...!

Anyway, I will use the pods I've got left ,to do a few more colours experimentations, some will come out more attractive than others but that is only normal. All will make interesting pens, no doubt and after all, we all have different tastes so, what some hate, others make like and vice versa.:biggrin:

I didn't wanted to put the whole 4 side pics from each blank, they are available to see at my eBay store but, I will add a couple with some other sided where a the moment, has the most resin...!

Hope the pics are what you were looking for...!

Many of the blanks samples I shown of the OP, and many more prior to those ones, no one has seen, nor I offered them for sale anywhere, I keep making them and like to put the a side for a few months so that they cure properly. Some of the batches are in excess to 50 blanks and still I don't bother in doing anything with them for some time.

Is only one particular time that I get a quite painful reality check and need to address the issue and that is when, I run out of the 25lt resin gallon, which mean I'm running out of everything and that is when I have to move stuff to acquire the capital necessary to replace of was used, never much change of $500 :eek::mad::frown:

Interestingly, someone here has seen these new Banksia pods and told to someone else that is from this area (Adelaide), and as much as I like to leave the fresh resifills alone for a few months, didn't work this time as today (morning) I had a call from someone that wanted to come and see me today, about some pens blanks I was told.

An hour later I had a young gentleman and his wife at my front door to have a look at my "lolly shop", little did I knew that they (both make pens), where looking for these new Banksia pod blanks I shown on IAP...!:eek:
It didn't make any difference that I told and shown them that they have been made 48 hours ago so, they were still bleeding and not hard/cured enough, their response, "don't worry, they will dry at our place...!:eek::)"

What do I know...???:rolleyes::biggrin:

Cheers
George
 

Attachments

  • 100_2266_(1).jpg
    100_2266_(1).jpg
    277.3 KB · Views: 86
  • 100_2248_(1).jpg
    100_2248_(1).jpg
    274.8 KB · Views: 86
  • 100_2261_(1).jpg
    100_2261_(1).jpg
    275.5 KB · Views: 94
  • 100_2253_(1).jpg
    100_2253_(1).jpg
    279 KB · Views: 121
  • 100_2247_(1).jpg
    100_2247_(1).jpg
    273.6 KB · Views: 75

robutacion

Member
Joined
Aug 6, 2009
Messages
6,514
Location
Australia - SA Adelaide Hills
3 more samples and a BT..!

Hi George

More great looking blanks- I would like to see these smaller pods with a red or blue swirly resin. I like how the edge of the pods looks like fingers or a rib cage trying to wrap around the cylinder- is thee a small band of pure resin running vertically up one side of the blank
the experiment blank looks kinda like skull's!!! very weird.

G'day George and everyone else...!:wink:

I decided to try 3 more batches (7 each, including the sample), 2 with colours you suggested and 1 with the clear resin as I mention I would do, and see how it would come out.

The result with the clear resin is not as effective as the "hairy pod" ones, but that I was expecting due to the partial filling the pod makes within the pen blank size, I wanted to do it so now I know...!

The red and blue didn't come out as I wanted either, this time I did pick a very bad day to do them in my open working area, it was raining, the moisture was unbearable, cold as ice and a wind that did go straight through the bones...!:eek:

I do all my resin work, in a area where it has a roof and 2 side walls with plenty of breeze/ventilation through it. While this arrangement is ideal for warmer days, is not to ideal with the conditions I had Thursday evening.
I tend to use the 2% catalyst in my pours all year around, but is not the first time where I got identical problems as I had last Thursday.

The hardening/gelling process, wasn't happening due to the humidity and cold, and I couldn't make the 2 colour mix, (1 read and white, the other blue and brown) as I normally do, so and after waiting about 45 minutes to see any reaction in the resins, I endup pouring the resin in layers, (red>white>red) and the other, blue>brown>blue). I used a tooth pic to swirl in between the pods and after I did on both of the molds, it did look that it was holding so I put them in the pressure pot and finish for the day.

The next morning I got the molds out of the pod and put them outside to day a little, they appeared to be hard, one I couldn't see any signs of the pearl white and the other one was totally brown on the top surface...!:eek:
So, I knew that the separation did happen but not the way it was suppose to as the white stayed in between the 2 layers of the red and didn't swirl with the tooth pick, and the brown that was put also in between the 2 layers of blue, has some how floated to the top, changing slightly the blue colour but not showing any signs to have swirled with the blue...!:mad:

It doesn't bother me that much how they come out, I was more annoyed that they didn't do what they were suppose to do but, such as life, a big B&$T@...!:biggrin:

I did also, play with some of the smaller new Banksia pods, and made half a dozen of BT blanks. I finished one today to see how it would look on the kits I have but, the resin is still bleeding too much from the inside of the blanks, when the outer clear layer of resin is cut out, so I will re-do it again next week or so and take better pics of it...!

Experimentations, experimentations...!:eek: are fun, shame these are a little sticky...!:mad:

Cheers
George
 

Attachments

  • 100_2375_(1).jpg
    100_2375_(1).jpg
    280 KB · Views: 77
  • 100_2376_(1).jpg
    100_2376_(1).jpg
    277.5 KB · Views: 69
  • 100_2380_(1).jpg
    100_2380_(1).jpg
    278.8 KB · Views: 99
  • 100_2384_(1).jpg
    100_2384_(1).jpg
    278.6 KB · Views: 68
  • 100_2387_(1).jpg
    100_2387_(1).jpg
    276.7 KB · Views: 85
  • 100_2396_(1).jpg
    100_2396_(1).jpg
    284.9 KB · Views: 96
  • 100_2374_(1).jpg
    100_2374_(1).jpg
    270.5 KB · Views: 85
  • 100_2372_(1).jpg
    100_2372_(1).jpg
    274.1 KB · Views: 90
  • 100_2362_(1).jpg
    100_2362_(1).jpg
    267.1 KB · Views: 96
  • 100_2397_(1).jpg
    100_2397_(1).jpg
    280 KB · Views: 79
  • 100_2388_(1).jpg
    100_2388_(1).jpg
    279.5 KB · Views: 80
Last edited:

robutacion

Member
Joined
Aug 6, 2009
Messages
6,514
Location
Australia - SA Adelaide Hills
These will test your patience and skill...!

Hi everyone,

Yes, that's right...! these blanks are not for the beginner nor for the fainted hearted, in fact, if you already suffer from hair loss, I suggest you to keep the hell out of them, or by the time you're finish, you will be totally bald...!:eek::wink:

The little seeds seen in the resin are the off cuts from the Banksia pods I use to make the normal "hairy pod blanks". These off-cuts are rare in availability, as there are not many of them coming out from the pods I prepare for the pen blanks. I will say that, from the very beginning that I have been making the "hairy pod pen blanks" the seeds (bits) used in these 3 batches of 7 blanks each, is all I had.

Unfortunately, PR doesn't stick too well to these little buggers (I wish I had Alumilite available to me, for these situations...!) and I may have also used a little too much of hardener of these lots, the 2.5% I use in cold weather may and maybe not have something to do with it, even tough, my summer castings are done with 2% hardener.:confused:

For whatever the reason, these "little suckers" tend to fly off at 100 miles an hour when spinning very fast in the lathe, at the slightest touch of the gouge. As soon as they get hit, they fly off and disappear, unless you have a clean lathe and floor and some sort of back wall, where they hit hard.

I did seem to, not have much trouble in cutting them from the casted block while in the square shape, the "$#!t started to hit the fan", when I went to cut the square corners on the bandsaw, using my usual jig. I had a hell of a time gluing back lots of pieces that went flying in an area where is never clean and full of sawdust and send...!:mad:

After spending a ridiculous amount of time cutting the 21 blanks (7x3) square corners gluing bits and cutting again, gluing and gluing and well, I endup giving up trying to glue back all the bits (many never found again) and concentrate of filling the bigger holes with the bit that come out of it or finding and identical bit that could fill the gap, reasonably well...!

When I though that my bigger problems were over, I had some "interesting" times making a sample out of each colour. Lets just say that it took me, about triple of the time a normal sample does...!:eek::mad::frown:

OK, they look nice and different and I'm sure they will make amazing pens but, there is only one way one can approach these blanks and there is, soak them with very thin CA and either let it dry normally or use accelerator to get things moving. The problem is that, the accelerator will not reach the deeper part of the pod bit just glued and, you have to repeat the process every few mm of turning, otherwise, it will look like a Swiss cheese...!:eek:

Soaking it with thin CA, would be the first thing I would do if I was working the blank to make a pen, this is even before I would think in start cutting and drilling. No doubt that, after the tube is glued properly, any of the seeds touching the tube(s) will get more stable but, and unless you take the time to keep soaking with the CA, let dry, turn a little, and keep repeating the process right to the finish size, you won't have a pen in the end.

Even my faithful "Flap disc" system din't stop the little pieces from flying off, without soaking it with the thin CA...!:mad:

So here they are, the blanks from hell...!:eek::biggrin:

Cheers
George
 

Attachments

  • 100_2449.jpg
    100_2449.jpg
    59.6 KB · Views: 82
  • 100_2454.jpg
    100_2454.jpg
    51.2 KB · Views: 88
  • 100_2459.jpg
    100_2459.jpg
    55.2 KB · Views: 79
Last edited:

KBs Pensnmore

Member
Joined
Oct 16, 2010
Messages
834
Location
Murray Bridge 5253 Australia
Hi George, to get around the problem of making your square casting to round why not start off with rounds. I cut them square on the bandsaw then run them through again on a jig to take off the corners so that they will fit into the 15mm ID tube. I use 3 different types of Banksia, the realy short Menzies, I trim to size and use 2 in the one mold for slimlines. No trouble with chunks going off into who knows where. I don't use a vacuum or pressure chamber! For the resin I use Diggers casting and molding resin, (clear) and sit them on my scrollsaw for about 15mins. The only problem is that tools don't like resin, I use a carbide tipped home made tool on them.
I've done this for about 30 blanks.
I only use CA as an overall finish, they look excellent with the Brass Tube showing through, my customers think it is gold in the fillings.
Kryn
 
Last edited:

robutacion

Member
Joined
Aug 6, 2009
Messages
6,514
Location
Australia - SA Adelaide Hills
Hi George, to get around the problem of making your square casting to round why not start off with rounds. I cut them square on the bandsaw then run them through again on a jig to take off the corners so that they will fit into the 15mm ID tube. I use 3 different types of Banksia, the realy short Menzies, I trim to size and use 2 in the one mold for slimlines. No trouble with chunks going off into who knows where. I don't use a vacuum or pressure chamber! For the resin I use Diggers casting and molding resin, (clear) and sit them on my scrollsaw for about 15mins. The only problem is that tools don't like resin, I use a carbide tipped home made tool on them.
I've done this for about 30 blanks.
I only use CA as an overall finish, they look excellent with the Brass Tube showing through, my customers think it is gold in the fillings.
Kryn

Hi Kryn,

I understand what you are saying and I know that using round molds, it would safe a considerable amount of resin but, the round mold systems don't really suit the type of casting I do, as I pour on a square large mold to make 7 blanks at the time x 3, which is the pressure pot capacity.

These ones have not been put under pressure, they were poured on a table top and left to the next day...!
From the 2 types of Banksia pods I have, I make a "few" different type pen blanks and they all seem to stick alright to the Polyester resin (PR) but, is a know factor that PR doesn't have the same good sticking qualities as other resins such as Alumilite and probably Silmar or Diggers...!

This is the very reason why most people casting woods or other materials on the resin use those resins. Unfortunately, those are not available in Australia, even tough the PR I use is of hight quality (and price), which has been great for 99% of the castings I make but, these are the first ones where I found a very poor adhesion of resin to these Banksia pod seeds,

Looking closer at the seeds, they are probably responsible for this the problems as the outer surface is very hard, not allowing much if any penetration of resin and are, very glossy/slippery type. I still thing that the hardener % I used have something to do with it, as I believe that, for some reason the 2.5% used was too much here, or for whatever reason the resin did set too fast (even though it took forever to start gelling...!), or something else happens that created too much heat and the resin shrunk/lost volume as it cured as, I felt that the resin was a lot more brittle than normal and that is not a good sign and results wanted/needed with type castings.

As soon as I get some more available seeds, I will try again but this time with only 1% of hardener and let it cure slowly (2 days), we see what happens...!:wink:

PS: The pic shown is of the pods/seeds without all they "hairs"...!

Cheers
George
 

Attachments

  • PIC09403.jpg
    PIC09403.jpg
    87.3 KB · Views: 75
Top Bottom