To cut up or turn?

Signed-In Members Don't See This Ad

ericofpendom

Member
Joined
Jun 6, 2012
Messages
371
Location
Bolton, England
After seeing the wood / resin fusion blanks I am wondering what to do with these Australian Goldfield burrs that I have had in my garage for about 6 years waiting to be turned. Should I cut them into strips and attempt to make fusion blanks or turn a natural edged form such as a bowl? I think there is probably a lot more £ return on blanks but there is a lot more work involved in transforming them.

Your thoughts would be welcome.

Eric...
 

Attachments

  • Large Goldfield burr.jpg
    Large Goldfield burr.jpg
    101.5 KB · Views: 217
  • Large Goldfield burr 2.jpg
    Large Goldfield burr 2.jpg
    123.3 KB · Views: 228
  • Large Goldfield burr close.jpg
    Large Goldfield burr close.jpg
    139.5 KB · Views: 280
  • Large Goldfield burr tight.jpg
    Large Goldfield burr tight.jpg
    155.7 KB · Views: 228
  • Tight Goldfield burr close.jpg
    Tight Goldfield burr close.jpg
    160.9 KB · Views: 175
Signed-In Members Don't See This Ad

Tim'sTurnings

Member
Joined
Aug 19, 2008
Messages
420
Location
Central Michigan
Can you post some pictures of the bottom and side views? Also the approximate sizes? That would make it better for someone to advise.
Thanks, Tim.
 

fitty

Member
Joined
Dec 27, 2011
Messages
308
Location
High Point, NC
Do both. Trim off a few inches off the edge and create fusion wood pen blanks. The rest could be used for making bowls.
 

grz5

Member
Joined
Jul 23, 2011
Messages
268
Location
Upland, CA
Do both. Trim off a few inches off the edge and create fusion wood pen blanks. The rest could be used for making bowls.

This! I did it with 2 red mallee burl caps I had and it worked out very well. That way you waste little to no wood.
 

Fred

Member
Joined
Feb 18, 2007
Messages
3,557
Location
N.E. Atlanta, Georgia U.S.A.
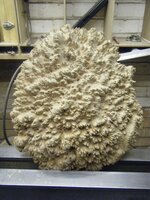
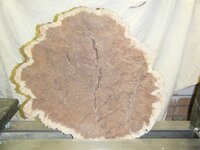
I would make the entire burl into a bowl. No trimming at all. Just sand down the edge a little to protect the hands of whoever handles the finished product. Power carve the inside and leave a good half inch of inside wood to protect the lighter wood from showing up. Be careful as you carve and follow the general outside edge to form the inside.

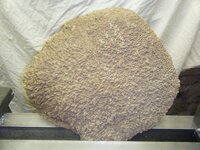
The more you sand the inside the prettier it will be. I usually finish with a quality clear polyurethane finish with sanding between the several coats of applied finish. Then when fully cured I polish with Carnuaba wax using buffing wheels.

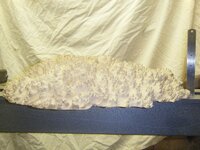
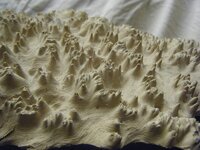
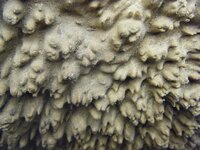
I usually sand down the prickly 'spear points' and may quite often take them all the way down to a smooth edge leaving the larger natural creases alone. The spears form great burl eyes and are spectacular looking IMHO.

Just go slowly and take your time. BTW, cloth sandbags loosely filled will greatly facilitate the carving. Carve the inside prior to removing the 'spears' as they will hold onto the cloth bag material. I use money bags from the bank as sand bags. A heavy duty plastic bag inside the cloth bag holds the sand just great. Put the plastic bag inside the cloth bag, fill them with sand, fold over the top several inches, put a piece of tape over the fold and stitch up the cloth top and you are set to go to town.

Have fun and keep your eyes open for the treasure inside the burl when you apply the finish. :cool:
 

Bowl Slinger

Member
Joined
Mar 25, 2012
Messages
591
Location
Seattle, WA
"I am wondering what to do with these Australian Goldfield burrs"
How many do you have? When I see "these" I thinking that you have more than one so is there a reason you cant do both?
 

ericofpendom

Member
Joined
Jun 6, 2012
Messages
371
Location
Bolton, England
Hi Slinger, there are two burrs. One has finer spikes than the other and is very prickly to handle. Your right I could have a go at doing both.

Cheers

Eric...
 
Top Bottom