Celtic Knot Insert Question

Signed-In Members Don't See This Ad
Joined
Jun 27, 2012
Messages
22
Location
Indiana
I'm interested in trying to make celtic knot blanks for turning. I've read several posts regarding the making of the blank. It looks like that not cutting all the way through the blank is the best solution. I understand that the inserts need to be the same width as the blade. What I don't understand is how to go about cutting the inserts the same width of the blade. How do I measure it to cut it? Do I need to make some sort of jig for it to be repeatable? I am using a Dewalt tablesaw for this. Any help is appreciated.
 
Signed-In Members Don't See This Ad

GaryMGg

Member
Joined
Nov 23, 2006
Messages
5,786
Location
McIntosh, Florida, USA.
NB: Don't do this if you're new to woodworking, not familiar with your TS, don't have a fence which is parallel to the blade OR if it just makes you nervous.

Sometimes, I come across an offcut which looks perfect for an inlay. I'll just use a drill bit to set the width between the fence and blade although usually I can find the sizing rip I've already made.
A small block of wood with the blade's kerf cut into it makes a good Go/No Go gauge. I have one for each of the blades I typically use.
Close is good--not so tight as to require force to insert it and not so loose it just falls out. Air whooshing out when you slide the slice thru is best (at least for me when using Titebond II with multiple woods).
If the blank is 1" square, a 7/8" wide slice works. Thus, IF I have a piece that's long, milled flat and square AND is at least 1-1/2" tall, I'll just rip it with the blade height set to 15/16, pushing it thru the blade with two push sticks: one on top, one to the side.
Then I just cut that slice off with the blade height just over 1/8 and the offcut to the outside of the blade.

If I think about it, I'll place a stop block on the far side of the original positioning for the fence. This makes it feasible to return the fence to its original position. Now, I can take the billet and run it thru the saw again with the remaining rebate down to the table and slice off the rest of the rip, leaving it ready to be made square again.

It takes less time to do than it took to write this explanation.

Safe and easy.

One more thing: when you do it this way, and the rip slides through your gauge--make another to keep. It's your sizing rip for next time. :wink:
 

dogrunner

Member
Joined
Mar 23, 2014
Messages
365
Location
mi
its best to cut them on the left side of blade. take your miter gauge and screw a wood fence to the face of it.
leave the fence short of the blade by a 1/2 inch or so. put a screw in the wood fence and set it to the size of the strip you want slide you fence and wood up to the screw rip your strip and repeat hope this makes sense
IMG_1541_1_1.JPG

IMG_1542_2_1.JPG

IMG_1543_3_1.JPG
 

lwalper

Member
Joined
Mar 16, 2014
Messages
492
Location
Lancaster, TN
As was said, "repeatable" -- that's been my problem. So far I haven't been all that successful with the second, third, and fourth cuts being in exactly the same place so my knot comes out crooked.
 

jttheclockman

Member
Joined
Feb 22, 2005
Messages
19,132
Location
NJ, USA.
Well your sign-on name and the fact that you are asking this question makes me a bit worried. Working around any power tools or any tools requires knowledge of that tool and respect of what it does and can not do. Also respect that at anytime it can hurt you.

With that said to answer your question comes down to some trial and error. Just because a blade says it cuts a 3/16" or a 1/8" kerf may not always be true. If there is runout on the arbor of your saw it is possible it will cut a wider slot. The blade used may have a tooth that is not set properly and so on. But what you want to do is take a scrap piece of wood (at least 3/4" thick) and run a cut through it about half the thickness of the wood. This leaves enough material so that it does not deform when inserting your trial pieces. Now you will cut thin slices and try them and adjusting accordingly. You want a snug fit but not one where you have to force the piece in. remeber there needs to be room for glue. You do not want a piece to loose either because when you clamp the knot you do not want to deform the blank in any way.

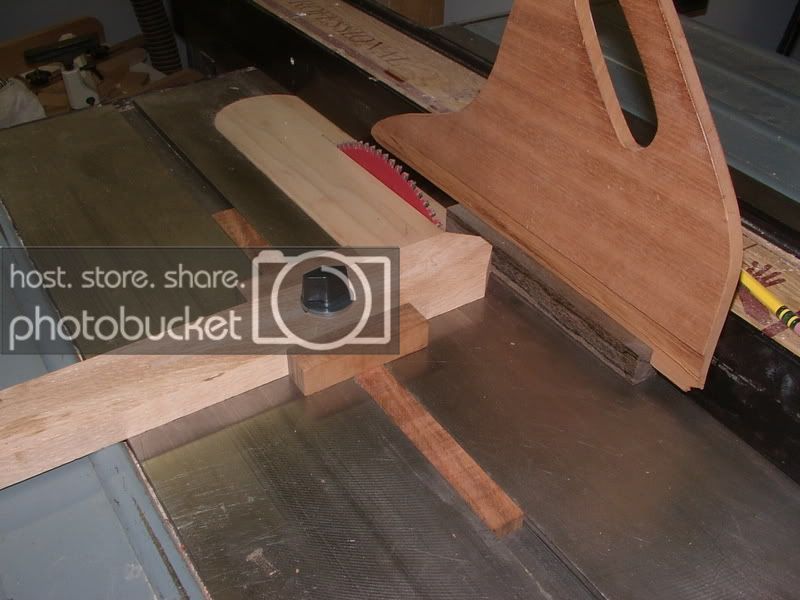
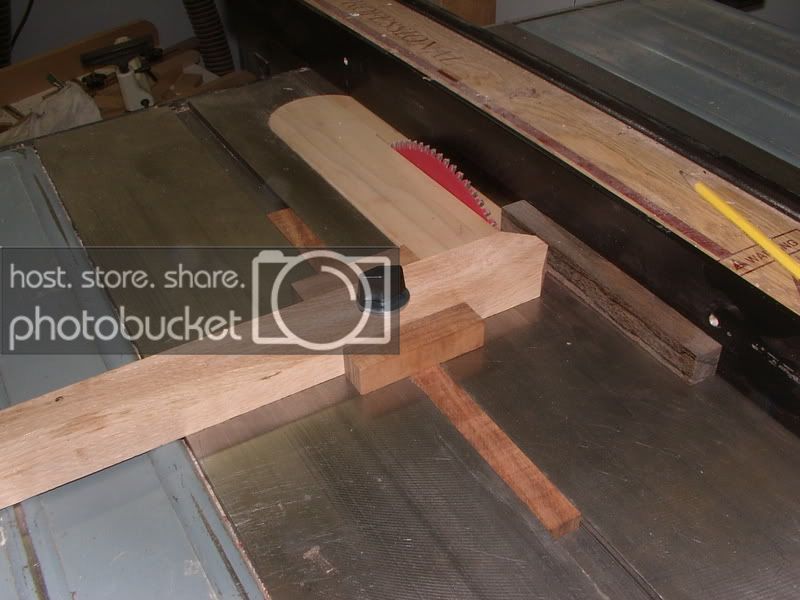
Ok there are many ways to do this but to get repeatable cuts the easiest thing is to have a fixed point. This point is the distance from the outside edge of the blade to the fixed point. You want the piece to fall away from the blade and not get trapped between the fence and the blade. It makes for a safer operation hands down. If it were a wider piece than fixing the fence to a desiered distance between the blade and itself would be OK. In this case we are talking 1/8" or slightly larger. Not safe.

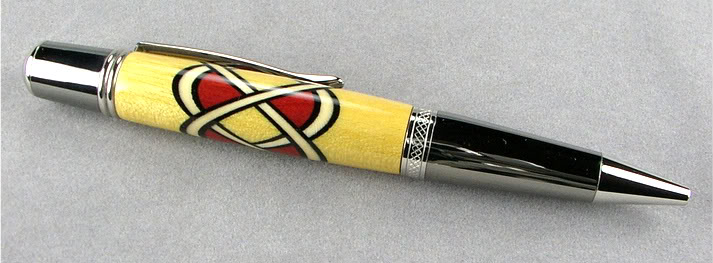
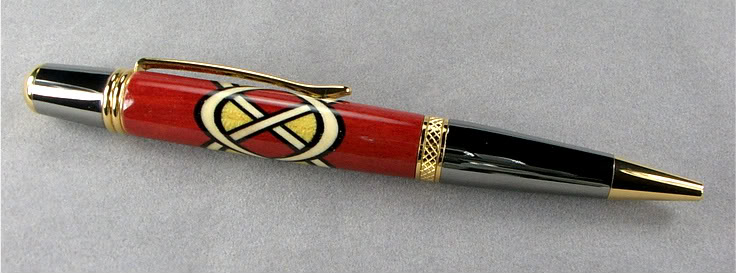
Here is what I use. They make commercial jigs for this but with a bit of thinking they are easy to make. The photo should be self explanitory but if you have questions fire away. Be safe. One other thing I forgot to mention the use of a zero clearance plate is a must. You do not want the thin piece dropping down as you push it through. Also you keep the jig on the feed side of the blade and not in the middle or at the other end. You want the piece to fall away from the blade. After each cut you slide the fence and the blank piece up against the stop again for the next cut. Keep doing this for as many slices you need. After doing a few knots this becomes easier. Simple but effective. Then you can make knots like this.


Last edited:
Top Bottom