Best Euro Style

Signed-In Members Don't See This Ad

rebfan04

Member
Joined
Dec 15, 2010
Messages
65
Location
Flowood, MS
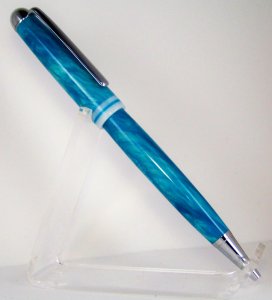
Ok..Going to do first Euro style..have held off because didnt want to have to do tenon. Any suggestions as to easiest kit, best kit, what not to do..ect..
Thanks Roger
 
Signed-In Members Don't See This Ad

jtrusselle

Member
Joined
Nov 24, 2008
Messages
74
Location
south berwick, maine
I've had good luck with the Woodcraft busings and kits but the Euro can be one of the more challenging pens to make because of the tenon. Depending on the precision of the tenon cut and the wood, I use either CA or Gorilla glue. Early on I had some bad experiences using CA with the tenon coming loose due to either use, wood shrinkage or undercutting the tenon. Once the tenon is cut to the right dimension try dry fitting the center ring. If tight enough to press fit then CA will work and if somewhat loose then use Gorilla and clamp overnight. I've been using a Birdseye Euro for over a year in work and it's still going strong...
 

PenMan1

Member
Joined
Jul 8, 2009
Messages
6,380
Location
Eatonton, Georgia
Tenons are not a problem for me, so I use the CUSA Euros. They have very nice platings.

If the tenon worries you, the new PSI Designer ballpoints do not require a tenon.
 

PenMan1

Member
Joined
Jul 8, 2009
Messages
6,380
Location
Eatonton, Georgia
For the record, if you DO decide to make a Euro with a tenon, DO NOT secure the centerband with CA!!!!

If your tenon fit is precise, a press fit will hold the band nicely. If the fit is "just" undercut, red or blue Loctite thread compound will secure the band. If the tenon is severely undercut use a very small dab of 5 minute epoxy will work.

I make several hundred (maybe 1,000?) Euro pens per year. Not only is it virtually impossible to get CA in the right spot without ruining your finish, CA that comes in contact with the plated parts will actually destroy the plating. I noticed this several years ago on pens that had never been used, just sitting inventory.

WHAT'S WORSE, the instructions for ALMOST EVERY Euro sets SAYS USE CA!!!! I've had NO plating issues since changing from CA to Loctite.
 

76winger

Member
Joined
Aug 30, 2009
Messages
2,784
Location
Lebanon Indiana
Tenons are not a problem for me, so I use the CUSA Euros. They have very nice platings.

If the tenon worries you, the new PSI Designer ballpoints do not require a tenon.

I recently did one of the PSI tenonless Desingners. Nice kit and assembles much like slimline, but with bigger parts.
 

76winger

Member
Joined
Aug 30, 2009
Messages
2,784
Location
Lebanon Indiana
For the record, if you DO decide to make a Euro with a tenon, DO NOT secure the centerband with CA!!!!

If your tenon fit is precise, a press fit will hold the band nicely. If the fit is "just" undercut, red or blue Loctite thread compound will secure the band. If the tenon is severely undercut use a very small dab of 5 minute epoxy will work.

I make several hundred (maybe 1,000?) Euro pens per year. Not only is it virtually impossible to get CA in the right spot without ruining your finish, CA that comes in contact with the plated parts will actually destroy the plating. I noticed this several years ago on pens that had never been used, just sitting inventory.

WHAT'S WORSE, the instructions for ALMOST EVERY Euro sets SAYS USE CA!!!! I've had NO plating issues since changing from CA to Loctite.

I'm glad you mentioned this, as the tenoned variety was next on my list of pens to try. And as a former mechanic, I've got LOTS of loctite supply!
 

LeeR

Member
Joined
Nov 13, 2010
Messages
630
Location
Fort Collins, Colorado
Last edited:
Joined
Sep 24, 2006
Messages
8,206
Location
Tellico Plains, Tennessee, USA.
Since I didn't know any better, and my first kits were part of the Christmas gift of my lathe, I started/learned to do pens on the Euro design... not knowing better, I though the tenon was just part of the design of pens, so they have never been a problem for me... I use a small 1/8 parting tool or a very small 1/4 inch wood chisel to cut them and hardly slow down for them. Just take an old center band as a go by and to check fit.. that way you won't damage the CB for the kit.
 

studioso

Member
Joined
Feb 14, 2010
Messages
358
Location
Montreal, qc, Canada
From my experience: cutting the tenon is not that hard. However it is easier if you use a nushing kit that actually has a loose ring that you can slide over the tenon to check the fit. Other kits, including lee valley, just have a stepped bushing: a narrower section to help you with the tenon cut, and a wider section to show you where to cut after the tenon. This kits make it easier to mess up. The worst part is finishing a pen, then realizing the tenon is too big.

One other advice, is to very slightly undercut the tenon's shoulders, just to mKe sure that you will not have space between the blank and the band.

One last thing: for some reason, any out of round your lathe might have- both offcenter rounds and oval rounds- is much more noticeable on this kit, where the front blank fits and twists in the center band.

Thanks for the glue advice! I always used ca. And indeed I did mess up the finish occasionally...
Will switch now!
 

KGPenmaker

Member
Joined
Nov 16, 2010
Messages
11
Location
Virginia
I thought that all Euro bushing sets came with a loose ring, with the exception of the mini-Euro that WC sells, but CSUSA's bushings come with a loose ring as well as WC's Euro (again, NOT the mini-Euro) bushing sets.

Here is my advice: 1) After turning the top section round: make the tenon first! (+1 to studioso's recommendation for undercutting the tenon at the shoulder, I would even recommend slightly tapering the shoulder so that at the tenon, the shoulder is cut deeper than at the outside diameter of the blank) 2) Once you have the tenon turned, you can "mount" the loose ring and turn the blank to that diameter to ensure that the blank that is fitted right up against the centerband will be the right diameter (DAMHIKT, also with a tapered shoulder you are ensured that no matter how much material you remove from the diameter the centerband will fit tightly against the shoulder). 3) Then you can taper and turn the blank down at the top of the top section to that bushing size.

Paul
 
Top Bottom