3D blank actual time in production- 50 min

Signed-In Members Don't See This Ad

greenmtnguy

Local Chapter Leader
Joined
Nov 18, 2007
Messages
1,689
Location
Chester, Vermont, USA.
I think people are getting the impression that our 3D blanks take days to complete. Here is an actual time frame on a test blank I did today.
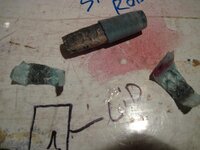
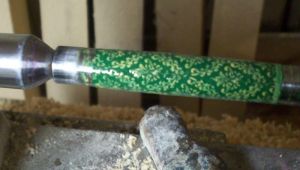
totally painted and ready for Ca was 12 min. Paint the tube a solid color and dry. Using my special tool, tap the paint to almost dry on a fingertip and apply with the lathe running at a fairly high speed lightly touching the blank.


Another tool for fine detail. Tap color dry and touch lightly to spinning blank.


Complete and dry at 12 min.


I applied CA at 810 rpm. I had 3 coats on and dry at 18 min and that is geting CA and paper towels ready too.


CA was done ar 38 min.

Finished at 1810 rpm on a Rikon without variable speed.
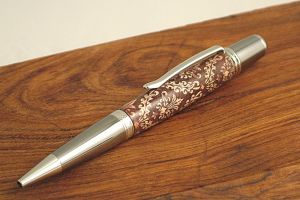
50 min later I am done. If I was going to keep this blank, I am sure I would have taken some more time, but the band on the end of the blank is not on the finished product. Had to adjust the laser to a different style of blank.

 
Signed-In Members Don't See This Ad

jttheclockman

Member
Joined
Feb 22, 2005
Messages
19,148
Location
NJ, USA.
Ok I must have come in the middle of a conversation again. Correct me if I am wrong. You take a wood blank I am guessing maple and you laser the design in and then you base coat it and then apply the dust to the high spots. A little like flocking in a way. Is this correct or if it is a different process can you explain??? Thanks.
 

greenmtnguy

Local Chapter Leader
Joined
Nov 18, 2007
Messages
1,689
Location
Chester, Vermont, USA.
I use Monty's mild accelerator. Because of the thickness of Ca that I apply, I let the blank spin for a bit, before I use accelerator. We are waiting for testers to cast, but no word from them yet. :frown:
 

greenmtnguy

Local Chapter Leader
Joined
Nov 18, 2007
Messages
1,689
Location
Chester, Vermont, USA.
John,
The blanks are Maple. I painted the total blank Green and then with the blank spinning and very little paint on my fingertip- see photo- rub it lightly against the spinning blank, hitting the high points only. The Yellow in this blank is not burned, leaving it raised above the lasered surface enough so you can feel the depth with your fingers. The band at the end of the blank in the photo is not on the production blank. This was a reject so I used it for the test.
 
Last edited:

NewLondon88

Local Chapter Leader
Joined
May 15, 2008
Messages
5,077
Location
Claremont NH
You take a wood blank I am guessing maple and you laser the design in and then you base coat it and then apply the dust to the high spots. A little like flocking in a way.

That's a pretty good description of the process.
Of course, people are free to try whatever they want to do.. but we were
talking about it and wondered if people were thinking it had to be more
difficult than it really is. You can get a really good looking blanks with a
simple process. The first one was just stained and then the highlights were
sanded back to plain wood.

There's a couple of dozen test blanks out there, but the testers are
awfully quiet..

Flocking .. now there's an idea.. :tongue:
 

RAdams

Banned
Joined
Apr 5, 2009
Messages
2,983
Sorry i have slacked your test blank. I didn't realize i was supposed to shut down my shop to work on the test piece. It is in the oven now (after casting the blank) I don't think it worked out but I will post pictures no matter how it turns out.


It has taken me so long because i had to come up with an idea and find ways to execute. I only have one blank to play with as opposed to ruining 6 or 8 to find my techniques. Do or Die, your blank will be posted tonight.


Again, sorry for the delay.
 

skiprat

Passed Away Mar 22, 2022
In Memoriam
Joined
Oct 19, 2006
Messages
7,812
Location
In a Skip in Wales
I'm very impressed by the amount of very fine and sharp detail you guys are getting. I can't remember from the previous posts if you said you could do aluminium or not? Cool if you could. Then I'd spray the entire cut blank black or maybe electric blue, then CA fill, then sand back so the hi-lights are back to ali. I think that would look cool.
Alternately, have you thought about using dyed wood as the base ( the final colour you want the raised parts to be ) then paint the entire thing, fill with CA, then sand back to expose the dyed raised surface? Then a final CA coat.?
It might be easier on people that are a bit wary of their skill to paint just the ridges?
 

RAdams

Banned
Joined
Apr 5, 2009
Messages
2,983
well i ruined mine.

I was trying to make it look like a fishing lure. It looked ok before i put it in the PR. The PR didnt stick to the wood, instead it stuck to the paint and tooling it caused failure. The PR peeled right off the blank. It was still a bit warm from the oven as i wanted to hurry up and get it posted. I have a fish hook cast in resin i was going to use for the finial but i will just throw it away.

You fellas want me to send this back? If not it is on it's way to the trash can.

Definately above my skill level.
 

Attachments

  • 1_3d_failure.JPG
    1_3d_failure.JPG
    48.2 KB · Views: 194

NewLondon88

Local Chapter Leader
Joined
May 15, 2008
Messages
5,077
Location
Claremont NH
Sorry i have slacked your test blank. I didn't realize i was supposed to shut down my shop to work on the test piece.

That wasn't the point, Ron .. it just seemed like people were over-thinking it..
maybe thinking they were more difficult than they need to be.. or perhaps
trying new techniques on a new type of blank. I know that when I try new
things, I try to change one thing at a time.. that way if something goes
wrong, I know which part gave me the trouble. Others may have better
luck than me, but at least this way I have a shot.

I just saw your other post where the PR didn't work out. This is the kind of
information we need from people doing the testing. We haven't been
able to test all that much ourselves. So far it's been different colors and
CA finishes.

What type of paint did you use? Was there some sort of top-coat in between the paint and the resin?

If you want to try another one, let me know. And thanks for the pics :biggrin:
 

NewLondon88

Local Chapter Leader
Joined
May 15, 2008
Messages
5,077
Location
Claremont NH
I can't remember from the previous posts if you said you could do aluminium or not? Cool if you could. Then I'd spray the entire cut blank black or maybe electric blue, then CA fill, then sand back so the hi-lights are back to ali. I think that would look cool.

Anodizing is on our list of 'need-to-get-to-this-soon' blanks. :tongue:
Positive or reverse, there's a lot of possibilities there. We can do anodized
aluminum, but that's about it for metals. We can mark it but not cut it.


Alternately, have you thought about using dyed wood as the base ( the final colour you want the raised parts to be ) then paint the entire thing, fill with CA, then sand back to expose the dyed raised surface? Then a final CA coat.?
It might be easier on people that are a bit wary of their skill to paint just the ridges?

Our first one was stained.. then highlights sanded off. But not dye/paint.
I did try some TransTint on one blank, but the color just zoomed across
the wood. I never thought about painting over the dye..

hmm.. more things to try
 

JerrySambrook

Member
Joined
Dec 4, 2006
Messages
1,312
Location
Southwick, MA, USA.
well i ruined mine.

The PR didnt stick to the wood, instead it stuck to the paint and tooling it caused failure. The PR peeled right off the blank. It was still a bit warm from the oven as i wanted to hurry up and get it posted. I have a fish hook cast in resin i was going to use for the finial but i will just throw it away.

Definately above my skill level.

Ron,
Is it possible you tried to turn it too early? If the resin was still warm from the oven, then was it cured completely?
Also, the blank does not look like it is damaged from the pic, but the other side might be. I suggest maybe re-painting it, recasting, and then waiting a day to turn it. The idea sounds great.

Jerry
 

RAdams

Banned
Joined
Apr 5, 2009
Messages
2,983
Silmar41.

And yeah, the resin probably wasn't fully cured. If i would have waited, I am sure it would have worked. I would have had to shorten the blank a bit due to it chipping at the ends. The resin was lightly tinted blue to give it a water hue so using CA to repair the chips would have looked funny. Would have been ok with the custom finial and all.

I knew that these blanks had already been done in a solid color pattern (the whole blank looks the same). I wanted to try something different. I used a fishing lure (Rat-L-Trap) as a model, dark on top, with gills and eyes and all that. For some reason the testors flat tan enamel paint didnt work out. The PR caused it to run instantly, and bubble out the top of the blank. It had dried for over 24 hours beore casting.

I dont know if it could be saved or not. I didnt really inspect it that closely. I will look closer at it later this evening maybe.

I will also do a write up on it later in the vendor thingy... They are super cool blanks for sure. But i do agree that they tend to push a persons imagination, which may not be such a bad thing i guess.
 
Top Bottom