1st Successful Scalloped Pen

Signed-In Members Don't See This Ad

rcflyer23

Member
Joined
Sep 7, 2008
Messages
138
Location
Holly Springs, NC
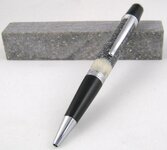
After seeing Kaspar amazing pen I was inspired to give it a try. Here is my first successful Attempt. It took me three tries and about 5 hours of looking and tinkering to figure out what I needed to do. The colors are not the greatest it's all I had that I was willing to waste. :) Anyway here is my attempt:

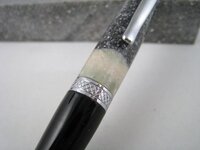
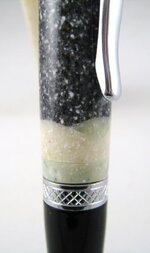
Added a photo to see the scallops better.
 

Attachments

  • IMG_1647.jpg
    IMG_1647.jpg
    29.3 KB · Views: 526
  • IMG_1648.jpg
    IMG_1648.jpg
    32.5 KB · Views: 462
  • IMG_1667.jpg
    IMG_1667.jpg
    19.5 KB · Views: 276
Last edited:
Signed-In Members Don't See This Ad

rcflyer23

Member
Joined
Sep 7, 2008
Messages
138
Location
Holly Springs, NC
Sorry Just realized I posted this in the wrong place I think. I think it should be in Show off your pens! Mods please move if need be. Sorry about that..
 

VisExp

Member
Joined
Oct 1, 2007
Messages
2,738
Location
Palm Coast, FL, USA.
Well done on figuring it out Kevin. I'm sure that was a satisfying process. If you glue a veneer like piece between the scallops and the main body of the pen in a contrasting color it will define the scallops better.

Also, don't doubt whether you are going to accompish something and choose to use cheap materials. The time you put into experimenting is worth far more than the materials. I'm not saying that you should use your top of the line blanks but use materials that will look good if your experiment works.

Like you I have often used a cheap material, then when I'm done tinkering and have been successful, I look back and wish I'd dared to experiment with better materials given the amount of time I put into it.
 

workinforwood

Member
Joined
Mar 1, 2007
Messages
8,173
Location
Eaton Rapids, Michigan, USA.
I only see a curve that looks like it could be a single lonely scallop or could just be a piece of wood cut on an angle and sliced in. Chop you blank into 4 pieces/triangle wedges, so the blank ends up looking like the top of a fence post. That's 4 scallops surrounding the pen. Glue in your replacement pieces and re-chop off the new end and get a 2nd row of scallops. Even better, if you re-chop it the second time, pull your 4 wedges from the corners of the blank rather than the sides so that your scallops alternate like fish scales! hmmm fish scales...I see a Nemo pen in my future!
 

rcflyer23

Member
Joined
Sep 7, 2008
Messages
138
Location
Holly Springs, NC
It was nice to finally get it figured out. I am going to order some pic guard material to place between the scallops. Yeah I have to agree with you on using the cheap materials, after I did figure it out I wish I had used some nicer blanks, time to hit the shop again and try it with some better materials. I think my wife wants one but I am going to use some nicer materials.
 

rcflyer23

Member
Joined
Sep 7, 2008
Messages
138
Location
Holly Springs, NC
I only see a curve that looks like it could be a single lonely scallop or could just be a piece of wood cut on an angle and sliced in. Chop you blank into 4 pieces/triangle wedges, so the blank ends up looking like the top of a fence post. That's 4 scallops surrounding the pen. Glue in your replacement pieces and re-chop off the new end and get a 2nd row of scallops. Even better, if you re-chop it the second time, pull your 4 wedges from the corners of the blank rather than the sides so that your scallops alternate like fish scales! hmmm fish scales...I see a Nemo pen in my future!

A Nemo Pen. That would be cool looking. :) I will rotate the pen and take another pic later there are 4 scallops but the colors blend so it is hard to see them. I am going to play today and see what I come up with.
 
Top Bottom