
At our local chapter meeting last Saturday I was allowed to pick one of the Inlay Kits Donated by Ken at Kallenshaan Woods. Ken donated quite a few kits and other things to be given away at the meetings and I want to use this time to personally thank him for that.
I have never done an Inlay kit so I wanted to pick something easy and forgiving. I chose the Patchwork Kit. When I got home I immediately tried to put it together without looking at the directions. 30 seconds later I got my glasses and the instructions out.
They are actually very easy to assemble if you follow the instructions. I did a dry run to verify that all the pieces fit. Then did the actual assembly, it went together without a hitch.
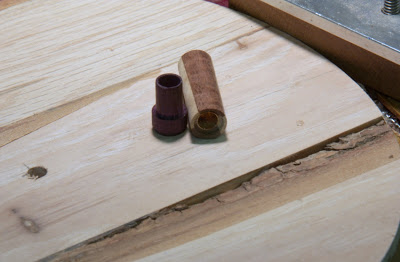
The kit is supposed to be for a Sierra style/size kit so I grabbed a Zen Tube and glued it onto that. The Zen is longer than the stock Sierras and let me use all of the kit I could.
I decide I wanted to make a pen to match the tube so I used blood wood and Purple heart for the other parts of the pen. At least I think its Blood wood.
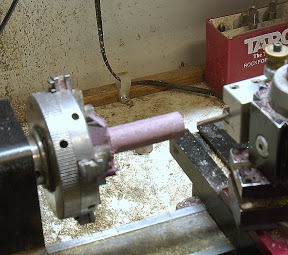
IN the pictures I start with making the center band of the pen out of Purple heart. I turn the piece down and drill it with a 5/16 drill bit for the 8mm tube I will use. I clean it up with a cutter and cut it free. The outer diameter is .520 to allow me room to match the lower tube unit once its made and attached.
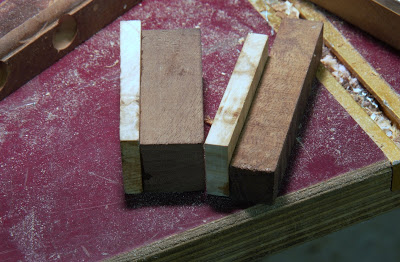
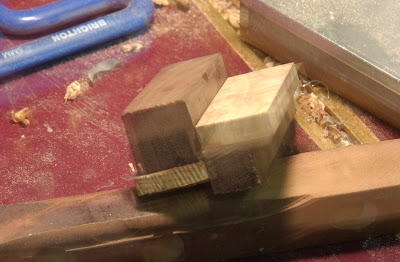
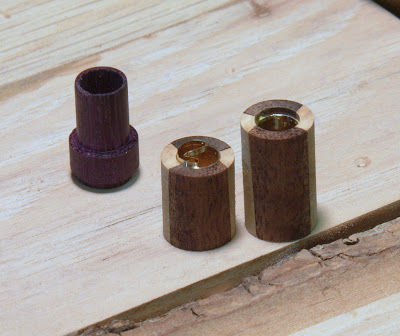
I decided the lower unit needed to match the upper tube as close as I could make it so I grabbed some scrap Koa, Maple, and walnut and quickly glued up a block of wood. I belt sanded matching surfaces flat and then super glued them together into two pairs. I purposely mis matched sizes and when I glued the two pairs together I angle one side to the other. It moved back a bit and it didn't get quite as much of the angle I wanted.
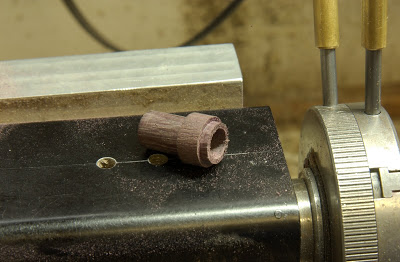
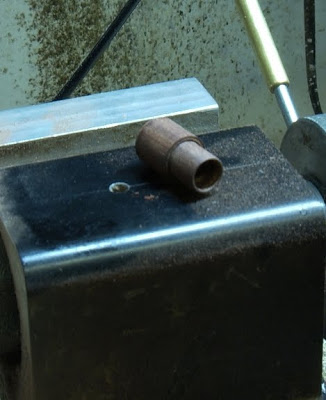
I then drilled it and turn it round and then cut the relief to fit the purple heart into. I decided the lines were still to straight to match the patch work blank and cut the tube in half. I cut part of the tube out of the middle on one side and made a tenon to the tube on the other piece. I then glued them back together putting them more than 180 degrees out. The first picture of the brass tube with the ribbon of brass is from the cut off tool I cleaned it off and then cut the tenon I needed.
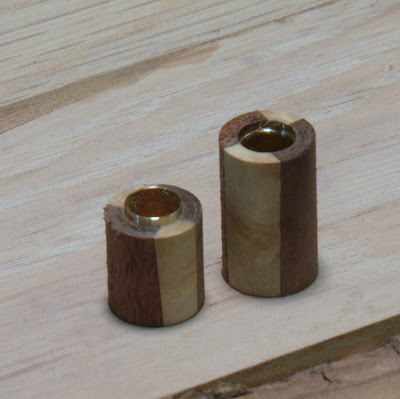
I cut apiece of blood wood off and turned it down and made my upper tube cap and lower nosecone out of it. I then assembled the lower unit and turned it to shape on the mandrel.
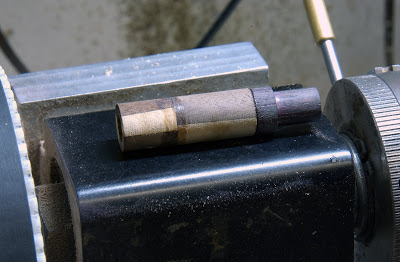
I use a PSI kit the pkmont2 (8mm) euro kit for the 8mm tubes, tranny and tranny connector. I press the tranny threaded connector into an 8mm tube chuck the tube up and cut the shoulders off flush to the tube.
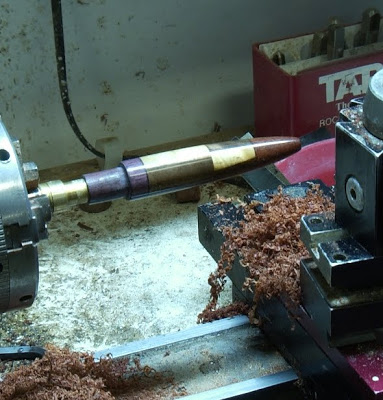
IN the next picture you see the assembled lower unit the first shot of the patchwork upper tube, the blood wood upper cap and the piece of 8mm tube that will be glued into the cap to grab the tranny.
The dimension for length I use is 3.200. That is the distance from the very tip of the nosecone to the shoulder on the threaded coupler that the tranny stops against. I check it several times with the spring off the refill. I cut the tube down a little at a time until its just where I want it and glue it together. The extra piece I cut off is the one that will go into the cap.
BEFORE! I glue the top tube and cap together I check to see how far down the brass tube in the cap needs to be. I then cut it to length and glue it in the cap and then into the tube.

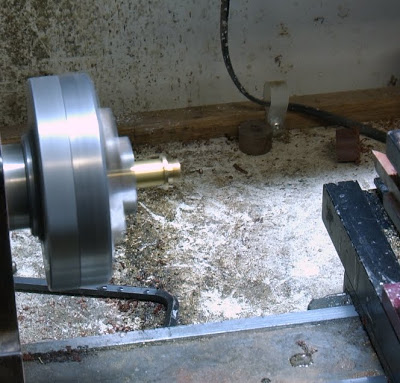
I now mount it on a brass mandrel, shape the cap and tube together, do the ca finish, and start on the Clip.
I decided to do the clip out of purple heart to match the center band. I cut it out by hand and hand finish it With ca.
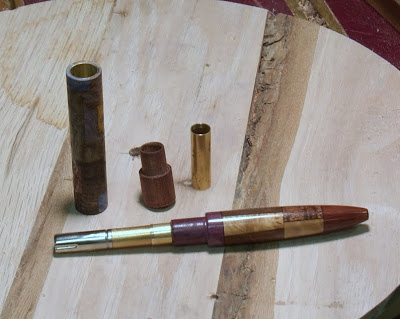
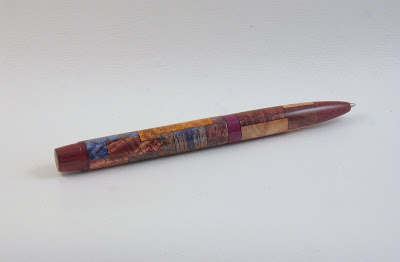
The pen
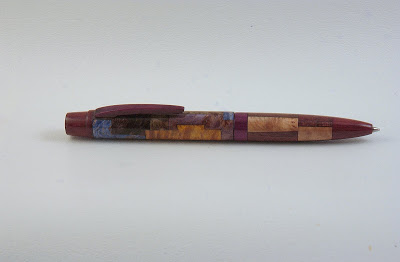
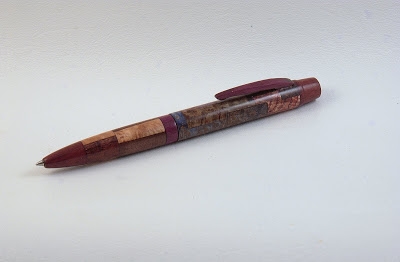
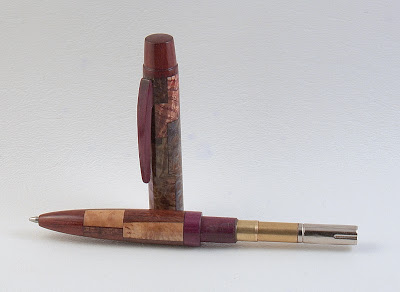
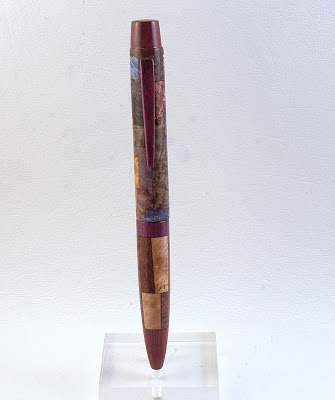
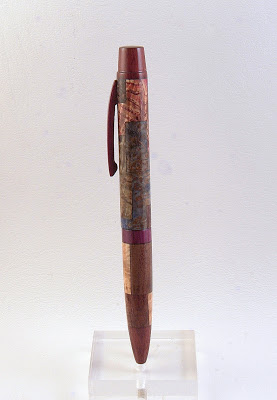
I left a bit of room for improvement there are a couple of places that could be tightened up and done better.
As always all comments and questions are welcome.
Enjoy.
I have never done an Inlay kit so I wanted to pick something easy and forgiving. I chose the Patchwork Kit. When I got home I immediately tried to put it together without looking at the directions. 30 seconds later I got my glasses and the instructions out.
They are actually very easy to assemble if you follow the instructions. I did a dry run to verify that all the pieces fit. Then did the actual assembly, it went together without a hitch.
The kit is supposed to be for a Sierra style/size kit so I grabbed a Zen Tube and glued it onto that. The Zen is longer than the stock Sierras and let me use all of the kit I could.
I decide I wanted to make a pen to match the tube so I used blood wood and Purple heart for the other parts of the pen. At least I think its Blood wood.
IN the pictures I start with making the center band of the pen out of Purple heart. I turn the piece down and drill it with a 5/16 drill bit for the 8mm tube I will use. I clean it up with a cutter and cut it free. The outer diameter is .520 to allow me room to match the lower tube unit once its made and attached.
I decided the lower unit needed to match the upper tube as close as I could make it so I grabbed some scrap Koa, Maple, and walnut and quickly glued up a block of wood. I belt sanded matching surfaces flat and then super glued them together into two pairs. I purposely mis matched sizes and when I glued the two pairs together I angle one side to the other. It moved back a bit and it didn't get quite as much of the angle I wanted.
I then drilled it and turn it round and then cut the relief to fit the purple heart into. I decided the lines were still to straight to match the patch work blank and cut the tube in half. I cut part of the tube out of the middle on one side and made a tenon to the tube on the other piece. I then glued them back together putting them more than 180 degrees out. The first picture of the brass tube with the ribbon of brass is from the cut off tool I cleaned it off and then cut the tenon I needed.
I cut apiece of blood wood off and turned it down and made my upper tube cap and lower nosecone out of it. I then assembled the lower unit and turned it to shape on the mandrel.
I use a PSI kit the pkmont2 (8mm) euro kit for the 8mm tubes, tranny and tranny connector. I press the tranny threaded connector into an 8mm tube chuck the tube up and cut the shoulders off flush to the tube.
IN the next picture you see the assembled lower unit the first shot of the patchwork upper tube, the blood wood upper cap and the piece of 8mm tube that will be glued into the cap to grab the tranny.
The dimension for length I use is 3.200. That is the distance from the very tip of the nosecone to the shoulder on the threaded coupler that the tranny stops against. I check it several times with the spring off the refill. I cut the tube down a little at a time until its just where I want it and glue it together. The extra piece I cut off is the one that will go into the cap.
BEFORE! I glue the top tube and cap together I check to see how far down the brass tube in the cap needs to be. I then cut it to length and glue it in the cap and then into the tube.
I now mount it on a brass mandrel, shape the cap and tube together, do the ca finish, and start on the Clip.
I decided to do the clip out of purple heart to match the center band. I cut it out by hand and hand finish it With ca.
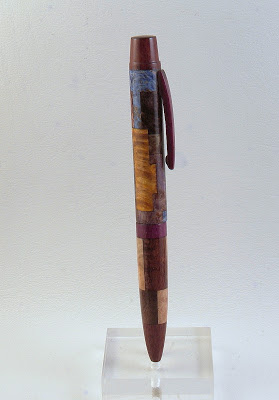
The pen
I left a bit of room for improvement there are a couple of places that could be tightened up and done better.
As always all comments and questions are welcome.
Enjoy.
Last edited:
")
