Watch parts - A learning curve!

Signed-In Members Don't See This Ad
See more from Twissy

Twissy

Member
Joined
Dec 20, 2011
Messages
573
Location
Annesley Woodhouse, Nottinghamshire
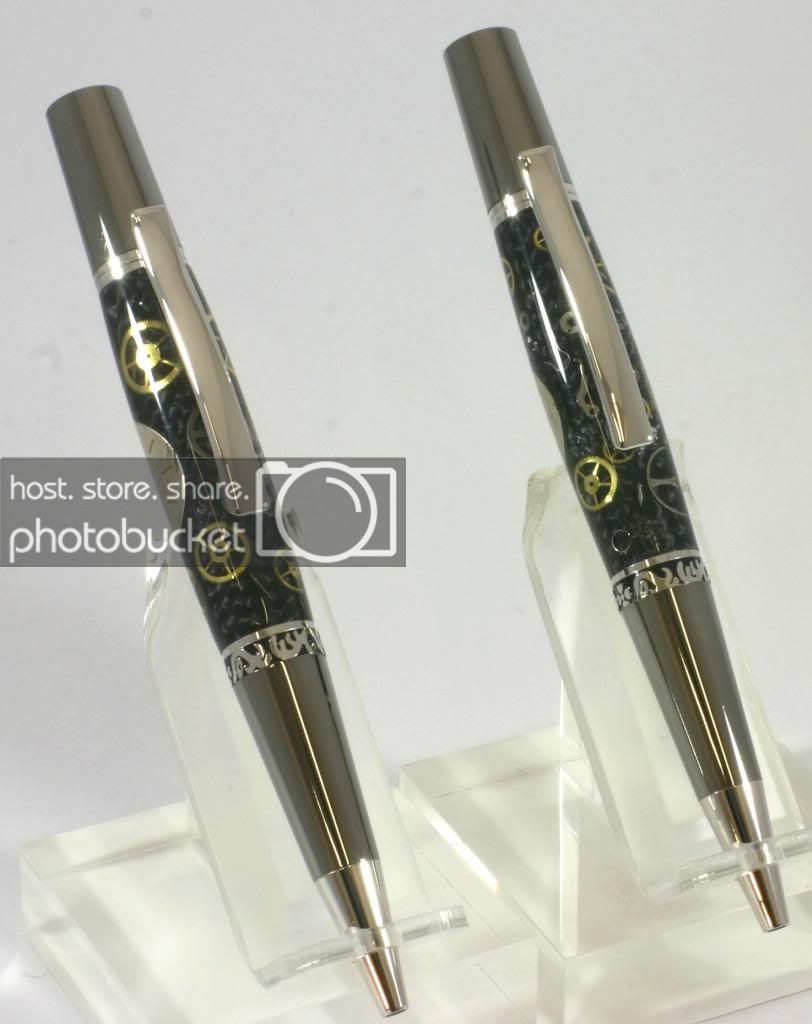
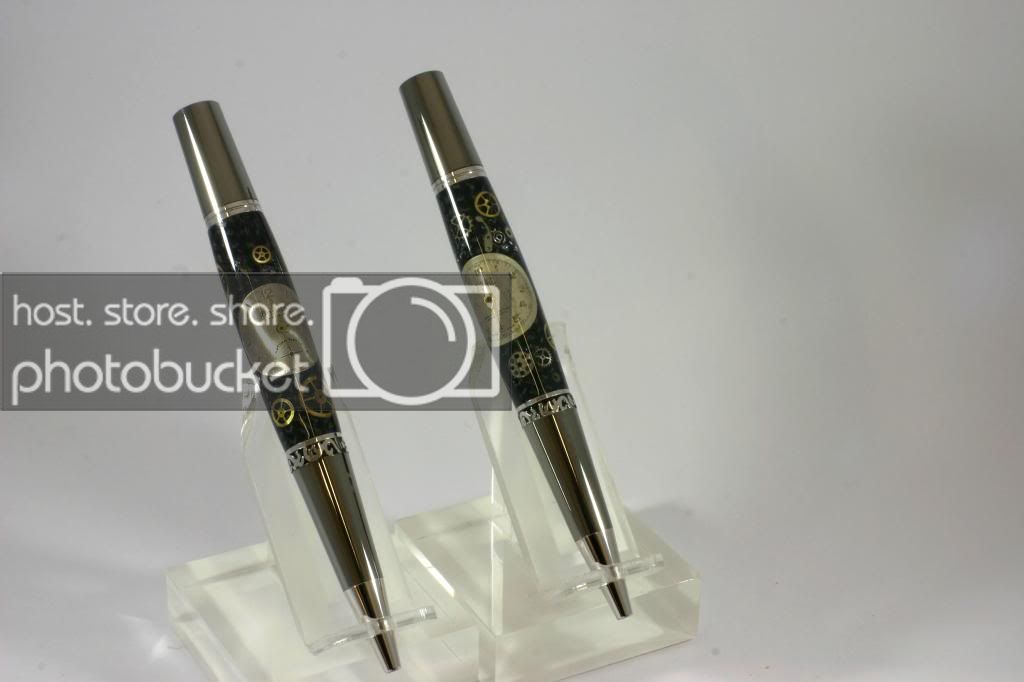
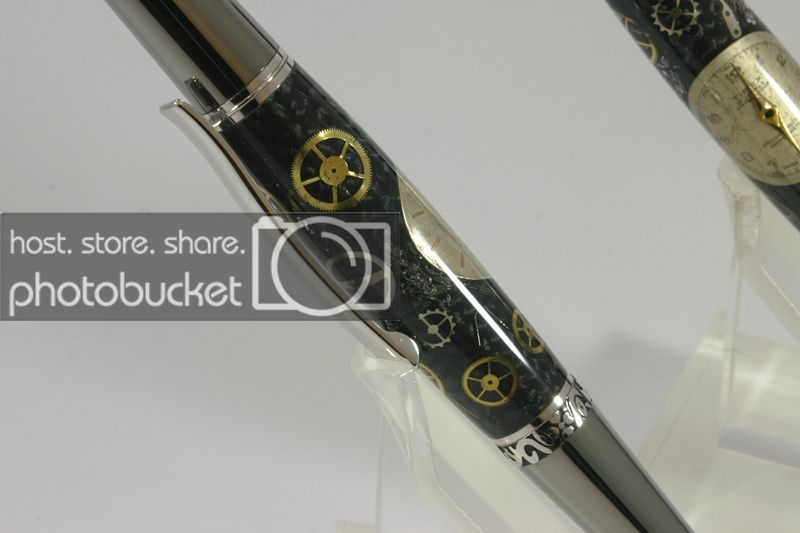
After turning one of Marla's great watch part blanks I wanted to have a go at making them myself.
For a first go I think they are so so!
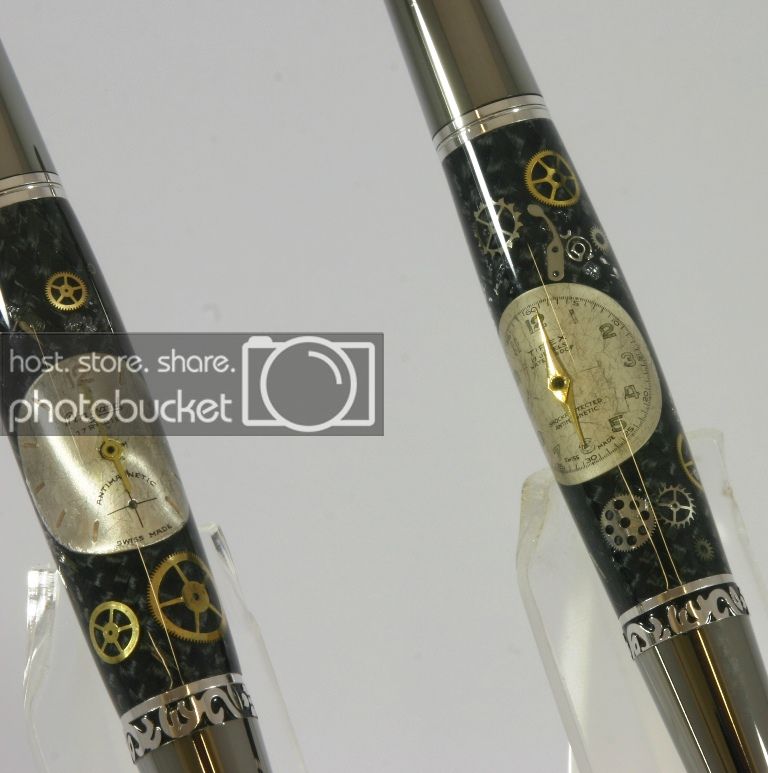
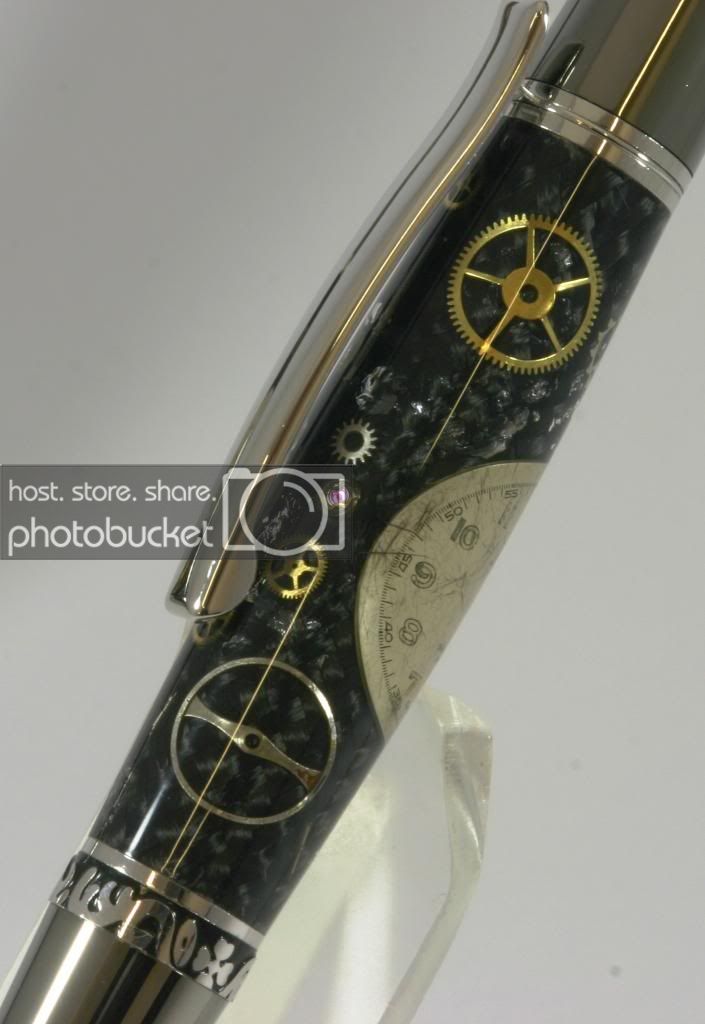
First problem was how to get the carbon sleeve on to the tube, and decided to use clear epoxy....first mistake! What looks like air bubbles is in fact epoxy.
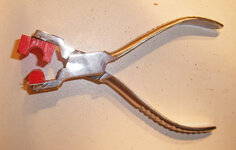
Second mistake was hand bending the parts to go around the tube....a couple of them cracked.
Third mistake was not enough light to see by so consequently didn't notice one cog ended up almost at right angles to the tube so it got snagged when turning.

Next time I intend using the same resin to put the carbon on the tube and also to glue the parts on. Also going to make some kind of former for the parts.

Any suggestions will be more than appreciated!!!:)
IMG_0371_zpseb8b6516.jpg

IMG_0372_zpsd817cb5f.jpg

IMG_0373_zpsaf6a4d36.jpg

IMG_0374_zps9996d357.jpg

IMG_0375_zps6034c163.jpg
 
Signed-In Members Don't See This Ad

PenMan1

Member
Joined
Jul 8, 2009
Messages
6,380
Location
Eatonton, Georgia
John:
I feel your frustration about epoxy gluing the CF tube to the painted pen tube. I picked up a very valuable tip from the carbon fiber tutorial in the library. It's such a simple thing, but just by using my finger to smooth the epoxy really did eliminate the problems.

Fool4Peppers has a CF casting video on YouTube. He is using CA to hold the sleeve. I've got some degassing now to try that method.

As far as "painting" catalysed resin over the CF, I tried that method. I couldn't make it hold well enough to keep the CF from slipping on the tube and causing "cracks". If you can perfect this method, I'd be VERY INTERESTED, as this seems like a very time efficient way to do it.
 

PenMan1

Member
Joined
Jul 8, 2009
Messages
6,380
Location
Eatonton, Georgia
As far as a "jig", I've had decent success drilling a hole about the same diameter at the pen tube into a wood block and then splitting the block with the band saw. Then I use a transfer punch to bend the parts.

One some parts (cogs, etc) I've tried sanding the back sure to make them more pliable. This seems to work, but very hard in finger tips.

Respectfully submitted.
 

Hendu3270

Member
Joined
Mar 13, 2012
Messages
919
Location
Pearland, Texas
Interesting process for sure.

Never turned one of these pen before, and maybe it's just me, but the band closest to the nib looks incomplete. Like it's missing a small band in front of the decorative accent?

Either way, great looking pen and really cool blank.
 

Twissy

Member
Joined
Dec 20, 2011
Messages
573
Location
Annesley Woodhouse, Nottinghamshire
John:
I feel your frustration about epoxy gluing the CF tube to the painted pen tube. I picked up a very valuable tip from the carbon fiber tutorial in the library. It's such a simple thing, but just by using my finger to smooth the epoxy really did eliminate the problems.

Fool4Peppers has a CF casting video on YouTube. He is using CA to hold the sleeve. I've got some degassing now to try that method.

As far as "painting" catalysed resin over the CF, I tried that method. I couldn't make it hold well enough to keep the CF from slipping on the tube and causing "cracks". If you can perfect this method, I'd be VERY INTERESTED, as this seems like a very time efficient way to do it.

Thanks for the input Andy!
I've seen the video using the CA, and discounted it for almost the same reasons as I experienced with the epoxy! I will be very interested to know how you get on with it, and what viscosity of CA you have used.
I did run my finger over the epoxied fibre, but probably not enough. My thoughts for next time was to use something like 0.5% catalyst and "lay up" the CF like you would fibre glass.

My jig was going to be made the same way, but probably using acrylic or even brass, but I hadn't thought of using a transfer punch.... I like the economy of effort in that :) I am going to try to sand the back of the face next time because they are tough to bend!
Regards
John
 

Twissy

Member
Joined
Dec 20, 2011
Messages
573
Location
Annesley Woodhouse, Nottinghamshire
Interesting process for sure.

Never turned one of these pen before, and maybe it's just me, but the band closest to the nib looks incomplete. Like it's missing a small band in front of the decorative accent?

Either way, great looking pen and really cool blank.

Cheers Chris.
I see what you're saying about the accent band. This is the new(ish) Lucida kit from Timberbits. The plating seems to be really good, and at a bargain price too!
Regards
John
 

Joe S.

Member
Joined
Jan 11, 2012
Messages
2,000
Location
South Lyon, MI
I hope I can eventually do somthing like this! That's really good looking for a first try! Can't wait to see more :)
 

healeydays

Member
Joined
Nov 30, 2012
Messages
1,057
Location
Bedford NH
That is a beautiful pen. What type of pens are these blanks they best for as I can't see a slimline being doable as the watch components must have some depth.
 
Last edited:

ToddMR

Member
Joined
May 3, 2010
Messages
1,715
Location
Columbus, OH
Very nice first attempt as others have said. I would be too scared to even try that yet lol. I think they look pretty good, even with the things you mentioned. Here is hoping your next attempt goes more the way you want it to.
 

Curly

Member
Joined
Nov 20, 2010
Messages
4,849
Location
Saskatoon SK., Canada.
Looks good. Some of the brass bits are harder than others and will crack if bent too far. You could try and anneal them with a torch but then you have to figure out how to shine them up again. :eek: If a part does break through the surface a CA finish does a good job of fixing it. Sometimes the better way to go than be chicken and make a guppy shape. :wink:
 

gwilki

Member
Joined
May 20, 2007
Messages
971
Location
Ottawa, ON, Canada.
I do as others have said as far as a jig is concerned. I made mine from a small block of aluminum. I made the hole just smaller than the pen tube, as I found that there was some spring back. A transfer punch works well to bend the part into shape.

I use a very small drop of gel CA to hold the individual pieces in place. I started using epoxy, but not only was it messier, but it took longer to cure than CA. A toothpick serves as the CA applicator, enabling a very small drop that is invisible in the final product.

Yours is very fine.
 

Kenny Durrant

Member
Joined
Sep 11, 2012
Messages
2,505
Location
Sachse Tx. 75048
I agree with the others nice pens . I haven't tried the watch parts but I have made one with the carbon fiber. I painted the tube flat black and used the clear epoxy to glue the fiber to the tube. I put a large amount of epoxy on the tube and some squeezed out when I tightened the fiber on the tube. I used my finger to smooth it out and when it cured I put thin ca over the fiber and smoothed it out as well. I thought I ruined it after the ca but I cast it anyway and after it was cast it looked good as new. I don't know if I was lucky or if that was the way it was suposed to go. I haven't tried the second one yet.
 

JeremyLP

Member
Joined
Jan 23, 2013
Messages
51
Location
Calgary, Canada
I have been reading the forums here for a while, but this thread is the one that prompted me to join.

I have made a few of these pens, and have just bought more dead watches to make more.
013.jpg

I heat up the gears with a candle and them bend them in a form I made using hard maple and a round piece of metal. Once I have it to the right shape I use a tiny amount of epoxy applied with a tooth pick.

I paint my tubes to give myself the most clearance I can.

For thicker pieces, I use a file to file them thinner so there is no chance of turning past the resin and hitting the pieces.

I also like to use the back plate of the watch with the company name on it and it usually has a cool design on it as well.
018.jpg

In all reality, the only thing you an do is experiment to find what works for you.
 

Twissy

Member
Joined
Dec 20, 2011
Messages
573
Location
Annesley Woodhouse, Nottinghamshire
Thank you folks for all your input, it is greatly appreciated:)

Jeremy, your watch pens look fantastic, and I especially like the added detail of the back of the watch. I have thought about not using the carbon, and on some of the pens I want to use it may well be the only way! A couple of others have mentioned heating the parts, and it did cross my mind. How do you clean them afterwards?

Once again, thanks folks!
 

Dai Sensei

Member
Joined
Jan 14, 2009
Messages
482
Location
Gold Coast Queensland Australia
I make my blanks by using a thin layers of PC and press the watch parts into it. They stick pretty well and Ok when the pC is baked. I then coat the blank with a few coats of clear acrylic paint and leave to dry completely. i then coat the blank with PR using a paint brush to ensure I get all the nooks, prior to casting in a resin saver type mold, no pressure.

As far as the watch parts, I bought a watch pin bending plier that has teflon guides screwed on (off Ebay), but not the right shape. I then make my own guide using some cutting board. I have attached photo of finished pliers and how I make the guides.

Hope it helps.
 

Attachments

  • Watch PLIER MOLD.pdf
    17.4 KB · Views: 178
  • watch pliers.jpg
    watch pliers.jpg
    137.4 KB · Views: 125

SDB777

Member
Joined
Feb 6, 2010
Messages
6,620
Location
Cabot, Arkansas USA
For a 'first' I'd say you done a lot better then most that have tried(only to never try again)!

PenMan, Jeremy have both given some really nice tips. Maybe I'll try this once more?


What's the Sierra type kit that uses larger nib, finial(making the casting thicker?


Scott (keep on turnin') B
 

Twissy

Member
Joined
Dec 20, 2011
Messages
573
Location
Annesley Woodhouse, Nottinghamshire
Thanks guys.

Neil, think I'll leave the PC for a while, although it is somewhere on my todo list!!! I really like your use of the pliers...I'm going to search in the garage tomorrow for something similar, and thanks for the plans, I will be using them.

Scott, I think the Sierra Vista gives the greatest amount of clearance for casting. A couple of others that give a reasonable amount that I know of are the Aero/Elegant Beauty and the Majestic Squire.

Regards
John
 

ed4copies

Local Chapter Manager
Joined
Mar 25, 2005
Messages
24,528
Location
Racine, WI, USA.
When we were doing a lot of casting objects in pen blanks, I measured every kit I could find (about 2007?) The Sierra Vista was the largest and provided a little over 1 mm in thickness, for "implants".
 

jttheclockman

Member
Joined
Feb 22, 2005
Messages
19,148
Location
NJ, USA.
Nice try first time.


You have been given advice on the bending and all so I will not touch that. But from your closeups it looks like you are using the wrong carbon fiber material. There are different weights as well as cross patterns. To me it looks like you have a heavy material. I always glue the material on with the same resin I am casting in. I let dry and then add pieces using med CA. Let dry and outgas before casting. Sierra Vista is a good kit to cast as well as Timberbits Spring Blossom ( the lower barrel is great for casting but the upper barrel is thin)
 

JeremyLP

Member
Joined
Jan 23, 2013
Messages
51
Location
Calgary, Canada
After I heat up the gears and bend them, I wipe them off really fast, usually that is fast enough to get most of the carbon off before it really sets.
 

JeremyLP

Member
Joined
Jan 23, 2013
Messages
51
Location
Calgary, Canada
Also, John T. I love your ebony and holly pen you posted on lumberjocks. Thats the pen that inspired me to start segmenting. It inspired this pen, made from yellow cedar burl, dyed green stab maple burl and black veneer.

green,yellow baron.jpg

green, yellow baron 2.jpg:
 

Hendu3270

Member
Joined
Mar 13, 2012
Messages
919
Location
Pearland, Texas
Interesting process for sure.

Never turned one of these pen before, and maybe it's just me, but the band closest to the nib looks incomplete. Like it's missing a small band in front of the decorative accent?

Either way, great looking pen and really cool blank.

Cheers Chris.
I see what you're saying about the accent band. This is the new(ish) Lucida kit from Timberbits. The plating seems to be really good, and at a bargain price too!
Regards
John

Gonna have to get me a few of these.
 

Twissy

Member
Joined
Dec 20, 2011
Messages
573
Location
Annesley Woodhouse, Nottinghamshire
Nice try first time.


You have been given advice on the bending and all so I will not touch that. But from your closeups it looks like you are using the wrong carbon fiber material. There are different weights as well as cross patterns. To me it looks like you have a heavy material. I always glue the material on with the same resin I am casting in. I let dry and then add pieces using med CA. Let dry and outgas before casting. Sierra Vista is a good kit to cast as well as Timberbits Spring Blossom ( the lower barrel is great for casting but the upper barrel is thin)

I think you have confirmed my suspicions about the CF sleeve. I bought it as lightweight, but it seemed thick, and very hairy! And anyone with the initial JT has to be right :wink:
This little island of ours is so limited for supplies I think I may well have to get some in from somewhere else.
Regards
John
 

jttheclockman

Member
Joined
Feb 22, 2005
Messages
19,148
Location
NJ, USA.
Also, John T. I love your ebony and holly pen you posted on lumberjocks. Thats the pen that inspired me to start segmenting. It inspired this pen, made from yellow cedar burl, dyed green stab maple burl and black veneer.

View attachment 88336

View attachment 88337:


Jeremy

Thanks for the kind words. I do hope to eventually get a few more out there to show. Time is not friendly right now.

May I suggest you show this pen in Show us your pen forum. It deserves to be seen by many.


Nice try first time.


You have been given advice on the bending and all so I will not touch that. But from your closeups it looks like you are using the wrong carbon fiber material. There are different weights as well as cross patterns. To me it looks like you have a heavy material. I always glue the material on with the same resin I am casting in. I let dry and then add pieces using med CA. Let dry and outgas before casting. Sierra Vista is a good kit to cast as well as Timberbits Spring Blossom ( the lower barrel is great for casting but the upper barrel is thin)

I think you have confirmed my suspicions about the CF sleeve. I bought it as lightweight, but it seemed thick, and very hairy! And anyone with the initial JT has to be right :wink:
This little island of ours is so limited for supplies I think I may well have to get some in from somewhere else.
Regards
John


John

If you continue to use that fiber you run the risk all the time of gas bubbles traped and then released when cast and that can cause bad things. Keep at it. This is how we learn.
 
Top Bottom