Walnut / Ebony roller ball wooden pen

Signed-In Members Don't See This Ad
See more from mredburn

mredburn

IAP Activities Manager
Staff member
Joined
Jul 5, 2009
Messages
8,753
Location
Fort Myers FL
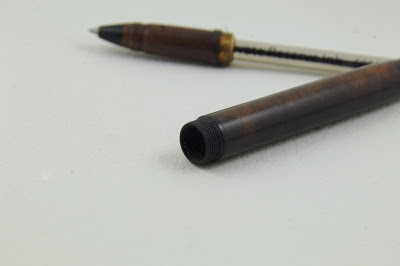
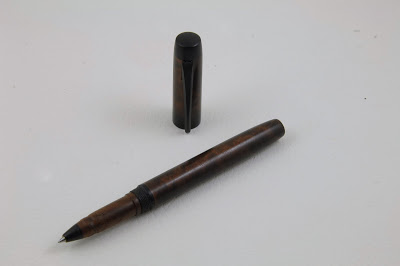
Every once in a while I have a pen that it becomes a matter of principle to finish. This was one of them. It supplied me with a great deal of "design" opportunities as I went. First it was supposed to be made of walnut with Koa accents and nose cone. There isn't a lick of Koa on it. After I made the body in walnut I started in on the koa nose cone. Just as I'm finishing the tip where the refill comes out I caught a void in the koa and ripped the tip of the nose cone apart. So then I made a new tip for it out of ebony. Now it didn't match the pen. I set that nose cone aside for another pen and made the one thats on the pen now. It's in the background of the first picture with the threaded ebony connector.
ce%252520walnut%2525201.jpg


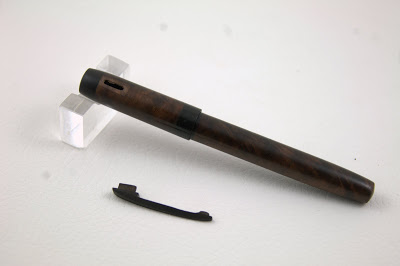
I had finished the pen and was cutting the flat spot for the clip to set in when a chunk of wood blew off the pen. Horsefeathers! or something to that effect.
ce%252520walnut%2525202.jpg


This was supposed to be a closed end pen. But now I had to cut the wood off down to the edge of the bottom cut.
ce%252520walnut%2525204.jpg


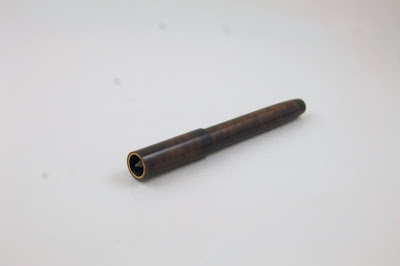
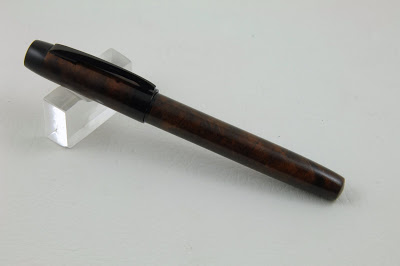
I then took a scrap piece of ebony and made a new finial/cap for the upper tube and refinished it. Re cut the slot and flat spot for the clip and assembled it. The clip for this pen and all my wood pens are hand cut out, shaped and finished.
ce%252520walnut%2525206.jpg
ce%252520walnut%2525205.jpg


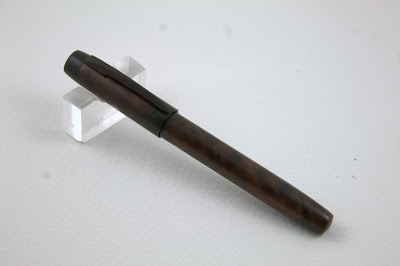
After I epoxied the clip on I used Dr's Woodshop "walnut oil, shellac and wax" wipe on finish on the the pen. It will go to my son in law that doesn't like CA finishes but prefers a hand rubbed oil finish look.
ce%252520walnut%2525207.JPG
ce%252520walnut%25252011.JPG


ce%252520walnut%25252012.JPG


Comments welcome.
 
Signed-In Members Don't See This Ad

wiset1

Member
Joined
Aug 25, 2010
Messages
2,222
Location
Florida
She went kicking and screaming the whole...entire way! Glad to see that you stuck with it because it's a fantastic looking pen and had you not of shown us you wouldn't have been able to tell that this wasn't the intended design idea. Really great turn!
 
Joined
Jun 28, 2010
Messages
1,830
Location
Pineville, Louisiana
Holy macaroni... you stuck with ith through all of that? I have had my share of go wrongs but all that and I would have given up. In the end though your designed and re-re-re designed pen turned out great. I really like the fact that you make your own wooden clips. The wood nib adds a whole different look to your pens.
Thanks for showing your hard earned pen.
Brian K.
 

Wingdoctor

Member
Joined
Jul 8, 2011
Messages
272
Location
Columbus, OH
Would you be able to offer instructions/directions on how you make the wood clip?

The pen is beautiful! With all the problems that developed you hung in there and made artistic changes to work with what you had.

I was told at work years ago that the pay was based on the ability to solve problems, not just work ethic. The bigger the problems you are able to solve, the higher the wage paid. I hope you are able to realize the proper pay scale for your problem solving for paying customers, as your problem solving skills are exceptional.
 

firewhatfire

Member
Joined
Mar 7, 2011
Messages
3,813
Location
Columbiana, Alabama
HorseFeathers...............I almost ended up with a headache reading about you trying to figure that thing out after breaking it. The finished product is well worth the extra effort.

Phil
 

bluwolf

Member
Joined
Oct 2, 2008
Messages
995
Location
SW Florida
Um...how did I miss this? Like Dale, I saw this pen in person. They do look great. But, to see the clip as a separate part in your hand... I get tired just thinking about making one. I always tell him, better him than me.

Mike
 

mredburn

IAP Activities Manager
Staff member
Joined
Jul 5, 2009
Messages
8,753
Location
Fort Myers FL
Bruce, The clips are easy to make. I will put together a better set of pictures when I make the next one but I start with a piece of wood the width of the clip. I draw the profile on the side and cut it out on a band saw. I then cut and shape the bottom tab and bump on the front of the clip with a jewlers saw or a file until I get the shape I want. I have a Ridgid oscillating sander I use to shape the upper angles on the clip.
I then coat the clip with CA except the bottom tab. Then hand sand the clip like you would a blank down through the grits and MM. Epoxy the clip into the hole made in the pen. It takes me about an hour to cut and shape the clip and coat it with ca.
Depending on conditions another 10- 20 minutes to had sand the CA.
 

sumterdad

Member
Joined
Sep 1, 2011
Messages
1,159
Location
sumter sc
If I could get mine to look that good after all that trouble. I would be doing pretty good. It looks good
 
Top Bottom