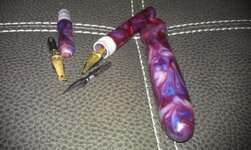
This is exactly what I am looking for. I have a artist who paints oils and insists on signing them with India Ink. I convinced her on a another ink that will serve her better but cannot figure out a way for her to apply her signature. Your dip method using the calligraphy point is perfect. I need to know everything you did to make this pen.
You seriously liked the idea? Cool!
It was very simple.
**Body**
1) I chucked up the blank, drilled a 9mm hole on my lathe and taped it with a 10/1mm tap for the body to section.
2) I made a small aluminum plug with the 10/1mm threads and plugged the body.
3) I turned down the part that the cap will thread to and threaded it with a 14/1mm die. Then removed the 10/1mm plug.
4) I used a small aluminum rod as a mandrel, I turned most of it down to slide it into the 9mm hole and threaded the last bit with the 10/1mm die to accept the body.
5) I turned the rest of the body down just below the 14/1mm threads. Sanded and polished.
**Section**
1) Turned down 10/1mm tenon and die cut threads.
2) I made a small aluminum mandrel by drilling and taping 10/1.
3) I screwed the section into the mandrel and drilled a 1/4" hole, 3/4" deep with my lathe.
4) I chucked up some scrap blank and turned a 1" long rod a little less than 1/4" thick.
5) When I found the right thickness. I used 2 drops of CA making sure to keep a gap for the nib.
6) Chucked up the section using that aluminum mandrel, shaped and finished.
**Cap**
1) Made an aluminum mandrel with a shaft that would go in a 13mm hole and threaded the last bit with my 14/1mm die.
2) Chucked up the blank, drilled a 13mm hole deep enough to accommodate the section and nib, and taped with the 14/1mm.
3) Chucked up the mandrel and used it to shape, sand and polish the cap.
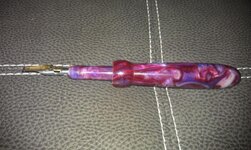
Because the body is below the cap threads it uses the same threads to post the cap.
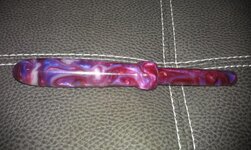
If you DO plan on making one for gods sake PLEASE don't make it as ugly as this one.
** I would love to see how yours comes out. Please post your version. **