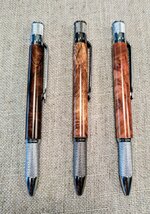
Looks great and fantastic finish.
What's your finishing method ?
Thanks! I do CA, using Bob Smith Industries thin and medium, here is a rough breakdown of what I did for these:
Lathe set at 500 rpm
Blank mounted on lathe between centers (no bushings)
CA applied with paper towel
2 coats of thin by "dribbling" on blank while simultaneously wiping excess
When the blank is raw it really soaks up the thin
2 coats of thin by applying to paper towel first
4 coats of medium applying to paper towel first (accelerator between coats)
4 coats of thin by applying to paper towel first (accelerator between coats)
Sand aggressively with 400 until no more (or very few) "shiny spots"
sand thru grits (600, 800, 1000, 1200, 1500, 2000)
4 to 8 more coats thin by applying to paper towel first (accelerator between coats)
sand thru grits (400, 600, 800, 1000, 1200, 1500, 2000)
should have eliminated
all of the tiny pits, if not then more sanding and reapply coats of thin
Micromesh wet through all 9 pads
HUT Ultra Gloss using soft cotton (old T shirt)
With the Rose Gum Burl I filled the voids with medium (with the lathe off) and then after the glue set I turned it down using the skew. This helped reduce the amount of sanding needed.
In general I am happy with the finish, but there still seem to be pesky micro scratches. Really only visible on the darker woods. From what I can tell I am not alone in this with the MM pads. When I get some time and money I am going to try out a buffing system which will hopefully eliminate this issue.