
You are using an out of date browser. It may not display this or other websites correctly.
You should upgrade or use an alternative browser.
You should upgrade or use an alternative browser.
Thought I would try something different
- Thread starter swanny70
- Start date
Signed-In Members Don't See This Ad
See more from swanny70


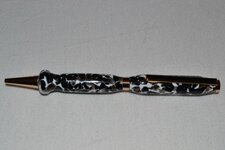
I hope this is enough to give you some ideas/inspiration. I had to limit myself before I posted like 200 pictures here.
The process is pretty simple, actually. Get a bushing that's larger than the standard Slim bushing. The Comfort Twist center bushing is a good place to start. Turn it all down, then swap the Comfort bushing out for a regular Slim bushing. You'll have the edges hanging free so you can sand/polish the edges round and smooth. If you don't, it will be pretty ugly. The pen mill doesn't leave a dead-perfect surface every time, and when you have two imperfect surfaces mated with those sharp angles, the imperfections magnify each other significantly. I also have examples of that outcome if you want pics.
What's the bushing for? I just butt the barrels up against each other and cut right across them.
If you're not applying a finish (e.g., just polishing plastic) then you can do it like this start-to-finish. If you are applying a finish, you probably want to separate the barrels with a bushing so they don't get glued together - but no need to do this until after they are cut to shape.
I've done that, too. I like having some guides for final thickness. There's only so much extra barrel the clips can accomodate and I've run into that a couple of times. And I just end up with better results. Not knocking your process. I just need to take steps to me-proof it some.
Signed-In Members Don't See This Ad
corian king
Member
Nice Job!! Penn state and others (probably) sell a real nice set of beading tools.They make it alot eaiser and the customers love it.
azamiryou
Member
It's much easier if you ditch the center band. Make your own or do without, and you end up with a lot more freedom to make the pen any shape you want - no need to get back to "center band size" in the middle.
Drstrangefart
Member
Matt hit the nail on the head. Use a larger bushing in the center, remove it before polishing and replace it with a regular bushing so you can soften the edges.
swanny70
Member
Hey guys, I have pen looking for pictures on a slimline without the center ring. Haven't found any. Could you guys please show me some pictures? I'm new to this and can't seem to wrap my brain around how to match the 2 blanks up without a center ring. Thanks!
Drstrangefart
Member
I hope this is enough to give you some ideas/inspiration. I had to limit myself before I posted like 200 pictures here.
Drstrangefart
Member
Hey guys, I have pen looking for pictures on a slimline without the center ring. Haven't found any. Could you guys please show me some pictures? I'm new to this and can't seem to wrap my brain around how to match the 2 blanks up without a center ring. Thanks!
The process is pretty simple, actually. Get a bushing that's larger than the standard Slim bushing. The Comfort Twist center bushing is a good place to start. Turn it all down, then swap the Comfort bushing out for a regular Slim bushing. You'll have the edges hanging free so you can sand/polish the edges round and smooth. If you don't, it will be pretty ugly. The pen mill doesn't leave a dead-perfect surface every time, and when you have two imperfect surfaces mated with those sharp angles, the imperfections magnify each other significantly. I also have examples of that outcome if you want pics.
GoatRider
Member
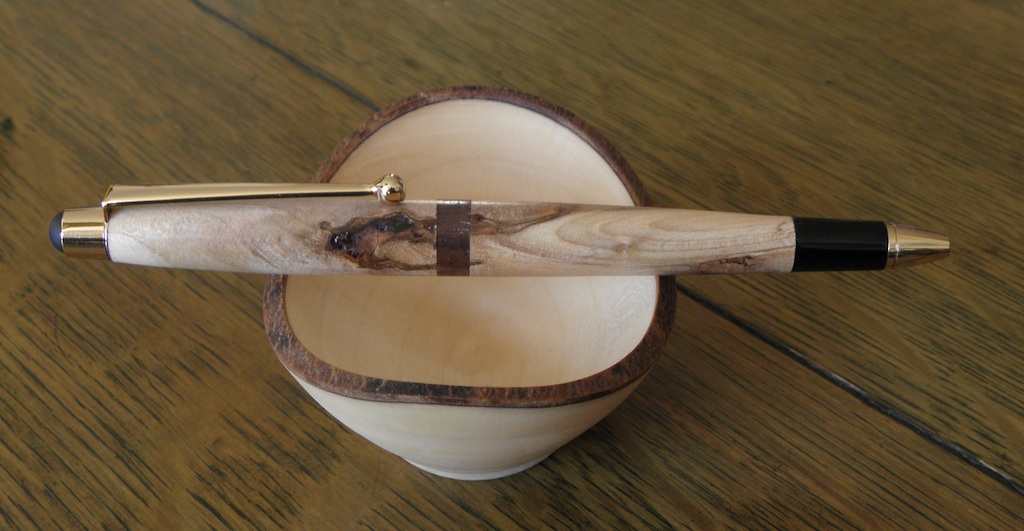
You can also carve your own center band with a piece of contrasting material. This is silver maple with a bit of walnut for the band:
swanny70
Member
Thanks, guys! Those pictures help alot. I will post a picture in the next few days.
azamiryou
Member
Use a larger bushing in the center
What's the bushing for? I just butt the barrels up against each other and cut right across them.
If you're not applying a finish (e.g., just polishing plastic) then you can do it like this start-to-finish. If you are applying a finish, you probably want to separate the barrels with a bushing so they don't get glued together - but no need to do this until after they are cut to shape.
Drstrangefart
Member
Use a larger bushing in the center
What's the bushing for? I just butt the barrels up against each other and cut right across them.
If you're not applying a finish (e.g., just polishing plastic) then you can do it like this start-to-finish. If you are applying a finish, you probably want to separate the barrels with a bushing so they don't get glued together - but no need to do this until after they are cut to shape.
I've done that, too. I like having some guides for final thickness. There's only so much extra barrel the clips can accomodate and I've run into that a couple of times. And I just end up with better results. Not knocking your process. I just need to take steps to me-proof it some.