Phillip Kelley
Member
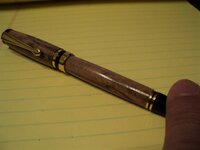
I am not good @ photography either! You can't se it, but there is a 1/4' crack on the lower barrell, close to the ring at the nib. I don't know if this happened during assembly or later. I diidn't notice it until about an hour after I completed the assembly and was showing it ot my wife. Is it possible to dis-assemble, turn that section off & glue something else in? Any recommendations on what variety of wood to use?