Semi Kitless w/ Triple Start Tap and Die

Signed-In Members Don't See This Ad
See more from bluwolf

bluwolf

Member
Joined
Oct 2, 2008
Messages
995
Location
SW Florida
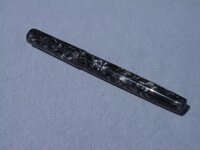
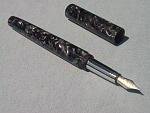
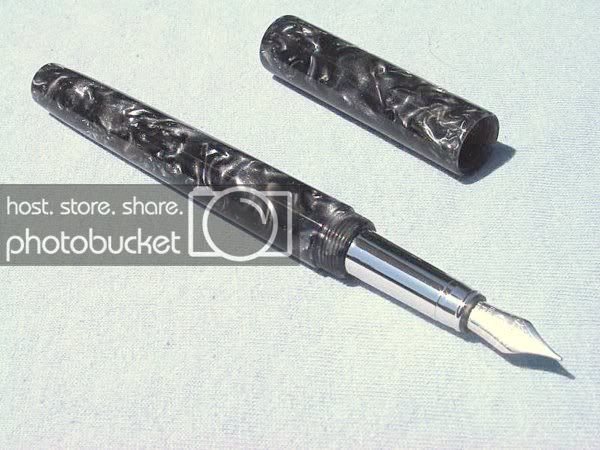
My first picture post. Yes, my photography leaves much to be desired. One thing at a time. Like many others I got my triple start tap and die from the group buy (Thanks again Joe).

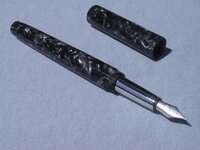
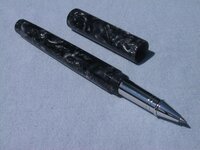
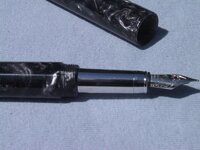
It's my first try with it but it didn't come out too bad so I figured I'd post it, right? I fitted it with both a rollerball and fountain pen nib because I couldn't decide which one I liked better.

Mike
 

Attachments

  • ts5.jpg
    ts5.jpg
    62.1 KB · Views: 452
  • tsfp.jpg
    tsfp.jpg
    71.5 KB · Views: 491
  • ts1.jpg
    ts1.jpg
    70.6 KB · Views: 351
  • tsfp2.jpg
    tsfp2.jpg
    64.6 KB · Views: 438
Signed-In Members Don't See This Ad

mredburn

IAP Activities Manager
Staff member
Joined
Jul 5, 2009
Messages
8,753
Location
Fort Myers FL
Nice job Mike I like the rollerball look but the Fountain pen is my favorite. Your pictures arent that bad..
 
Last edited:

mredburn

IAP Activities Manager
Staff member
Joined
Jul 5, 2009
Messages
8,753
Location
Fort Myers FL
A quick dance with Picasa3
 

Attachments

  • roux fountain pen.jpg
    roux fountain pen.jpg
    3.9 KB · Views: 672
Last edited:

bluwolf

Member
Joined
Oct 2, 2008
Messages
995
Location
SW Florida
Cool! Now we know the tap and die work!

Nice pen! What's the material?

- Joe

The tap and die worked very well Joe. I expected more drama on the first go around. It was a slab about .700 thick that I've had around for longer than forever. I ripped off a piece on the tablesaw then turned it into a rod to get me started. I'm really not sure but I think it was called Crushed Velvet. I don't have a clue where I got it. I think it was given to me.

I know and use tap and dies. But what is a Triple tap and die? Not familiar with it. Enlighten please. Russ

Triple start threads are what are on all the high end pens, to couple the cap and barrel. There are 3 starts on them instead of the single start of a normal tap and die. It gives you a fine thread with a steeper pitch so it takes less turns to screw the two parts together. I'm sure someone else can explain it better than me.

Mike
 

bluwolf

Member
Joined
Oct 2, 2008
Messages
995
Location
SW Florida
A quick dance with Picasa3

Mike, I can't get your attachment to open to a larger view. Is it me?

My wife just got home from work with a battery for the camera remote so I don't have to touch the camera when I take a pic. Then I need to work on everything else.

Mike
 

mredburn

IAP Activities Manager
Staff member
Joined
Jul 5, 2009
Messages
8,753
Location
Fort Myers FL
No, its not you. its just a copy of your picture and it wont blow up any bigger. DO you have a picture editer PRogram? Picasa 3 is free and it will allow you to upload your pictures so you can post them in larger sizes.
 

OKLAHOMAN

Member
Joined
May 17, 2006
Messages
10,228
Location
Costa Rica
See if this is better:Now thats a great job....Got mine yesterday, need to make time to use it.
tsfp.jpg

Picture edited with Picasa3
 
Last edited:

Dalecamino

Local Chapter Leader
Joined
Jan 2, 2008
Messages
14,572
Location
Indianapolis, In.
Nice job with the new tap. I favor the FP nib too, but the RB is nice as well. The threads look real nice. I use Picasa 3 also for photo editing. You should see my pictures without it :redface:
 

mredburn

IAP Activities Manager
Staff member
Joined
Jul 5, 2009
Messages
8,753
Location
Fort Myers FL
IF you want download picassa and i can come over and teach you all I know in 5 minutes IF we include coffee.
24.gif
 

mredburn

IAP Activities Manager
Staff member
Joined
Jul 5, 2009
Messages
8,753
Location
Fort Myers FL
See if this is better:Now thats a great job....Got mine yesterday, need to make time to use it.
tsfp.jpg

Picture edited with Picasa3
bluewolf%20pen.jpg


Geez Mike by the time we get through with your pen it will be ready for the front page.:biggrin:
 

bluwolf

Member
Joined
Oct 2, 2008
Messages
995
Location
SW Florida
Wow. That was painless. I just have to post them then you guys can fix them for me long distance:) Imagine when I make a pen really worth posting. Mike, I may very well take you up on your offer. The coffee is no problem.

Mike
 

mredburn

IAP Activities Manager
Staff member
Joined
Jul 5, 2009
Messages
8,753
Location
Fort Myers FL
Mike
Did you thread the outside triple threads first or the inside 8.4 threads first. Others may wish to know as well.

Mike
 

workinforwood

Member
Joined
Mar 1, 2007
Messages
8,173
Location
Eaton Rapids, Michigan, USA.
Great looking pen Mike! I'm just not crazy about the grip, it just doesn't fit right with everything else. You know, you can unscrew the nib section and pull it out, then chuck that grip and spin it down thinner, then slide a piece of acrylic over the top of it to totally cover it and give it some shape. I'd put some tape on the threads of the grip, chuck it in a collet, and use the tailstock on the other end, and a woodchuck scraper will peal that soft metal right down quick. I can see by the shoulder where the grip meets the cap threads, you have tons of nice working room to beef up the grip too. When you do higher end shows, customers that are deep into fountain pens, like a grip shape that won't slip out of their fingers..like the El grande style kits use. That's my comments...the craftsmanship you put into the non kit part looks superb!
 

bluwolf

Member
Joined
Oct 2, 2008
Messages
995
Location
SW Florida
Let me know when this takes place. I like coffee too:biggrin:

Well, why didn't you say so when you were here:) Get with Mike and see what works for him then let me know, I'm flexible.

Mike
Did you thread the outside triple threads first or the inside 8.4 threads first. Others may wish to know as well.

Mike

I threaded the inside 8.4 first while it was a 5/8ths rod. Then I turned the tenon down and cut the triple threads.

Mike
 

bluwolf

Member
Joined
Oct 2, 2008
Messages
995
Location
SW Florida
Great looking pen Mike! I'm just not crazy about the grip, it just doesn't fit right with everything else. You know, you can unscrew the nib section and pull it out, then chuck that grip and spin it down thinner, then slide a piece of acrylic over the top of it to totally cover it and give it some shape. I'd put some tape on the threads of the grip, chuck it in a collet, and use the tailstock on the other end, and a woodchuck scraper will peal that soft metal right down quick. I can see by the shoulder where the grip meets the cap threads, you have tons of nice working room to beef up the grip too. When you do higher end shows, customers that are deep into fountain pens, like a grip shape that won't slip out of their fingers..like the El grande style kits use. That's my comments...the craftsmanship you put into the non kit part looks superb!

Thanks, everything you said is correct. This was just a prototype to work out any bugs with the triple start set. Figure out hole and tenon dimensions, get a feel for how much "meat" was left between the inner hole and threads and the triple start threads around, cap to barrel fit, etc.

But once I got that far I figured why not just finish it into a working pen. Get a feel for the weight and balance, etc. I actually screwed up and didn't step drill the cap so I couldn't taper it. Although I didn't think it looked too bad with the straight cap. Now, on to the next one...

Mike
 

bluwolf

Member
Joined
Oct 2, 2008
Messages
995
Location
SW Florida
Guys if it's Cuban coffee I might even show up...:wink::cool:

Sorry Roy, I have nothing that exotic, ask Mike R. But he had two cups so I guess it wasn't the worst coffee he ever had...or he was just being polite. You're welcome to bring some though, if you like. I'm sure we'd be happy to drink it.

Mike
 

drgoretex

Member
Joined
Aug 14, 2010
Messages
543
Location
Winnipeg
Woo-Hoo! Sweet! Great to see more kitless on the way! Gorgeous work!

(Down side of living this far away...gotta wait longer for the tap and die to get here...)

Ken
 
Last edited:

NewLondon88

Local Chapter Leader
Joined
May 15, 2008
Messages
5,077
Location
Claremont NH
NOW it's ready for the front page.. :tongue:
 

Attachments

  • celebrity.jpg
    celebrity.jpg
    30.1 KB · Views: 149
Last edited:

MartinPens

Member
Joined
Apr 3, 2010
Messages
1,813
Location
Medford, Oregon, USA
NewLondon88 said:
NOW it's ready for the front page.. :tongue:

LOL

Took me a few seconds to realize that the pen was in the photo! : ) So THAT'S the next step to pen presentation, huh?

Martin

Sent from my iPad using Forum Runner
 

Mapster

Member
Joined
May 21, 2010
Messages
505
Location
Orlando, Florida
What a pen! that is really cool, probably one of the cooler pens of yours I have seen. Great job, and definitely go fountain in my opinion. The nib works really well with the whole theme of the pen. Very nice!

Marshall
 

mredburn

IAP Activities Manager
Staff member
Joined
Jul 5, 2009
Messages
8,753
Location
Fort Myers FL
Wow...Okay, Mike, Roy, sorry, you guys are out. Charlie's doing all my photo work now:biggrin:

Mike[/quote]


Let us know how that works out for you.........
24.gif
 

cnirenberg

Member
Joined
Jan 26, 2004
Messages
2,700
Location
Fort Myers, Fl
Mike,
That's too sweet. I have to call Mike Redburn. Now that the hutch is done, it's possible I can get some turning time in.
 
Last edited:
Signed-In Members Don't See This Ad
Top Bottom