TerryDowning
Member
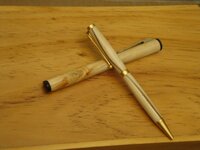
I just got notified by terryF that he received the pens I sent him. His camera is broken so here are some photos I took before I sent them.

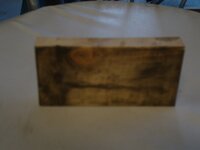
I started with this scrap of construction grade pine that was a trusty shop assistant for all kinds of things over the years. I figured this would be a fitting end for a reliable companion. I used the pine PITH as an opportunity to experiment and try new things.

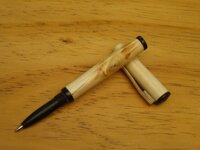
This is my first attempt at a completely kitless pen. The only difference not photographed is that I modified it to have a postable cap as the length of the pen seemed short in the hand. The front section and finials are turned from a rigid urethane material similar to alumilite. The tubes are 3/8" from a local hobby store and have a larger wall thickness than standard pen tubes. This allowed me to tap the cap and barrel with a 3/8" X 24 thread. The barrels did flare a bit while taping but were holding the section securely. The clip is laminated from 4 sheets of veneer alternating walnut and maple formed with a home made press and CA glued to the cap. The refill is a parker style ballpoint, a roller ball refill would not fit in the constraints of the section. The wall got too thin and buckled when I tried. I need a larger diameter (7/16"? 1/2"?) to accommodate a true roller ball. I only have a standard SAE tap and die set at present so my options on threads are currently limited by tool selection.

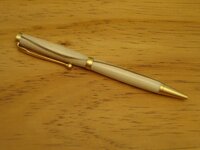
I also sent a segmented slimline with a satin gold finish. The blank was cut with a scroll saw, the inner segment is walnut veneer glued with yellow carpenter's glue and pressed into place with some clamps and left to dry.

The finish on both pens is CA.
Sadly, Terry informs me that the kitless pen did not survive the trip to South Africa but he will try to repair.
An album of full size photos can be seen on my sky drive galleries
Thanks for looking comments are always welcome.
Terry

I started with this scrap of construction grade pine that was a trusty shop assistant for all kinds of things over the years. I figured this would be a fitting end for a reliable companion. I used the pine PITH as an opportunity to experiment and try new things.

This is my first attempt at a completely kitless pen. The only difference not photographed is that I modified it to have a postable cap as the length of the pen seemed short in the hand. The front section and finials are turned from a rigid urethane material similar to alumilite. The tubes are 3/8" from a local hobby store and have a larger wall thickness than standard pen tubes. This allowed me to tap the cap and barrel with a 3/8" X 24 thread. The barrels did flare a bit while taping but were holding the section securely. The clip is laminated from 4 sheets of veneer alternating walnut and maple formed with a home made press and CA glued to the cap. The refill is a parker style ballpoint, a roller ball refill would not fit in the constraints of the section. The wall got too thin and buckled when I tried. I need a larger diameter (7/16"? 1/2"?) to accommodate a true roller ball. I only have a standard SAE tap and die set at present so my options on threads are currently limited by tool selection.

I also sent a segmented slimline with a satin gold finish. The blank was cut with a scroll saw, the inner segment is walnut veneer glued with yellow carpenter's glue and pressed into place with some clamps and left to dry.

The finish on both pens is CA.
Sadly, Terry informs me that the kitless pen did not survive the trip to South Africa but he will try to repair.
An album of full size photos can be seen on my sky drive galleries
Thanks for looking comments are always welcome.
Terry
