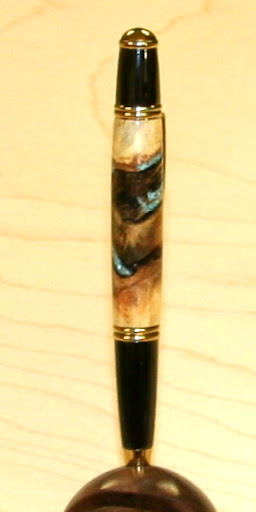
First I crush the turqioise so that it has both small chips and some reduced almost to dust. I cut off a finger from a nitrile glove, put a teaspoon or so of small turquoise chips in, and beat it with a small sledge hammer. I then pour the chips and dust into a shallow plastic cup wide enough for me to reach in and pinch out the turquoise
I turn the piece until it is about 1/32" oversize, and remove it from the lathe. I use a dental bit (ask your dentist to save you the old ones) mounted in a dremel or wizard (cordless dremel type tool). I enlarge and clean out the cracks with the dental bit.
To increase the contrast on a light wood, I may start with a thin layer of black embossing powder in the crack before I put in the turquoise. It serves to outline and highlight the stone. I sprinkle a little of the black powder (get it at the hobby store) into the crack and drip on a little thin CA. Then take a pinch of the coarser turquoise and dribble it into the crack and drip on a little thin CA. continue to build up layers if it is a deep crack. When you are at the surface, take a pinch of the fine powder and rub it into the infill to fill gaps between the larger chips. Add a drop of thin CA.
Mount the piece back on the lathe and spray lightly with accelerator while spinning. If you have a carbide tool, such as the Pen Pro, dedicate one insert for stone turning. It will smooth the stone in just a few passes.
If you don't have a carbide tool, use a good grade of coarse sandpaper backed by a small piece of wood to keep it flat, and slowly grind off the excess stone. DON'T try to turn it with your regular HSS tools. It will really chew them up AMHIKT!
As it comes flush with the surface, there will probably be small pits where a chip came out or an area between chips didn't get filled. Put a drop of medium CA in the pit, and rub a pinch of powdered stone into the area. Spray lightly with accelerator and re-turn or sand. Repeat as necessary until the stone is flush and smooth with the surface of the wood.
Turn or sand the work down to final size. If you are using sandpaper, use progressively finer grits until you get to about 400. For a pen I then use micromesh, but not on a bowl. If you are using a carbide tool, it is ready for 220 and 320 and 400 because it leaves the surface very smooth. The carbide tool reduced my infill time by about 80 percent!
I finish infilled pens with CA/BLO and bowls and other large turnings with friction polish.


