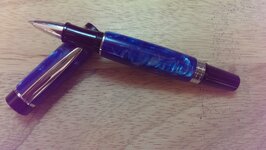
My second pen, and day two of pen turning. It's an El Grande RB in Chrome and a deep blue acrylic blank. I had a couple of stutter steps today, I started turning the blank before I inserted the tubes, for example... just too driven to get the thing on the lathe, I guess.
Anyway it seems to have come out okay. I need to work on figuring how much to leave above the bushing when I am done with the skew chisel. I am over-estimating the amount of material that I take off by sanding so I end up sanding A LOT.
Your C&C are not only welcome but desired, or my goal of being among the best pen turners in SoCal will be slow going :biggrin:.
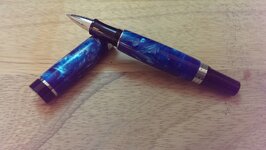
Also... I need a lightbox and to dig my actual camera out for better pics.
Eric
G'day Eric,
Considering the turning experience you've got, you are doing extremely well...!
One simple way to resolve forgetting the sequence steps/procedures when making a pen is to write a "step list" in a language you can understand and put it near the lathe or the bench working are, after a while, the list is not necessary and you will be OK...!
As for the barrel(s) thickness before sanding, in this case using acrylic, you don't really have to use CA to finish it so, slightly above the bushings (if correct and the tool finish is good/smooth) are the size you need to get.
If turning wood for example and you are finishing with a deep/thick CA finish, I normally use the tool right to the bushing size and then hand sand and that is normally the thickness the CA will take.
While this CA thickness (2 x thin + 6 x medium) is about paper thickness, you may have to experiment with a scrap piece of wood and after sanding it smooth, measure it with a digital calipers and take note of that measurement, proceed with the CA finishing method you are using (number of layers), sand it down as if you were doing the real thing and measure again, the difference between the 2 measurements is your CA finish thickness so, if doing wood, and after tooling it to the bushings size, you sanding down thickness, should match your CA finish thickness...!
The number of layers and the viscosity of the CA used, determine that finished CA thickness and while there is no such thing as the correct numbers of CA layers, you need to experiment with the CA and reach the finish you are happy with, only then you should work out what that thickness is and apply that to the various materials you may be working with.
Your barrels look straight/flat with the kit components however, this pen has the barrels diameter a little over and round the edges slightly, is a small improvement but still right, as per the average perception to what that fit should be.
Another thing that can spoil your barrels fitting (out of round) can be the result of stop cutting your barrel material too early and then try to reach the final dimensions with sanding. It there is a lot to sand, the chances are that the blanks goes from round to out of round so, getting the material diameter as close as possible and smooth with the cutting tool, is a more effective way to endup with a perfectly round barrel(s)...!
Best of luck...!:wink::biggrin:
Cheers
George