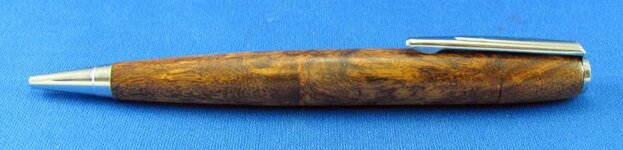
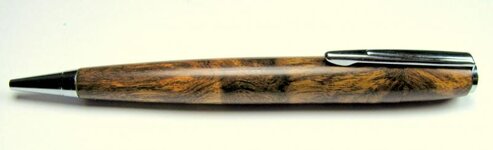
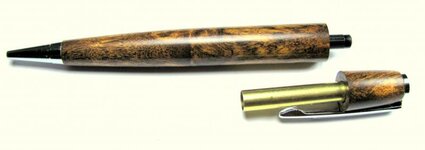
Looks good. One more design change and it would be perfect. Use a click mechanism instead of the twist.
")
Of course, that's just my humble (or maybe not so humble sounding) opinion.
Years ago, I had a pen where the clip came loose. I was too lazy to fix it and used it with the loose ciip. I was surprised how quickly the CA finish got marked.
Does anybody out there actually prefer to twist their pen instead of click it? What would the pen turning world be like if whoever made the first slimline pen kit had designed it to click instead of twist? I made a lot of twist pens over the years and everyone who got one loved it. Nobody ever asked me why I didn't make it click instead of twist. Would they have loved click pens as much?
Maybe the requirement to twist creates the illusion of higher quality in the users mind. Sort of like having to wind an expensive watch instead of buying a cheap battery operated one (that probably keeps better time).
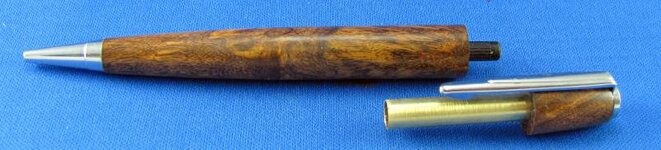
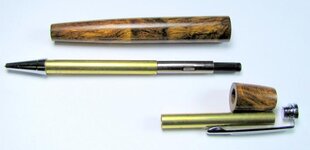
But getting back to the Don's posted topic. You could modify the design to make the pen body a little longer with the clip attached to the body. A small twist rod would protrude through a hole at the back. Just like the click button does on a clicker. Instead of clicking the button, you would twist it to operate the pen. The creative use of both 7mm and 8mm tube inside the body would make this doable. And imagine all the fun you get as users try to click the pen until they figure out that they are supposed to twist! This one might be a tough sell.
Ed