New Kitless FP in semi transparent acrylic with 5mm JOWO bib.

Signed-In Members Don't See This Ad
See more from More4dan

More4dan

Member
Joined
Mar 17, 2016
Messages
2,102
Location
Katy, TX
My first all acrylic FP. I used a blank that is transparent from one side and opaque from the other. It's not quite as dramatic after turning and drilling but still different. Dimensions are 12mm diameter and 125 mm capped and 123 mm uncapped. It uses a K5 converter and a JOWO 5mm nib with a Ruthenium finish. The ends were rounded with a 3/4" roundover router bit mounted in boring bar holder. Comments and questions welcomed. Any links to how to polish the ID would be appreciated. Thanks
 

Attachments

  • FB_IMG_1461080039292.jpg
    FB_IMG_1461080039292.jpg
    162.3 KB · Views: 179
  • FB_IMG_1461080045301.jpg
    FB_IMG_1461080045301.jpg
    164.4 KB · Views: 200
  • FB_IMG_1461080064345.jpg
    FB_IMG_1461080064345.jpg
    105.5 KB · Views: 204
  • FB_IMG_1461080059357.jpg
    FB_IMG_1461080059357.jpg
    174.6 KB · Views: 223
Last edited:
Signed-In Members Don't See This Ad

thewishman

Member
Joined
Mar 9, 2006
Messages
8,182
Location
Reynoldsburg, Ohio, USA.
Looks like a very nice pen!:)

For polishing the inside, cut a thin slot in a dowel and put a short strip of sandpaper through the slot - slide the dowel into a barrel and start sanding. It takes a bit of extra effort.
 

Bill78

Member
Joined
Dec 10, 2014
Messages
28
Location
Jersey, Channel Isles, UK
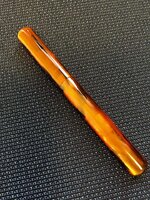
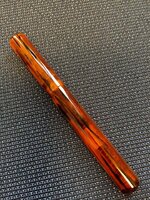
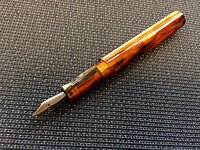
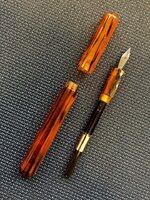
That's a great looking blank - very unusual effect, and I like what you have done with it! Looks very good.

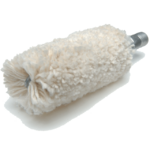
I have played around with trying to smooth out bores on metals - and I think that the principles move from one material to another. It's the same process as the one you have applied to get that smooth, shiny exterior. First you cut as smoothly as you can - well-sharpened drill, then a reamer if you have one (you can get expanding reamers that cover a range of diameters). After that I start with sanding as thewishman suggests - just like the exterior I use finer and finer grades through to wet and dry 1200 / 1500 paper around / through a bar of some sort. To get smoother than that I have used lapping pastes- you can get very, very fine pastes equivalent to 20,000 grit. The tool to use needs to be softer than the material you are lapping - to lap steel I use brass. The paste enbeds in the brass and wears away the steel. For plastics I think I would try wood - and finish up with metal polish using a cloth on a small bar.

Hopefully someone with more experience / knowledge will respond and we'll both learn something!

Good luck and please let us know how you get on.
 

bmachin

Member
Joined
Jul 28, 2013
Messages
613
Location
Owensboro, KY
Go to edisonpen.com. Click on: Resources--Helpful Videos. The video on the Beaumont Demonstrator is dedicated almost entirely to polishing the inside of the pen. The video on the Menlo Pump Filler shows Edison's whole process of making a pen, including a fairly complete section on the inside work.

There are probably other videos out there, but these are very, very good.

Hope it helps
Bill
 

Bill78

Member
Joined
Dec 10, 2014
Messages
28
Location
Jersey, Channel Isles, UK
Go to edisonpen.com. Click on: Resources--Helpful Videos. The video on the Beaumont Demonstrator is dedicated almost entirely to polishing the inside of the pen. The video on the Menlo Pump Filler shows Edison's whole process of making a pen, including a fairly complete section on the inside work.

There are probably other videos out there, but these are very, very good.

Hope it helps
Bill
Superb resource bmachin / Bill. Many thanks for posting that - I love the videos! Don't know about More4dan but they will help me a hell of a lot.

Bill78
 

More4dan

Member
Joined
Mar 17, 2016
Messages
2,102
Location
Katy, TX
Thanks for all the comments. The video helped a lot. Wooden dowel and fine grit sand paper ready to go. I also purchased some gun cleaning swabs in different diameters to use with buffer polishing rouge.
 

Attachments

  • 1321-CottonSwab_1.png
    1321-CottonSwab_1.png
    119.9 KB · Views: 90
Top Bottom