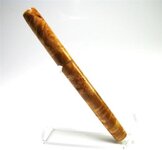
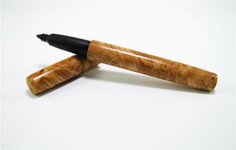
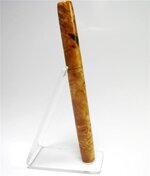
My First Closed End Pen

Signed-In Members Don't See This Ad
See more from alinc100

alinc100

Member
Joined
Feb 22, 2011
Messages
166
Location
Dearborn,MI,USA
Ok so it's not really a pen ....it is a Sharpie marker refill : )

I ended up making a pin chuck from 1/2" aluminum rod that I purchased at HD.
Thankfully I did not try to start with the 3/4" rod I already had.It took quite a bit to mill it
down to the sizes needed ,7/16" and 15/32". I know doesn't seem like much but it kept me busy for awhile.

I can see where steel might be a better choice but that will have to wait to be outsourced when I have more $$.

The blanks came from a box lot I bought via the classifieds.I think it is Maple Burl.
I am happy with it as a personal item but I need to work on the fit/quality before I can consider making these to sell.
All in all I think it is a good learning experience and hopefully I can hone my skills further with each similar project.
IMG_0293edit.jpg

IMG_0294edit.jpg

IMG_0308edit.jpg
 
Signed-In Members Don't See This Ad

Rick_G

Member
Joined
Nov 30, 2007
Messages
1,994
Location
Bothwell, Ontario, Canada.
Looks good. Bit of work turning down that rod for the sizes you need.

For your next pin chuck you might want to pick up a set of transfer punches. Busy Bee has them for $11.99 Buy Transfer Punches Set - B236 from Busy Bee Tools or Lee valley has them for $16.95. Transfer Punch Set - Lee Valley Tools
I'm sure there are many other places you can get them as well. Those 2 are just the cheapest I've seen. Pick your rod that is perfect fit or just slightly over size and sand to fit.
 

alinc100

Member
Joined
Feb 22, 2011
Messages
166
Location
Dearborn,MI,USA
Looks good. Bit of work turning down that rod for the sizes you need.

For your next pin chuck you might want to pick up a set of transfer punches. Busy Bee has them for $11.99 Buy Transfer Punches Set - B236 from Busy Bee Tools or Lee valley has them for $16.95. Transfer Punch Set - Lee Valley Tools
I'm sure there are many other places you can get them as well. Those 2 are just the cheapest I've seen. Pick your rod that is perfect fit or just slightly over size and sand to fit.


Rick,
I believe that is the route I am headed.I have a couple sets of transfer punches and I think I am going to dedicate a set to pin chucks as needed.This was just the beginning of a slippery downhill slope into more penmaking.
 

Charlie_W

Member
Joined
Nov 16, 2011
Messages
5,918
Location
Sterling, VA USA
I turned an acrylic closed end seam ripper earlier today. I used one of my punches that fit the closest and then a couple wraps of masking tape and it slid on snugly. I had knocked off the corners on the disc sander prior to turning. I used a PSI mandres saver with some double stick tape on the closed end and took it off after the rest was finished. Then just finished off the top....Sorry, no photo yet.
 

bluwolf

Member
Joined
Oct 2, 2008
Messages
995
Location
SW Florida
That came out very nice. I'm, surprised it doesn't look fatter/bulkier, and that's a good thing. Great shape and very clean looking.

Mike
 

SDB777

Member
Joined
Feb 6, 2010
Messages
6,620
Location
Cabot, Arkansas USA
The close-end addiction has you now!!

How did you get the steel rod down to size? You turn it on a metal lathe? Regardless, that sure does sound like a lotta work!!


Got to say, for the first closed end you've done, sure looks pretty good! Love the timber too.


Scott
 

alinc100

Member
Joined
Feb 22, 2011
Messages
166
Location
Dearborn,MI,USA
The close-end addiction has you now!!

How did you get the steel rod down to size? You turn it on a metal lathe? Regardless, that sure does sound like a lotta work!!


Got to say, for the first closed end you've done, sure looks pretty good! Love the timber too.


Scott

Scott,
My pin chuck was made from an 8" piece of 1/2" aluminum.I chucked it into my PSI collet chuck and exposed 1/2" inch,faced the end and drilled a dimple for a live center to sit.I then extended the rod about 3 1/2" snugged to my live center and turned down a 3" portion to 7/16". I did most of the milling with an R2 carbide cutter and got to my final dimension with files and sandpaper.I then cut the notch with a hacksaw and a dremel, finishing again with files. I then reversed the rod ,faced the end ,drilled the dimple.I exposed 2 1/2" of the rod and milled it to 15/32" dia for the cap end of the pen. I cut the notch as before. I left 2+" of the rod at 1/2" that mounts into the collet chuck regardless of which end is being used. I know there are other ways to get it done but this was my best thought at the time.
 

wizard

Member
Joined
Aug 27, 2009
Messages
3,569
Location
Houston, Texas
Andy, That's beautiful!! If that's your first closed ended pen...can't wait to see what comes next! IMHO..that's more than just a closed ended pen...It comes darn close to a kitless! Thanks for showing. Doc:)
 

Rick_G

Member
Joined
Nov 30, 2007
Messages
1,994
Location
Bothwell, Ontario, Canada.
The close-end addiction has you now!!

How did you get the steel rod down to size? You turn it on a metal lathe? Regardless, that sure does sound like a lotta work!!
Scott

If you are asking about the transfer punches Scott there are so many sizes available some are a perfect fit for tubes. The couple I had to bring down in size were just a hair oversized and I just put them in a drill chuck on the lathe and about 10 minutes of sanding and filing the groove for the pin and I was done. Work on the end away from the pin and you can still use it as a transfer punch.
 

TerryDowning

Member
Joined
Apr 27, 2011
Messages
520
Location
Newhall, CA
What size thread did you use for the body threads?? I tried this with 1/2 x 20 I'd seen in another thread and it failed miserably. It won't screw in at all, just slides all the way in way too big.
 

alinc100

Member
Joined
Feb 22, 2011
Messages
166
Location
Dearborn,MI,USA
Terry,
I am 100 % sure it was a 1/2-20 tap.I drilled a 7/16" hole and threaded the wood down about 3/8" into the body. I used a drill chuck in the tailstock while the blank was still in the PSI drilling chuck,fresh from drilling out the body to a 3" depth.

The basis of my info was from a YouTube video from Steve4948
Making a Pen to fit the Sharpie Refill - YouTube


As I wrote this the mail came.I had ordered some supplies from Amazon and what I thought I was getting was a 2 pack of sharpie MARKER refills,what I got was a Sharpie PEN refill.It is much smaller with an approximate 0.9 mm tip. Not what I was expecting,but it presents a new opportunity to attempt another style of closed end pen.Terry is it possible that this is what you have?
 

TerryDowning

Member
Joined
Apr 27, 2011
Messages
520
Location
Newhall, CA
Hmmmm, wonder what I did wrong then.

I did the same exact thing, drilled 7/16" used drill chuck as tap holder. I know the threads work as I have a threaded mandrel that I made to do the closed end work.

1/2 x 20 bolt, cut off the head, place in collett chuck, at slow speed on lathe file off threads at the beginning of bolt until 7/16 diameter. Holds the tapped 1/2 x 20 body nicely.

Maybe the bolt took some of the edge off the threads? At any rate, I need to rework it.

Terry
 
Top Bottom