Long Clicker Metallic Green

Signed-In Members Don't See This Ad
See more from qquake

qquake

Member
Joined
Feb 8, 2004
Messages
5,014
Location
Northern California
This is a Dayacom Long Clicker in bright copper. The blank is Metallic Green from Exotic blanks. I've wanted to make a Long Clicker for quite some time, and I'm glad I finally did. I like its simple elegance. I really like the green blank with the copper finish. There were several challenges involved, though, and I'll document them in subsequent posts.
 

Attachments

  • 067.JPG
    067.JPG
    36.7 KB · Views: 135
  • 068.JPG
    068.JPG
    35.3 KB · Views: 131
  • 069.JPG
    069.JPG
    36.7 KB · Views: 162
  • 063.JPG
    063.JPG
    131.5 KB · Views: 206
  • 066.JPG
    066.JPG
    38.5 KB · Views: 154
  • 065b.JPG
    065b.JPG
    89.4 KB · Views: 177
  • 065c.JPG
    065c.JPG
    80.6 KB · Views: 165
  • 065.JPG
    065.JPG
    121.4 KB · Views: 180
  • 064b.JPG
    064b.JPG
    120.3 KB · Views: 189
  • 064.JPG
    064.JPG
    115.9 KB · Views: 182
Signed-In Members Don't See This Ad

qquake

Member
Joined
Feb 8, 2004
Messages
5,014
Location
Northern California
The first challenge I ran into was drilling the blank. It calls for a 4-1/2" blank, and they recommend a drill bit with long flutes. I tried a 10" long impact bit I have, but it wasn't accurate enough. Same with the 12" standard bit I have. So I used my normal brad point bit, and raised the blank periodically as I drilled it. But it wouldn't drill past the flutes, so I finished it with a helix bit. I finally got it drilled all the way through. It didn't drill all that straight, but it was good enough.
 

Attachments

  • 001.JPG
    001.JPG
    114.8 KB · Views: 136
  • 002.JPG
    002.JPG
    59.9 KB · Views: 149
  • 003.JPG
    003.JPG
    109.2 KB · Views: 150
  • 012.JPG
    012.JPG
    73.9 KB · Views: 175
  • 011.JPG
    011.JPG
    118.2 KB · Views: 131
  • 014.JPG
    014.JPG
    124.7 KB · Views: 178
  • 017.JPG
    017.JPG
    79.4 KB · Views: 127
  • 016.JPG
    016.JPG
    71 KB · Views: 131

qquake

Member
Joined
Feb 8, 2004
Messages
5,014
Location
Northern California
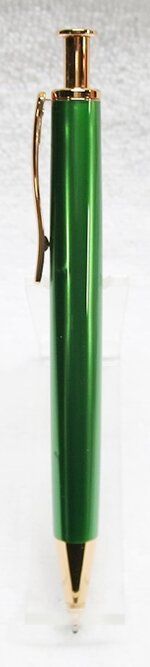
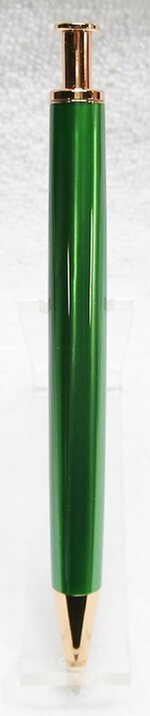
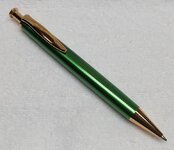
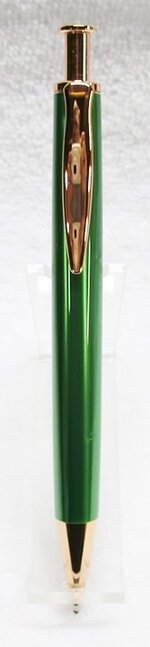
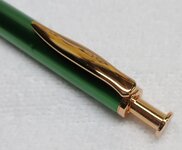
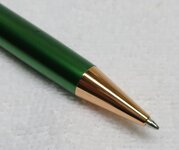
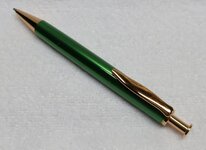
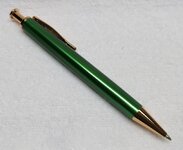
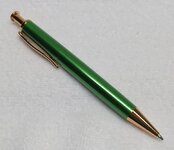
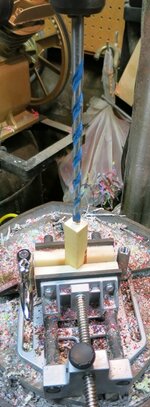
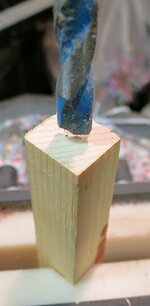
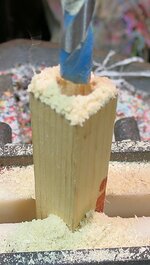
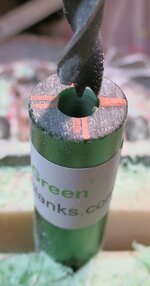
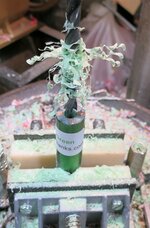
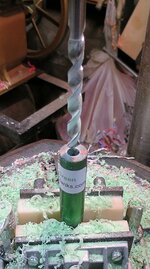
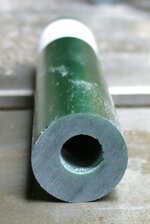
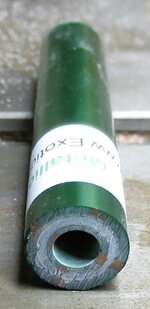
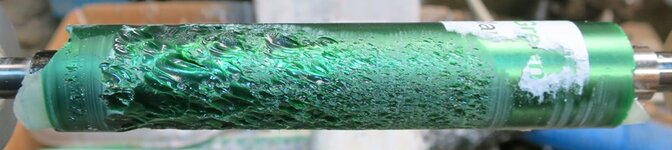
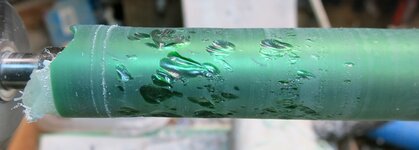
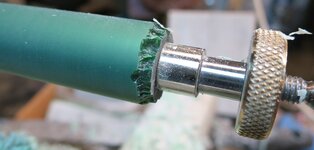
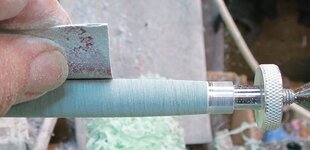
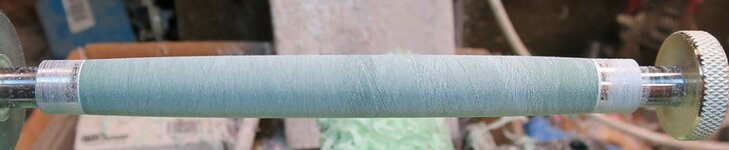
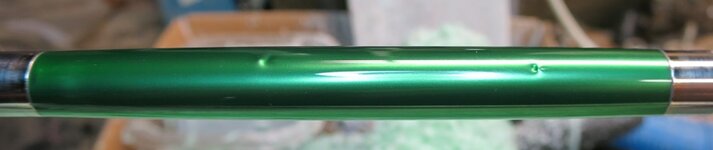
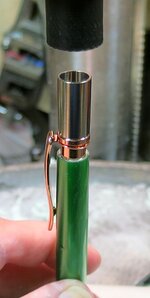
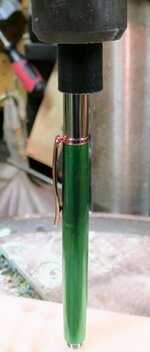
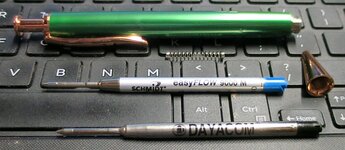
The next challenge wasn't with the pen, but with the blank. This particular blank was much more brittle than I expected. Turning it was as bad as, if not worse than, turning inlace acrylester. The spindle gouge I normally use chipped it very badly. So I switched to a carbide chisel, which was better. I wanted the body to have a slight bulge, but I was afraid to try shaping it with either chisel, as I was afraid the ends would chip out. That has happened to me in the past. So I reverted to the tried and true 120 grit chisel. That worked better than I expected. I polished it with my usual regimen, and it turned out quite nice. There are a couple of some sort of occlusions in the blank, but I don't think they look bad. They're not on the surface.
 

Attachments

  • 033.JPG
    033.JPG
    87.2 KB · Views: 156
  • 034.JPG
    034.JPG
    90 KB · Views: 151
  • 037.JPG
    037.JPG
    104.1 KB · Views: 146
  • 049.JPG
    049.JPG
    109.2 KB · Views: 111
  • 050.JPG
    050.JPG
    63.4 KB · Views: 122
  • 052.JPG
    052.JPG
    53.2 KB · Views: 142
  • 054.JPG
    054.JPG
    49.6 KB · Views: 136

qquake

Member
Joined
Feb 8, 2004
Messages
5,014
Location
Northern California
Assembling it was very easy, with only two parts to press into the body. It came with a sleeve to use for pressing the click mechanism into the finial end. Nice touch. But surprisingly, the Dayacom refill it came with wouldn't write. Fortunately, I ordered the upgrade EasyFlow refill with the pen kit. It writes well, but there is a ridge on the tip which kind of catches when the refill is retracted. Not as smooth as I like, but I can live with it.
 

Attachments

  • 062.JPG
    062.JPG
    63.8 KB · Views: 177
  • 060.JPG
    060.JPG
    60.5 KB · Views: 171
  • 061.JPG
    061.JPG
    51.8 KB · Views: 121
  • 070.JPG
    070.JPG
    155.4 KB · Views: 126
  • 073.jpg
    073.jpg
    55.2 KB · Views: 147

PSNCO

Member
Joined
Jun 7, 2013
Messages
334
Location
Brooklyn Center, Minnesota
I turn a lot of these kits. They were once very reasonable at Timberbits. Finding a drill bit long enough is always a challenge. A couple years ago, I came across a long "V" drill bit at Rockler's clearance aisle. Best $5 I ever spent.
 

Sappheiros

Member
Joined
Sep 26, 2015
Messages
900
Location
Chicago, Illinois
Thanks for sharing your process with us! The pen looks great! Sometimes it feels like I'm the only ones having any challenges, so thank you. The pen makes me think of Oz!
 

qquake

Member
Joined
Feb 8, 2004
Messages
5,014
Location
Northern California
Thanks for sharing your process with us! The pen looks great! Sometimes it feels like I'm the only ones having any challenges, so thank you. The pen makes me think of Oz!

Trust me, you're definitely not the only one having challenges. I just don't document all of mine. It is kind of Oz-like, isn't it?
 

rudya7

Member
Joined
Dec 28, 2008
Messages
88
Location
New Jersey
If you align the drill bit to the clamp that is holding the blank a little bit better, vertically, not just centered on the top of the blank, you will be able to drill the blank with a short bit by drilling half way through and the flipping the blank to the other end, and complete the drilling from the opposite end. This also eliminates the blow out that sometimes happens with acrylic blanks. I use a mortising machine as a drill press and the PHD vise, which allows for almost perfect vertical alignment top to bottom once its set up properly. I love these long clickers as they really give you a lot of space to showcase a good looking blank. I used to worry about drilling the long blanks before I got the setup dialed in properly. Now they are some of my favorites.
 

magpens

Member
Joined
Feb 2, 2011
Messages
15,912
Location
Canada
Thanks for sharing !!!!

I like the long clicker except for the unsightly large pushbutton !
 
Top Bottom