I traded this pen for . . . . . this.

Signed-In Members Don't See This Ad
See more from BSea

BSea

Member
Joined
Dec 28, 2009
Messages
4,628
Location
Little Rock, Arkansas
I made this pen for my daughter's new Mother-in-Law. I found out her favorite color was pink, and this is the result.
CathyKPen3.jpg


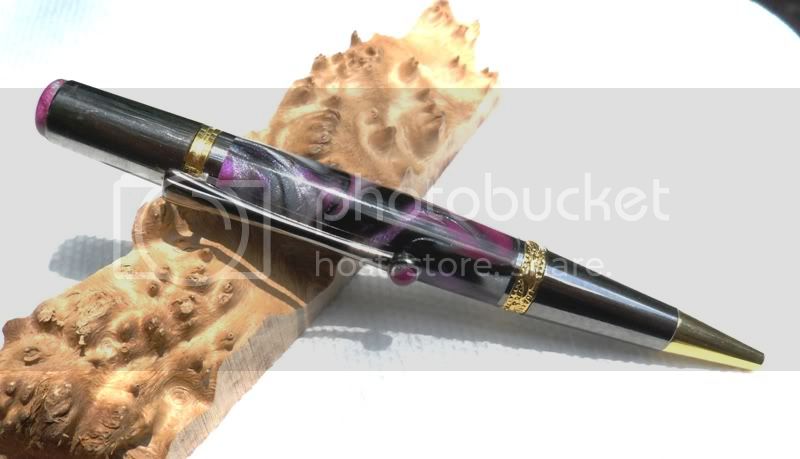
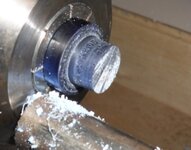
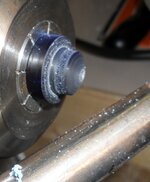
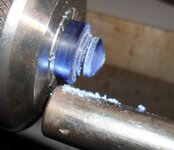
The pen is a Majestic Squire In Gold & Black TI. I removed the cap on the finial, and the fake diamond. I turned a cap and clip insert from the left over blank. The blank is a custom blank made by Jonathon Brooks (aka Brooks803), and I think it turned out better than I imagined it would. But that's no surprise coming from Jonathon.


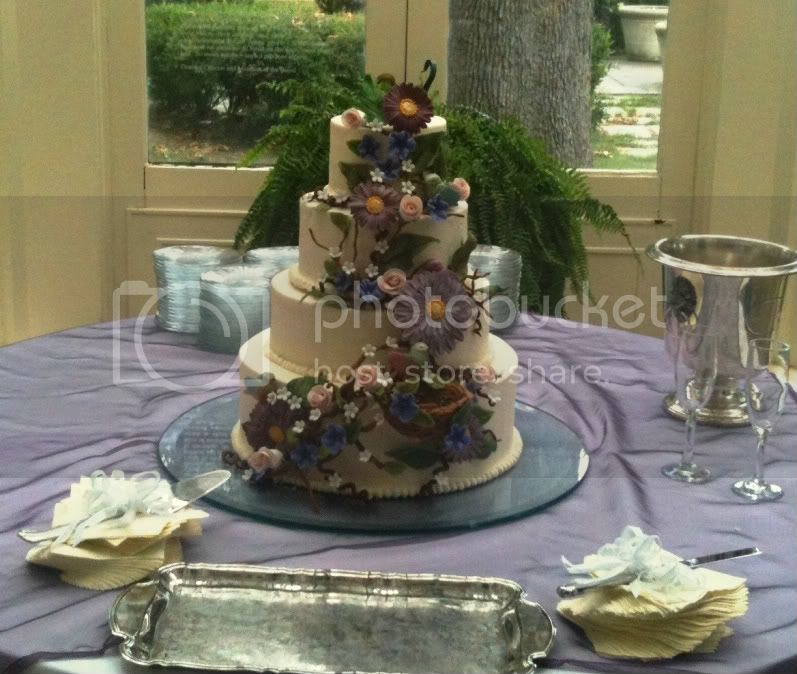
I thought it was a pretty good trade since she made my daughter's wedding cake. I wonder if she's interested in polymer clay? :rolleyes: And just for the record, it really wasn't a trade. The pen is just a small "Thanks" for the outstanding job she did on the cake.

WeddingCake1-1.jpg
 
Signed-In Members Don't See This Ad

BSea

Member
Joined
Dec 28, 2009
Messages
4,628
Location
Little Rock, Arkansas
Those are beautiful. What tooling do you use to turn something that small??
I have a small 1/4" spindle gouge that I use, and a narrow parting tool. But you can do it with a larger spindle gouge, and part it with a skew. The principle is the same on the clip insert. It's just a little smaller. I put a piece of the rounded blank into a collet chuck. Then use a regular parting tool to turn the end of the blank down to the right diameter. Then I turn the cap or clip piece facing the end of the blank, or at a slight angle that's almost perpendicular to where you normally have the tool rest set up. If that's not clear, I'll take some pictures tomorrow.
 

BSea

Member
Joined
Dec 28, 2009
Messages
4,628
Location
Little Rock, Arkansas
The pen is very pretty and a nice thank you ... The cake is fabulous, what a talented M-I-L your daughter has.
She made all the cake decorations out of frosting, or some sort of sugar thing that cake people use for decorations.

And if that wasn't enough, she also made the grooms cake & 300 cupcakes too.

Groomcake1.jpg
 
Last edited:

BlackPearl

Member
Joined
Mar 26, 2010
Messages
270
Location
DeSoto, TX
For a very brief moment I though you were going to post a picture of your son-in-law.

That woman is an artist. Fondant and polimer clay are not that much different maybe you could get her to do some blanks for you.
 

BSea

Member
Joined
Dec 28, 2009
Messages
4,628
Location
Little Rock, Arkansas
That's pretty clear, but I would like to see some pictures if it's not too much trouble. Thanks alot
Here are a few pics showing basically how I do it. I first use a parting tool to get close to the final diameter. The I use a spindle gouge to shape the piece. Then just part it off. If using a skew, I usually finish the parting with a hack saw. With the lathe running, just rest the saw blade in the groove, and let the lathe do the work. I used a 1/2" spindle gouge, a regular parting tool, and a skew to do the work shown. When doing the cap contour, I work from the outside to the center. And if I was going to use this piece, I'd polish it before parting it. Hope this helps. And I'm certainly no expert, so if anyone has some better tips, feel free to chime in.
 

Attachments

  • finial 2.JPG
    finial 2.JPG
    64.8 KB · Views: 110
  • finial 3.JPG
    finial 3.JPG
    195.1 KB · Views: 113
  • finial 4.JPG
    finial 4.JPG
    92.4 KB · Views: 129
Last edited:

Toni

Member
Joined
Feb 23, 2010
Messages
2,042
Location
Phenix City, Alabama
One heck of a cake Love the groom cake just adorable. You are lucky to have such a talented MIL. Great Pen I am sure she appreciated it
 

Brooks803

Member
Joined
Sep 13, 2009
Messages
5,632
Location
Aiken, South Carolina
Looks great Bob. I really like the mods. I don't want to take away from your work, but I took some pics of turning a clip accent. They might help everyone with that part. One tip is to put a taper on the backside so it looks just like a cut stone. That way it won't want to flip on you when you try to glue it in (i recommend epoxy). Also it's good to sand and polish the back, especially if its a see through material. I also included a good way to check fit. Nothing is better than calipers, but its a quick test fit.
 

Attachments

  • 100_2548 (700x525).jpg
    100_2548 (700x525).jpg
    414 KB · Views: 117
  • 100_2543 (700x525).jpg
    100_2543 (700x525).jpg
    315.1 KB · Views: 108

BSea

Member
Joined
Dec 28, 2009
Messages
4,628
Location
Little Rock, Arkansas
Looks great Bob. I really like the mods. I don't want to take away from your work, but I took some pics of turning a clip accent. They might help everyone with that part. One tip is to put a taper on the backside so it looks just like a cut stone. That way it won't want to flip on you when you try to glue it in (i recommend epoxy). Also it's good to sand and polish the back, especially if its a see through material. I also included a good way to check fit. Nothing is better than calipers, but its a quick test fit.
That's about how I did the clip insert, but I didn't have that much material exposed. It worked fine doing the taper like you suggested to me. My problem came doing the other side of the insert. I basically ended up shaping it by hand (after it was glued into the clip) with basically a small sanding tool I had for doing wooden models. But a fingernail file would probably work just as well. I just had to be careful not to scratch up the clip. Polishing was pretty easy once I had the shape I wanted. I just held the clip & did figure 8's over MM through all the grits. It probably took a little longer than doing a pen barrel, but the results were comparable. All in all, it was a fun pen to make, and I learned a lot.
 

PenMan1

Member
Joined
Jul 8, 2009
Messages
6,380
Location
Eatonton, Georgia
BAD TRADE!!!!!
That cake is TOO PRETTY TO EAT! You gonna starve! Nobody is gonna let you "take a slice"....That's what I HATE about food art:)
 
Top Bottom