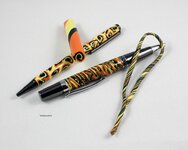
BOOO!! Halloween comes early here with two polyclay concoctions I whipped up. A Slimline (Candy Corn) and an Elegant Monarch twist pen (and I do mean twist being that's what I did with the clay on the one). These actually worked out pretty cool. Just don't let anyone know I had no idea what I was doing when I started this.......how 'bout a little fire scarecrow!?.....

You are using an out of date browser. It may not display this or other websites correctly.
You should upgrade or use an alternative browser.
You should upgrade or use an alternative browser.
Halloween duo
- Thread starter vakmere
- Start date
Signed-In Members Don't See This Ad
See more from vakmere


I tried to give a little info but it turned into this.... sorry :wink:
Edited - for the pictorial demo I used a Stratus.
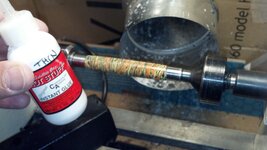
After picking the different colors they were jelly rolled to about 1/2" round as shown. The layers were staggered half way on each other before rolling them tight.
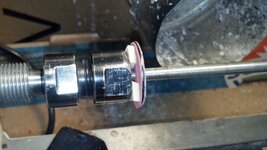
For the slimline it was reduced into a triangle, slices were 1/16". I used a 1/4-20x5" bolt with fender washers to place the 7mm tube with slimline bushings in between; then a nut to secure them from moving.
 Example shown with a Stratus tube.
Triangles were placed on the tube at random pressing them in as I went along. Don't want to go too thick. After they were all installed I gently rolled the tubes to blend the cane pieces. Bake at 250*f for 1/2 hour. Let cool over night.
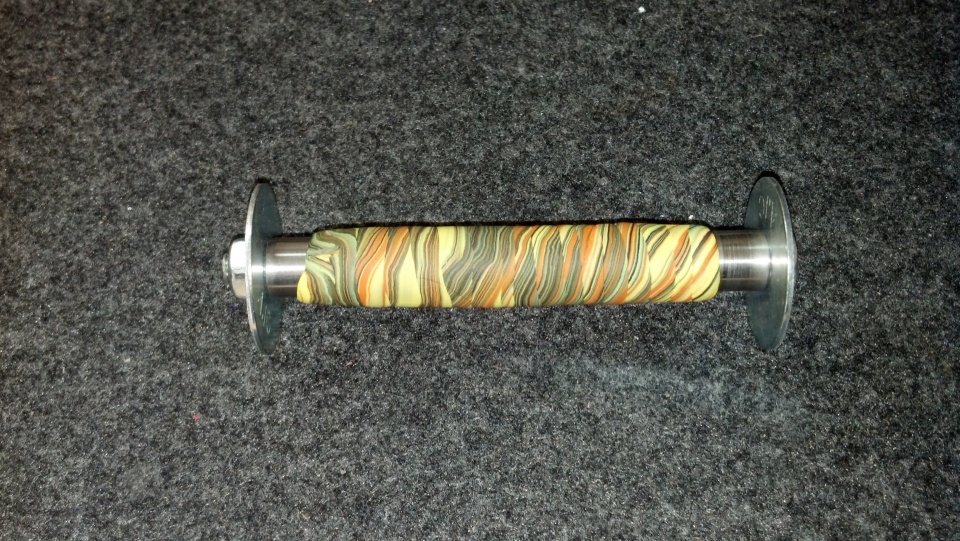
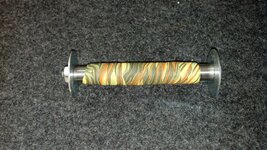
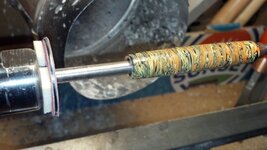
For the Monarch it was the same nut and bolt idea but with 27/64" bushings.
Idea of the fender washers is to make rolling and blending easier, keep the clay off the pan while baking and the bushings as a guide as to how much clay to put on the tubes. Too much clay and you will have problems turning. Don't remove the bushings.
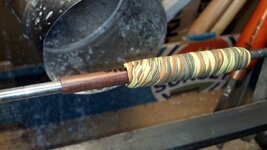
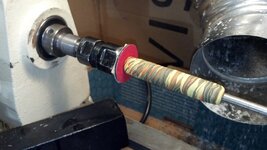
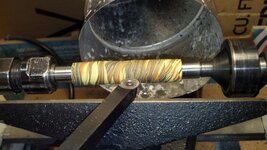
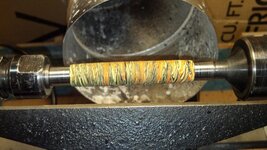
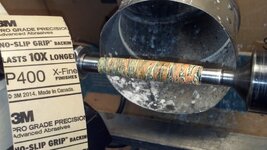
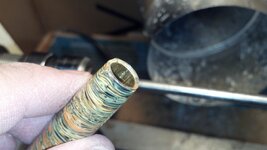
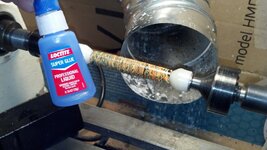
The Monarch blank I used the same cane before making it a triangle, cut the cane down the middle then again making 4 pizza like slices. Placed the slices with their backs to each other exposing the interior lines then rolled a long thin spaghetti. Twisted the spaghetti to look like that in the photo. Wrap it around the 27/64 tube with no gap in between. Gently roll the clay on the tube (this where the washers come in handy) and have the sections blend without mushing it up. To hard a roll and it will come off the tube and deform. Patience and touch is the key.
On both its ok to have the clay extend a little over the bushings. Again not to thick. Thin as you can but proud of the bushings. Bake with the bushings attached the same as above. Wait time is the same. You can do this on any pen kit. This is where the artist in you comes out.
How to turn, square, sand, and finish them? Slow, patiently, surgically.
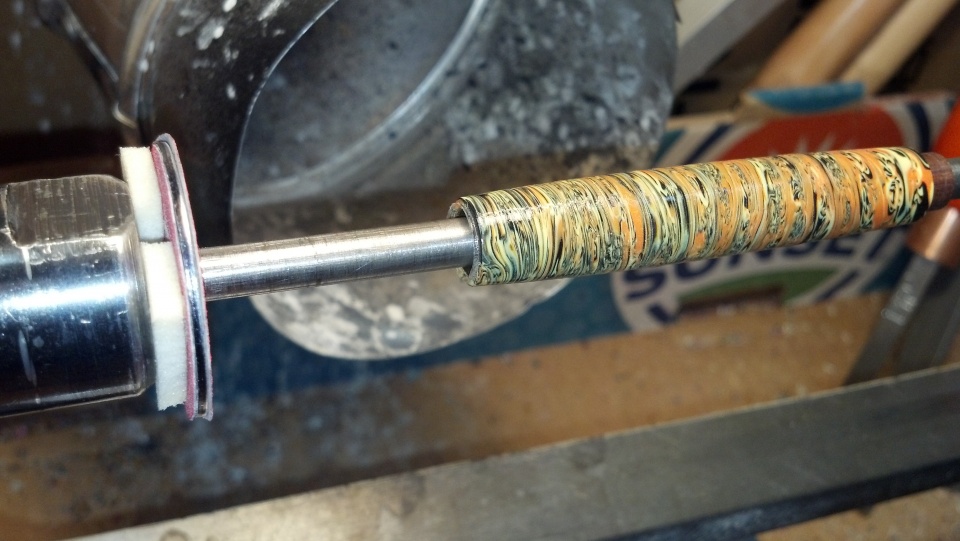
Squaring: Remove the bushings carefully. A barrel trimmer is of no use here. You will be sorry if you use one on these. No doubt one can find someone who did it but I had no success. I have a method of squaring PC material to the tube using home made trimmer shafts turned to fit any tube size, self adhered sand paper 120 grit stuck to a 1/4-20 fender washer that I slide on the mandrel using double sided tape to stick it to the mandrel chuck. Use a 1/4" bit to make the hole in the sand paper for a snug fit over the mandrel shaft.

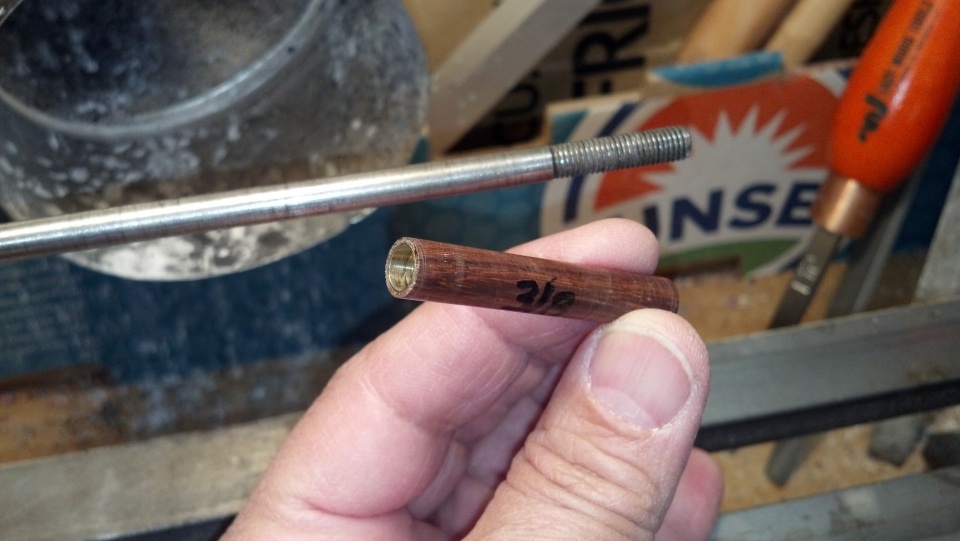

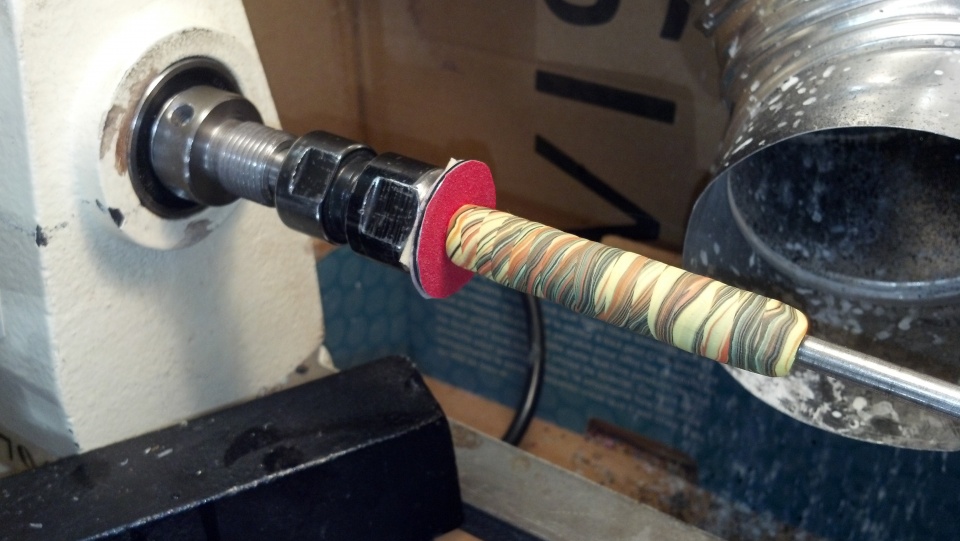
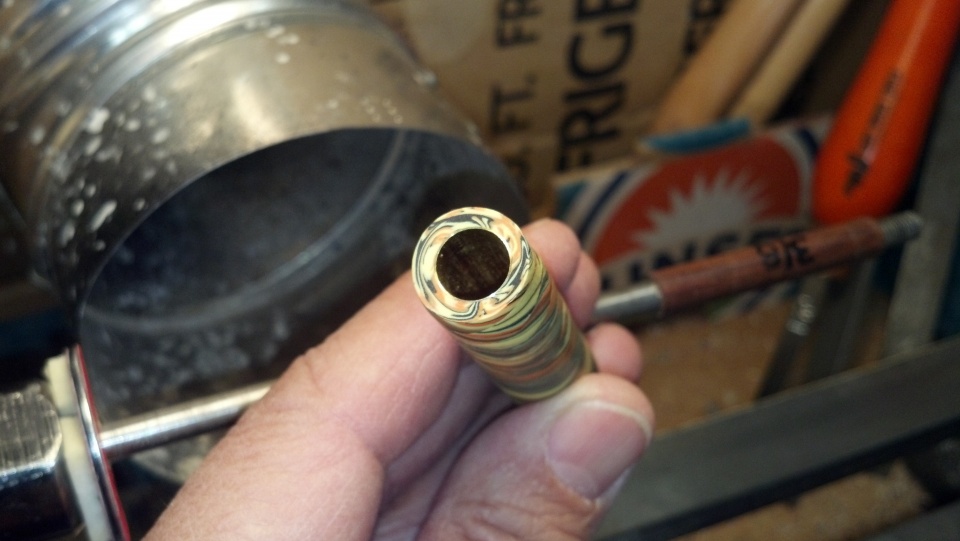
Remove the bushings. Slide the tube over the trimmer shaft and as the lathe spins around 1000rpm press the tube gently against the sand paper until you see brass clearing away dust build up from the tube end. For 7mm tubes the trimmer shaft is not needed. Put the bushings back on after squaring and complete the blank to the size you are going for.
Turning: you're on your own. I use a round carbide. All I can say is be careful and be easy or it will fly apart. If it does break apart go up and make another one. If you chip out CA the pits early in the turn and as often as you need to before getting to the final shape. If it looks hideous by that time, go up again and make another one. I will say that as you turn it down a noticeable change in color will show.


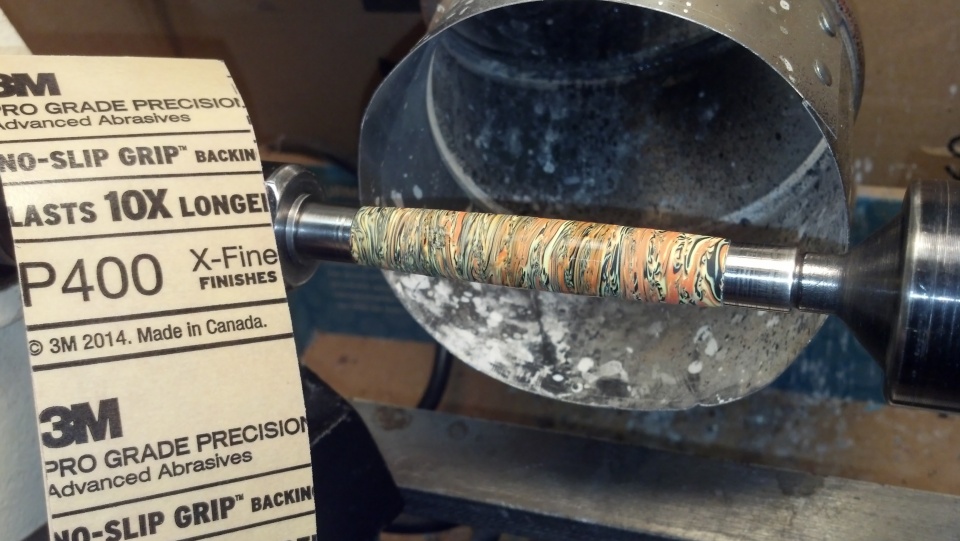
Sanding: If you get this far, 400 or 600 grit to get down to the final shape will be the best bet. this will take a while so don't press to hard to hurry up. It wont work. Then 800 grit. Final inspection for pits and texture before you do 3 apps of thin CA then medium CA. Accelerator is ok after the 3 apps. I do thick CA after the medium because I'm used to it and makes the process go faster. If you notice any CA overhang go back to the sanding disc setup as previously mentioned.


Finishing: Whatever you do for your CA finish.
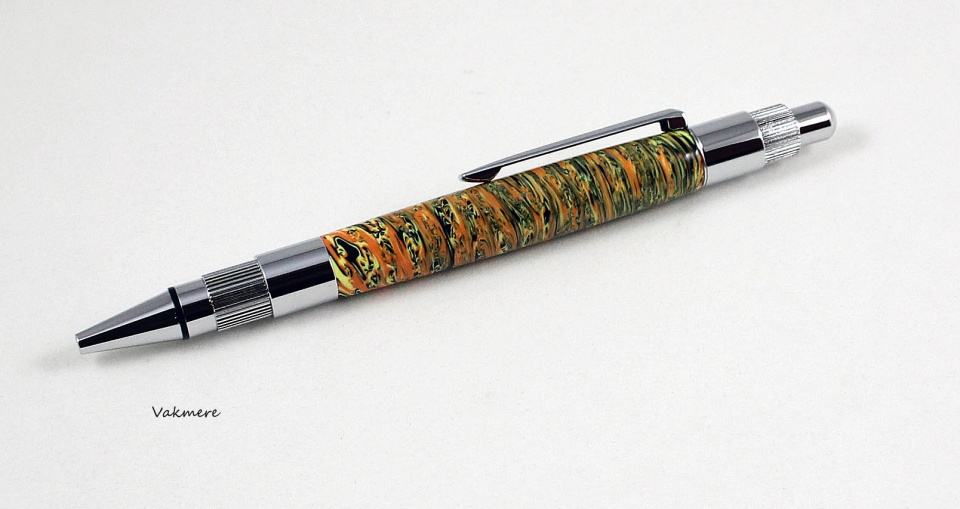
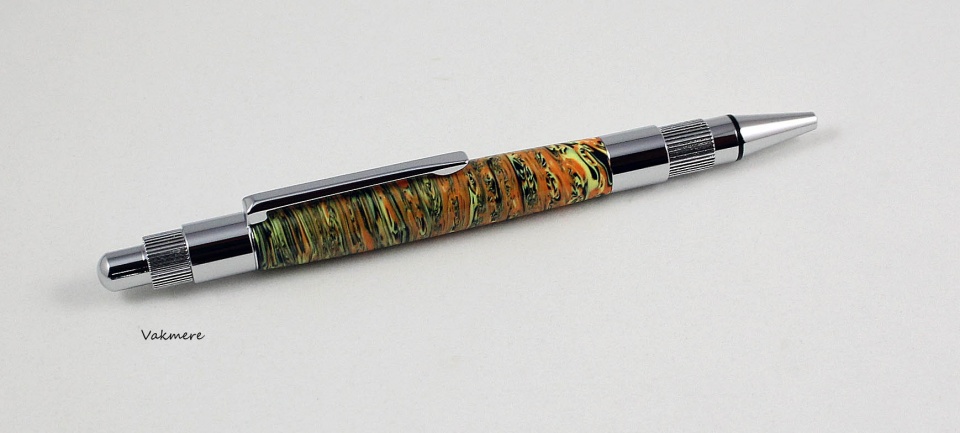
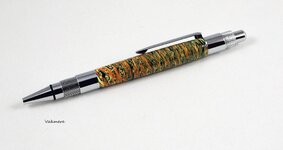
Hopefully it will look something like this...
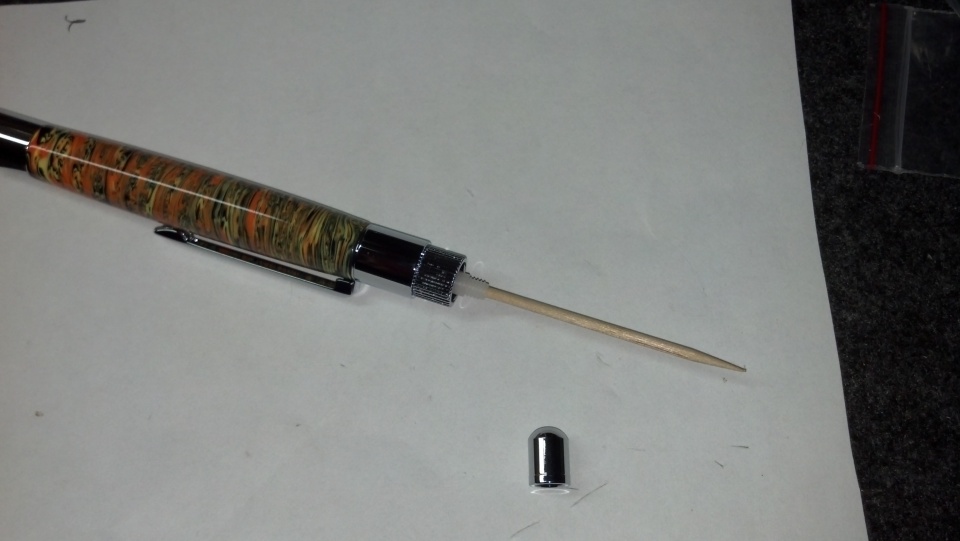
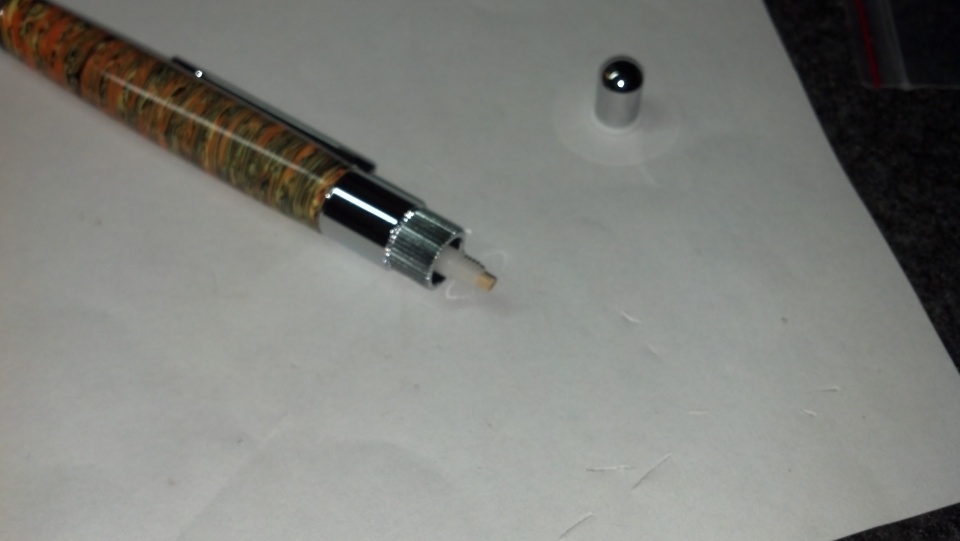
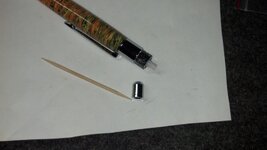
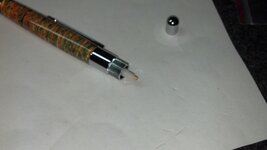
One thing about the Stratus. The cap is susceptible to breaking off if dropped. My remedy is to glue a piece of tooth pick into the plunger and that should help keep things together. I should drop one and test the theory but not today.

If you read all of this and actually understand it let me know. I got lost somewhere around 'how to turn'........:befuddled:
Hope this all was helpful and if this belongs in another thread perhaps the moderator can do that. It was an education just doing all this...whew!!
I still don't know how Toni does it. Don't want to, it will take the mystery out of seeing what she comes up with next. But as long as she does; she inspires me to experiment, try different ideas, watch others, and more importantly - have fun doing it.

Fimo or Premo. Avoid the soft ones.

Signed-In Members Don't See This Ad
qquake
Member
Very nice!
Charlie_W
Member
Wow! Very Cool!
Jim15
Member
Those are great looking.
qquake
Member
Can you give us a little info on how you made the blanks?
LouCee
Member
They both look great and I especially like the blank on the Elegant Monarch.
Can you give us a little info on how you made the blanks?
I tried to give a little info but it turned into this.... sorry :wink:
Edited - for the pictorial demo I used a Stratus.
After picking the different colors they were jelly rolled to about 1/2" round as shown. The layers were staggered half way on each other before rolling them tight.
For the slimline it was reduced into a triangle, slices were 1/16". I used a 1/4-20x5" bolt with fender washers to place the 7mm tube with slimline bushings in between; then a nut to secure them from moving.
Triangles were placed on the tube at random pressing them in as I went along. Don't want to go too thick. After they were all installed I gently rolled the tubes to blend the cane pieces. Bake at 250*f for 1/2 hour. Let cool over night.
For the Monarch it was the same nut and bolt idea but with 27/64" bushings.
Idea of the fender washers is to make rolling and blending easier, keep the clay off the pan while baking and the bushings as a guide as to how much clay to put on the tubes. Too much clay and you will have problems turning. Don't remove the bushings.
The Monarch blank I used the same cane before making it a triangle, cut the cane down the middle then again making 4 pizza like slices. Placed the slices with their backs to each other exposing the interior lines then rolled a long thin spaghetti. Twisted the spaghetti to look like that in the photo. Wrap it around the 27/64 tube with no gap in between. Gently roll the clay on the tube (this where the washers come in handy) and have the sections blend without mushing it up. To hard a roll and it will come off the tube and deform. Patience and touch is the key.
On both its ok to have the clay extend a little over the bushings. Again not to thick. Thin as you can but proud of the bushings. Bake with the bushings attached the same as above. Wait time is the same. You can do this on any pen kit. This is where the artist in you comes out.
How to turn, square, sand, and finish them? Slow, patiently, surgically.
Squaring: Remove the bushings carefully. A barrel trimmer is of no use here. You will be sorry if you use one on these. No doubt one can find someone who did it but I had no success. I have a method of squaring PC material to the tube using home made trimmer shafts turned to fit any tube size, self adhered sand paper 120 grit stuck to a 1/4-20 fender washer that I slide on the mandrel using double sided tape to stick it to the mandrel chuck. Use a 1/4" bit to make the hole in the sand paper for a snug fit over the mandrel shaft.
Remove the bushings. Slide the tube over the trimmer shaft and as the lathe spins around 1000rpm press the tube gently against the sand paper until you see brass clearing away dust build up from the tube end. For 7mm tubes the trimmer shaft is not needed. Put the bushings back on after squaring and complete the blank to the size you are going for.
Turning: you're on your own. I use a round carbide. All I can say is be careful and be easy or it will fly apart. If it does break apart go up and make another one. If you chip out CA the pits early in the turn and as often as you need to before getting to the final shape. If it looks hideous by that time, go up again and make another one. I will say that as you turn it down a noticeable change in color will show.
Sanding: If you get this far, 400 or 600 grit to get down to the final shape will be the best bet. this will take a while so don't press to hard to hurry up. It wont work. Then 800 grit. Final inspection for pits and texture before you do 3 apps of thin CA then medium CA. Accelerator is ok after the 3 apps. I do thick CA after the medium because I'm used to it and makes the process go faster. If you notice any CA overhang go back to the sanding disc setup as previously mentioned.
Finishing: Whatever you do for your CA finish.
Hopefully it will look something like this...
One thing about the Stratus. The cap is susceptible to breaking off if dropped. My remedy is to glue a piece of tooth pick into the plunger and that should help keep things together. I should drop one and test the theory but not today.
If you read all of this and actually understand it let me know. I got lost somewhere around 'how to turn'........:befuddled:
Hope this all was helpful and if this belongs in another thread perhaps the moderator can do that. It was an education just doing all this...whew!!
I still don't know how Toni does it. Don't want to, it will take the mystery out of seeing what she comes up with next. But as long as she does; she inspires me to experiment, try different ideas, watch others, and more importantly - have fun doing it.
Attachments
-
 2015-10-06_17-11-02_624.jpg311.7 KB · Views: 189
 -
 2015-10-06_17-12-44_347.jpg152.9 KB · Views: 173
 -
 2015-10-06_17-13-42_635.jpg139.2 KB · Views: 172
 -
 2015-10-06_17-16-37_377.jpg146.3 KB · Views: 167
 -
 2015-10-06_17-16-59_581.jpg150.2 KB · Views: 191
 -
 2015-10-06_17-20-11_401.jpg126 KB · Views: 188
 -
 2015-10-06_17-21-34_425.jpg202 KB · Views: 171
 -
 2015-10-06_17-28-09_850.jpg210.3 KB · Views: 181
 -
 2015-10-06_17-42-13_26.jpg169 KB · Views: 158
 -
 2015-10-06_18-08-16_472.jpg157.1 KB · Views: 196
 -
 2015-10-06_18-07-33_189.jpg136.1 KB · Views: 158
 -
 2015-10-06_17-39-59_988.jpg138.2 KB · Views: 162
 -
 2015-10-06_18-03-52_976.jpg164.8 KB · Views: 170
 -
 IMG_0001 copy.jpg122.2 KB · Views: 172
 -
 IMG_0002 copy.jpg96.2 KB · Views: 165
 -
 2015-10-06_18-35-13_734.jpg101.6 KB · Views: 191
 -
 2015-10-06_18-35-35_638.jpg99.9 KB · Views: 167
 -
 2015-10-06_18-36-49_210.jpg79.1 KB · Views: 160
Last edited:
Great effect with those colour combos. :biggrin:
qquake
Member
Wow, thank you for the detailed instructions! It may be something I want to try in the future. What kind of clay do you use exactly?
Wow, thank you for the detailed instructions! It may be something I want to try in the future. What kind of clay do you use exactly?
Fimo or Premo. Avoid the soft ones.