sanyalsoumitra
Member
Some time back , I had read a fine advise on FPN or IAP forum- what to to do with older pens you had made earlier, that looks crude and inaccurate in retrospect.
Well, the advise is to break them and re-make- sort of, salvage the usable hardware and scrap the rest.
It is quite a hard decision to make for an amature pen maker, who tends to be in love for any ugly thing he had created in the past!
Finally I relented- re-making all the ugly ones made in the past and the results have have impressed me in a big way. The confidence gained is simply wrth it - so re-make and make good your past.
This is also a very meaningful new year resolution for me. Hope the lesson learnt stays with me and 2015 works out a better year to spend with family and friends.
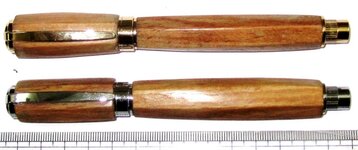
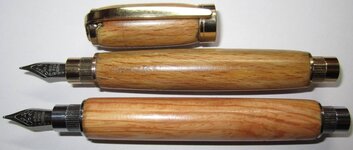
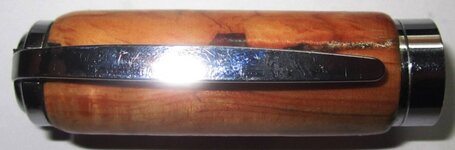
Started off with two Graduate Magnetic ones made earlier-these were too awkward any way!.
In the Gold one re-used the old wood and in the Chrome one discarded the body as the cap cracked. Yet to complete the Chrome Cap due to minor trouble with correct size drill bit availability.
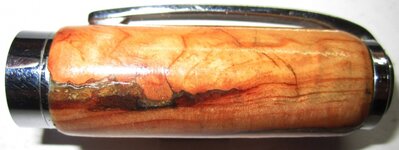
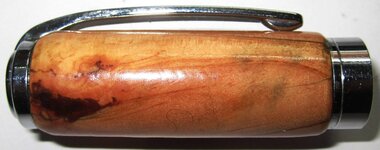
The wood is from different old shelves and packing material from my earlier ships- Phillipino seafarers call this wood " BaluChina" - some high fibre wood from china,no one could give me a genuine English name for the wood. In the incomplete one I have discarded the brass tube from the kit and used an aluminum tube.
Used 3 coats of thin CA available locally named " feviquick" ! Did not try to make the pen too shiny with more CA coats. These pens are yet to be technically perfect, meaning I would not dare sell them yet.But quite an OK make over from where it stood.
Welcome comments.
Well, the advise is to break them and re-make- sort of, salvage the usable hardware and scrap the rest.
It is quite a hard decision to make for an amature pen maker, who tends to be in love for any ugly thing he had created in the past!
Finally I relented- re-making all the ugly ones made in the past and the results have have impressed me in a big way. The confidence gained is simply wrth it - so re-make and make good your past.
This is also a very meaningful new year resolution for me. Hope the lesson learnt stays with me and 2015 works out a better year to spend with family and friends.
Started off with two Graduate Magnetic ones made earlier-these were too awkward any way!.
In the Gold one re-used the old wood and in the Chrome one discarded the body as the cap cracked. Yet to complete the Chrome Cap due to minor trouble with correct size drill bit availability.
The wood is from different old shelves and packing material from my earlier ships- Phillipino seafarers call this wood " BaluChina" - some high fibre wood from china,no one could give me a genuine English name for the wood. In the incomplete one I have discarded the brass tube from the kit and used an aluminum tube.
Used 3 coats of thin CA available locally named " feviquick" ! Did not try to make the pen too shiny with more CA coats. These pens are yet to be technically perfect, meaning I would not dare sell them yet.But quite an OK make over from where it stood.
Welcome comments.