Gloworm5
Member
With some kind encouragement & guidance from Barney (titan2), I was able to create my first calligraphy/dip pens. They were intended to be very basic just to get the feel and the process knowledge. Maybe this will encourage others to do the same.
The first step was to create a pin chuck to hold the pen blank. Barney gave me this nice link courtesy of RedRiverPens.com to help guide me through the process. Within this document you will find information on the pin chuck.
http://www.redriverpens.com/pdf files/calligraphy Dip Pen.pdf
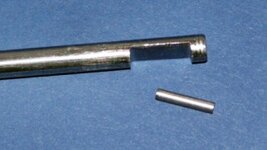
Since I already had a 7 mm shaft from an earlier pen mandrel, I decided to use one end of it to make the pin chuck on. The separate little pin is nothing more than a 0.100" diameter nail cut to just slightly shorter than the notch I made in the mandrel shaft.
The notch in the mandrel shaft was accomplished very easily and quickly with a flat steel file. I turned the file on its edge and began to slowly grind away the metal until I had a depth that was the same as the diameter of the nail.

Following the steps to creating the calligraphy/dip pens, I drilled the 7 mm hole in one end of my blank and glued it in place. After the glue had cured, I used my pen mill to square the blank end just as I would do for any other pen. I carefully held the pin in place sliding the pen blank over the end of the pin chuck. The pen brass sleeve should just barely fit over the chuck. Then with a light twist the chuck is tightened up. Mine was never real tight until I pulled my live center up and tightened it up between the head stock and the live center.
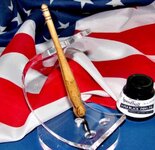
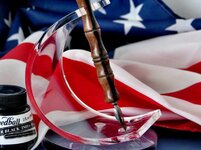
My first pen was finished with very little effort. I inserted the nib holder into the end of the pen and then inserted the nib. I was amazed at how light it was. It was like a feather. I placed it on my digital postage scale and found it weighed only 0.3 onces.

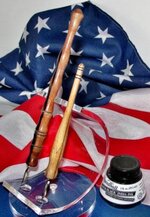
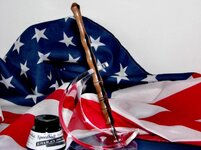
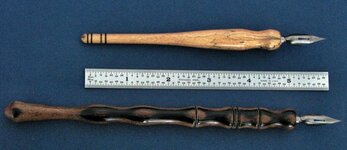
I decided to try my hand at it again. This time I made it a good deal longer. And, this time I used black/white ebony for the blank that I had laying around. Barney says the nibs are from around the turn of the 19th to 20th century.


Even as simple as these pens were to make, I enjoyed making them and writing with them is also a lot of fun. And, they bring back a lot of very old memories for me. Maybe a lot of you have never had this experience. Well, now is the time to take a little time to make a keepsake pen.
I hope you too will try to do the same again and again.
Larry (Gloworm5)
The first step was to create a pin chuck to hold the pen blank. Barney gave me this nice link courtesy of RedRiverPens.com to help guide me through the process. Within this document you will find information on the pin chuck.
http://www.redriverpens.com/pdf files/calligraphy Dip Pen.pdf
Since I already had a 7 mm shaft from an earlier pen mandrel, I decided to use one end of it to make the pin chuck on. The separate little pin is nothing more than a 0.100" diameter nail cut to just slightly shorter than the notch I made in the mandrel shaft.
The notch in the mandrel shaft was accomplished very easily and quickly with a flat steel file. I turned the file on its edge and began to slowly grind away the metal until I had a depth that was the same as the diameter of the nail.
Following the steps to creating the calligraphy/dip pens, I drilled the 7 mm hole in one end of my blank and glued it in place. After the glue had cured, I used my pen mill to square the blank end just as I would do for any other pen. I carefully held the pin in place sliding the pen blank over the end of the pin chuck. The pen brass sleeve should just barely fit over the chuck. Then with a light twist the chuck is tightened up. Mine was never real tight until I pulled my live center up and tightened it up between the head stock and the live center.
My first pen was finished with very little effort. I inserted the nib holder into the end of the pen and then inserted the nib. I was amazed at how light it was. It was like a feather. I placed it on my digital postage scale and found it weighed only 0.3 onces.
I decided to try my hand at it again. This time I made it a good deal longer. And, this time I used black/white ebony for the blank that I had laying around. Barney says the nibs are from around the turn of the 19th to 20th century.
Even as simple as these pens were to make, I enjoyed making them and writing with them is also a lot of fun. And, they bring back a lot of very old memories for me. Maybe a lot of you have never had this experience. Well, now is the time to take a little time to make a keepsake pen.
I hope you too will try to do the same again and again.
Larry (Gloworm5)
Attachments
-
 IMG_2465_Mod2_800x600.jpg21 KB · Views: 518
 -
 IMG_2453_Mod1_CalligraphyDipPen001_800x600.jpg49.2 KB · Views: 530
 -
 IMG_2465_Mod3_800x600.jpg45.1 KB · Views: 167
 -
 IMG_2478_Mod1_800x600.jpg54.4 KB · Views: 160
 -
 IMG_2476_Mod1_800x600.jpg60.7 KB · Views: 158
 -
 IMG_2483_Mod2_800x600.jpg83.3 KB · Views: 189
 -
 IMG_2482_Mod2_800x600.jpg68.9 KB · Views: 163
Last edited:
