
badger
Member
I finally got some time in the garage on a lovely day.
A couple of firsts for me, and an attempt and fail at a new technique. I tried sealing with thin CA for the first time, and all really did was glop it around, I had to sand it back down and I can see areas where I missed entirely. Also, glued my fingers together, heh he. All around an interesting day.
I made a Teachers pen for a friend (who is teaching and working on her Phd).
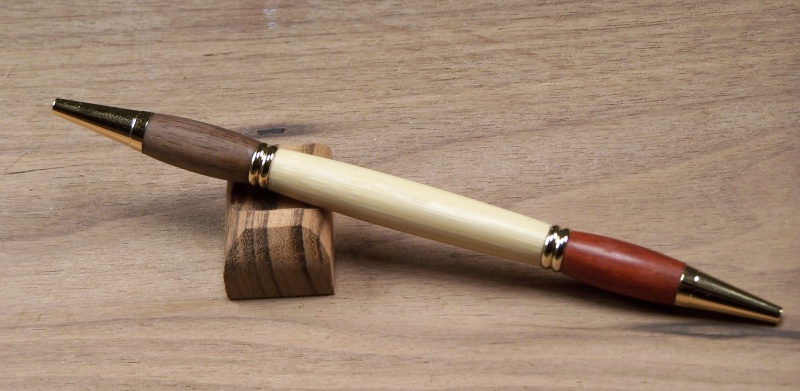
Woods is Walnut (recylced), Bamboo (sustainable), Chakte Kok (scrap wood).
The second is a prototype for a wedding pen set I am giving this summer. I got a Navigator kit at Woodcraft, and I'm going to try the stripe thing with TruStone on a platinum finish Baron for those. This was my attempt at visualizing the banding I wanted to do. I've learned two things. Firstly, I can't cut a right angle to save my life. Secondly, I LOVE this pen kit. I will be making many more in the future.
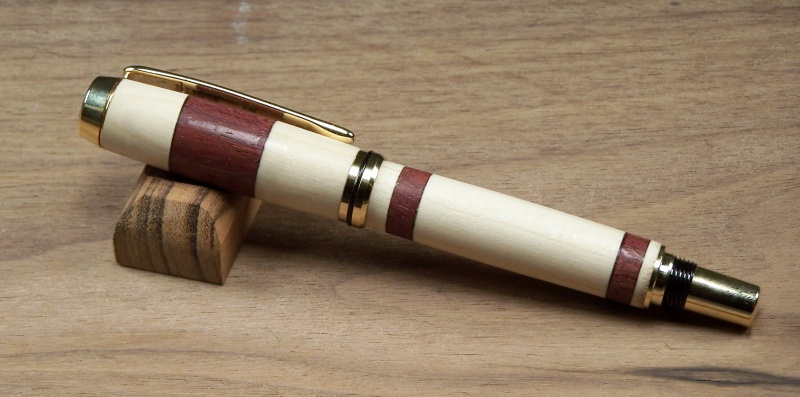
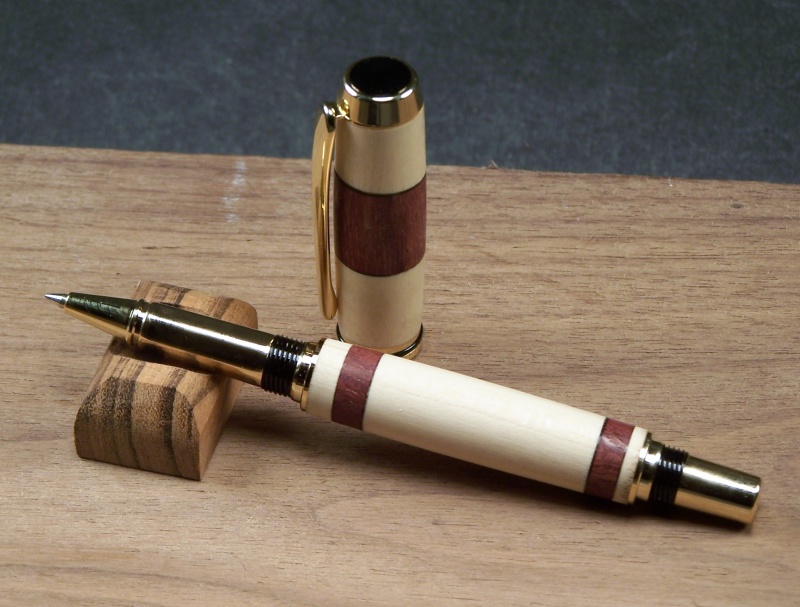
Wood is Maple (landfill lumber), and Purpleheart. None of the bands are cut 90 degrees. My table saw is not the way to go here, I need to figure something else out, and fast.
I'm going to remove on of the bands on the lower barrel I decided after seeing this. I'm going with a big band on the pen cap, and a small thin band on the lower barrel near the end, and remove the one by the writing tip.
Badger
A couple of firsts for me, and an attempt and fail at a new technique. I tried sealing with thin CA for the first time, and all really did was glop it around, I had to sand it back down and I can see areas where I missed entirely. Also, glued my fingers together, heh he. All around an interesting day.
I made a Teachers pen for a friend (who is teaching and working on her Phd).
Woods is Walnut (recylced), Bamboo (sustainable), Chakte Kok (scrap wood).
The second is a prototype for a wedding pen set I am giving this summer. I got a Navigator kit at Woodcraft, and I'm going to try the stripe thing with TruStone on a platinum finish Baron for those. This was my attempt at visualizing the banding I wanted to do. I've learned two things. Firstly, I can't cut a right angle to save my life. Secondly, I LOVE this pen kit. I will be making many more in the future.
Wood is Maple (landfill lumber), and Purpleheart. None of the bands are cut 90 degrees. My table saw is not the way to go here, I need to figure something else out, and fast.
I'm going to remove on of the bands on the lower barrel I decided after seeing this. I'm going with a big band on the pen cap, and a small thin band on the lower barrel near the end, and remove the one by the writing tip.
Badger
") AS to your comment of not being 90°, - the way that I finally decided upon took a little more time - about 20 to 30 minutes but everything was square.
AS to your comment of not being 90°, - the way that I finally decided upon took a little more time - about 20 to 30 minutes but everything was square.