First circuit board pen

Signed-In Members Don't See This Ad
See more from qquake

qquake

Member
Joined
Feb 8, 2004
Messages
5,014
Location
Northern California
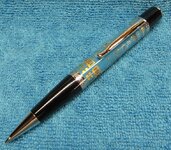
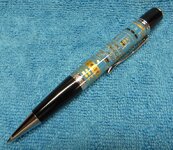
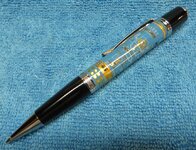
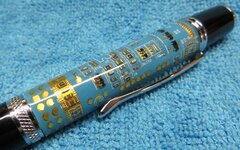
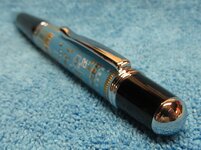
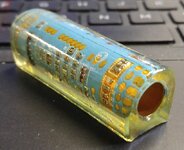
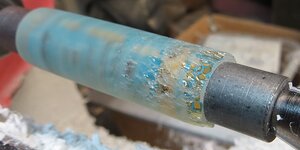
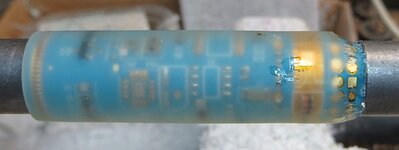
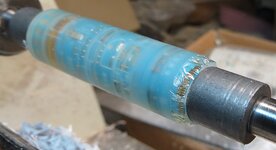
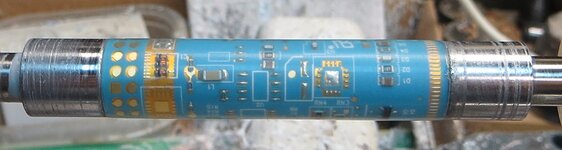
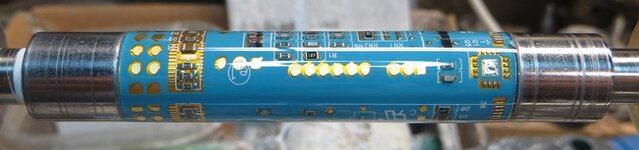
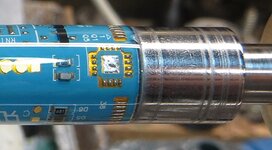
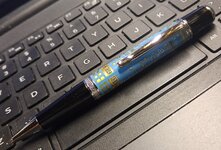
I've never been a big fan of the circuit board pens, they always seemed kind of "gimmicky" to me. I've also never been much of a fan of the Sierra style pens. But my friend Hanna was with me at Woodcraft a few months ago, and she thought they were very cool. Then when I saw that they were on clearance on Woodcraft's website, I ordered one. I must say, my opinion has changed. It is a very cool looking pen, and I think it goes well with the Sierra style. I know that the blue background isn't the best for this pen, but it's all I had. I need to get some different colors.
 

Attachments

  • 050.JPG
    050.JPG
    298.4 KB · Views: 118
  • 051.JPG
    051.JPG
    284 KB · Views: 117
  • 052.JPG
    052.JPG
    311.6 KB · Views: 94
  • 053.JPG
    053.JPG
    224.1 KB · Views: 115
  • 055.JPG
    055.JPG
    189.7 KB · Views: 99
Signed-In Members Don't See This Ad

qquake

Member
Joined
Feb 8, 2004
Messages
5,014
Location
Northern California
This is actually my second attempt at this pen. The first one chipped out very badly on one end, enough to make it unusable. Now I've chipped out a lot of blanks in my day, but didn't think it was my fault this time. The clear resin on the blank was a little odd. In the first place the outside surface was very sticky. Never experienced that before with acrylic. It also looked kind of yellowish, and I was thinking maybe there was something wrong with the resin. Maybe it had cured improperly or not completely. It was very brittle. I complained to Woodcraft, and they generously sent a new kit at no charge.
 

Attachments

  • 002.jpg
    002.jpg
    187 KB · Views: 113
  • 017.JPG
    017.JPG
    122 KB · Views: 125
  • 022.JPG
    022.JPG
    81.7 KB · Views: 113

jttheclockman

Member
Joined
Feb 22, 2005
Messages
19,132
Location
NJ, USA.
2 things. All these blanks come sticky. They all buy from the same place. Stick them in a toaster oven for a couple minutes on low. Or out in the sun.

Second you need to work on you attack on turning a blank. From your photo you turned away way too much on the end. You do turn the ends down first but you do it in a gradual step. You need the material of the blank to continue to support itself throughout the entire turning process. From that photo I can tell you had to present the tool at such a sharp degree you dug into the blank instead of smoothly turning away material. A picture is worth a 1000 words as they say. Good luck and those are always big sellers.

Also knock those square corners off before turning.
 
Last edited:

qquake

Member
Joined
Feb 8, 2004
Messages
5,014
Location
Northern California
The blank in the new kit was the same, sticky and yellow. So I proceeded very carefully, taking very light cuts. It still chipped, but not enough to ruin it. I finally got it turned and polished. I admit, I felt no small measure of satisfaction with the successful turning of it. If you look closely at the closeup photo, you can see I was left with a tiny chip on the end. But it was hardly noticeable in person, so I went ahead and used it.
 

Attachments

  • 039.JPG
    039.JPG
    112.5 KB · Views: 104
  • 045.JPG
    045.JPG
    87.4 KB · Views: 110
  • 047.JPG
    047.JPG
    79 KB · Views: 87
  • 047b.JPG
    047b.JPG
    161.8 KB · Views: 108

qquake

Member
Joined
Feb 8, 2004
Messages
5,014
Location
Northern California
2 things. All these blanks come sticky. They all buy from the same place. Stick them in a toaster oven for a couple minutes on low. Or out in the sun.

Second you need to work on you attack on turning a blank. From your photo you turned away way too much on the end. You do turn the ends down first but you do it in a gradual step. You need the material of the blank to continue to support itself throughout the entire turning process. From that photo I can tell you had to present the tool at such a sharp degree you dug into the blank instead of smoothly turning away material. A picture is worth a 1000 words as they say. Good luck and those are always big sellers.

Also knock those square corners off before turning.

Actually, I didn't turn the ends down first. I always cut straight across the blank when I turn, from left to right. Once it's at the desired diameter, if it's a blank that I want to be thicker in the middle, then I'll work on each end, from each bushing to the middle of the blank, then do final shaping. But in this case, I wanted the blank to be a uniform thickness from end to end. So when the chipping occurred, I was moving the chisel from left to right. My turning methods may not be "proper", but they work a majority of the time. In my defense, when I started turning pens, I had to teach myself. Over the years, I've discovered what works for me (most of the time).

And thank you for the advice to "bake" the blank first. I'll definitely try that next time.
 
Last edited:

mecompco

Member
Joined
Apr 24, 2015
Messages
1,607
Location
Fairfield, Maine
Very nice. They are so far one of my best sellers. I like the black one, especially, paired with Exotic Blank's Elegant Vista. Oh, and some thick CA will generally make an invisible repair if you have a minor chip out.
 

carlmorrell

Member
Joined
May 14, 2013
Messages
691
Location
Cary, NC
I use a circuit board pen as my "daily driver", since I am a computer programmer, it seems fitting. It came apart in my pocket, and then hit the ground. There were many big chips broken off the end. I was able, over several days to fill in the chips with CA. And I was really surprised at how well it came out after re-sanding. SHould have done before/after pics:frown:
 

jttheclockman

Member
Joined
Feb 22, 2005
Messages
19,132
Location
NJ, USA.
Jim I am sorry to say but you do need to teach yourself new tool control. You always want the bevel of a tool resting on the material. Never in thin air which you would get if going right to left. In other words never advance your tool from the bushing into the material. Also you need a sharp skew and you would never have any chip outs. Let the tool do the work. Just from all the photos you shown of the blank and the ends next to the bushing is way too steep for a beginning cut. that is why it is chipping on the end. It is like sharpening the point on a pencil.
 

eranox

Member
Joined
Sep 12, 2012
Messages
322
Location
Killeen, TX
Very nice! I recently turned my first circuit board blank, and I ran into the same issues. I use 50 grit sandpaper to get the blank to a roughly cylindrical shape before I start. Then I use my round nose scraper, starting from the middle of the blank and working toward the ends. Even so, I got a 1/4 hairline crack in the end of one of my blanks. It still turned out nicely; I discounted it and a friend of mine snapped it up.

Good work on the pen! Looks perfect to my eye.
 

JohnU

Member
Joined
Jan 31, 2008
Messages
4,951
Location
Ottawa, Illinois
Looks good, assume that it's PR like silmar 41, if so it should be able be recast.

I've successfully recast a few after having it chip out at one end on me. It was my fault turning a cold resin blank. Now I make sure to warm them up in my pocket about 20 minutes before I turn them. Like the others have said, they can be a big hit! I get lots of requests for them. I recently made a navy blue cigar circuit board pen on a 2 tone chrome kit. I had lots of eyes and bids on it at the fund raiser. Good luck!
 
Top Bottom