couple of Retros

Signed-In Members Don't See This Ad
See more from dow

dow

Member
Joined
Jun 25, 2009
Messages
585
Location
Boerne, TX, USA
I've been getting ready for a show, and here are a couple that I am particularly pleased with. I've been having a lot of fun doing custom finials on these. I think that they look a lot better than the metal domes the component sets come with.

1_IMG_1894.jpg


1_IMG_1895.jpg


1_IMG_1901.jpg


1_IMG_1902.jpg
 
Last edited:
Signed-In Members Don't See This Ad

D.Oliver

Member
Joined
May 10, 2011
Messages
3,531
Location
Faith SD
Those are two sharp looking pens. The plating you picked is a perfect match in both cases.
 

dow

Member
Joined
Jun 25, 2009
Messages
585
Location
Boerne, TX, USA
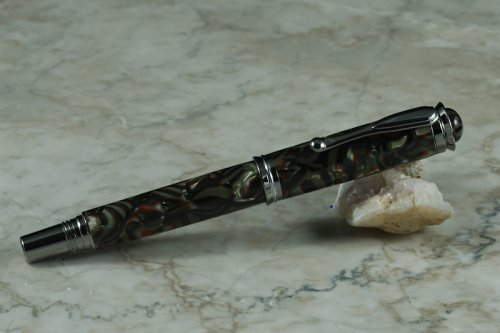
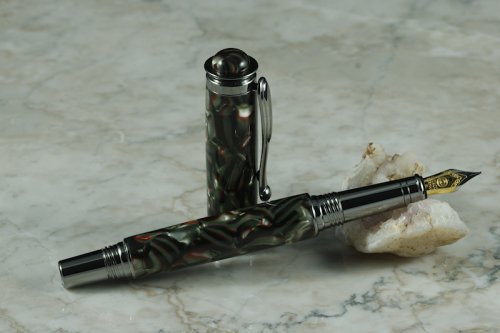
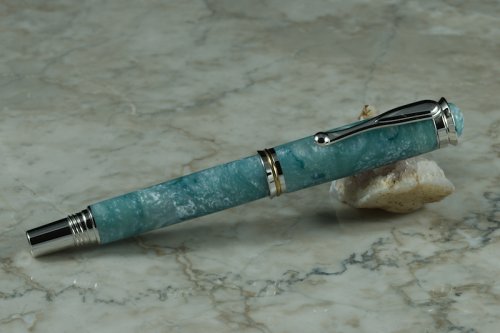
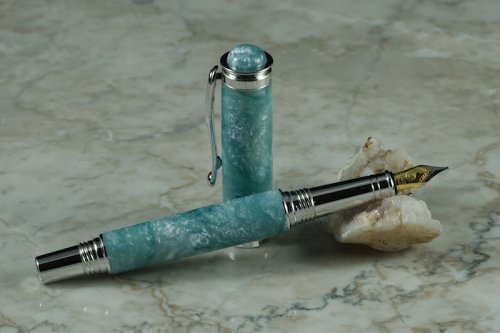
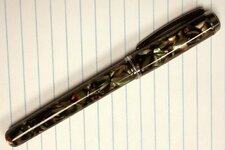
Derek, the first one is Italian serpentine ceboplast. Hasn't been made since the 30's, I believe, and it's one of my favorite materials to work with. I wish I could find some more of it, as my stash isn't as big as it once was. The second is alumalite made by el mostro, who I'm using more and more for my blanks. He does very nice work.

Funny thing about those pictures. They look way different on IAP than they do on my computer. I uploaded the same ones that I formatted last night, but they look way darker online. I think it may be the white background on the iap... That, and they don't display the same size online as they do on my computer. I've got a darker tile that I could have shot them on, but I was afraid that the ceboplast one would kind of vanish into it in a picture.

Yep. I just resized my browser window so that all I could see was the first picture, and I've got a black background on my desktop. That helped the picture a bunch. I wish I knew how to do the click-able thumbnail pictures that the guys here use. That would be better, I think.

Does anybody feel like teaching me how to do that "click on the little picture and get the big picture" thing? I'd sure appreciate it.
 
Last edited:

StephenM

Member
Joined
Apr 16, 2011
Messages
535
Location
Webster Groves, MO
Does anybody feel like teaching me how to do that "click on the little picture and get the big picture" thing? I'd sure appreciate it.


When you want to attach thumbnails, scroll down to "Additional Options" and then click on "Manage Attachments". From there you can upload your photos directly from your computer. That will include a thumbnail in your message and then people can click on the thumbnail for a bigger view.
 

dow

Member
Joined
Jun 25, 2009
Messages
585
Location
Boerne, TX, USA
Does anybody feel like teaching me how to do that "click on the little picture and get the big picture" thing? I'd sure appreciate it.


When you want to attach thumbnails, scroll down to "Additional Options" and then click on "Manage Attachments". From there you can upload your photos directly from your computer. That will include a thumbnail in your message and then people can click on the thumbnail for a bigger view.
Thanks Stephen. I'll give it a shot the next time.
 

IPD_Mr

Member
Joined
Jun 27, 2007
Messages
3,707
Location
Zionsville, In
Dow - At first I was going to say something about the shape of the finial, but I kept going back and looking at it. The more I looked the more it grew on me and I definitely like it. I just hope that you have glued it in well as I can just see a kid trying to pry it out at a show. :eek:
 

dow

Member
Joined
Jun 25, 2009
Messages
585
Location
Boerne, TX, USA
Dow - At first I was going to say something about the shape of the finial, but I kept going back and looking at it. The more I looked the more it grew on me and I definitely like it. I just hope that you have glued it in well as I can just see a kid trying to pry it out at a show. :eek:

Thanks! Yeah, they turned out a little bit taller than I'd have preferred, I didn't realize it until they were glued in. Oh, and epoxy is your friend with them. I turn them with a tenon the same diameter as the one on the metal factory finial and put epoxy in the cup of the crown. They stay centered until the epoxy sets up. I've done some jr. gents the same way, and my daily carry pen has been knocked around a lot. The finial on it has never budged.

other than price - is there any difference between LauLau's Retro and the JR. Retro at CSUSA?

The platings are different. Aaron has gold ti, black ti, and rhodium, while CSUSA only has 10k gold and rhodium. Aaron also has both rollerball and fountain pens. CSUSA no longer carries the foutain pens in this model.
 
Last edited:

dow

Member
Joined
Jun 25, 2009
Messages
585
Location
Boerne, TX, USA
Love the finials. I've got a half stick of that serpentine and I dunno what I'll ever do with it. It sure is beautiful! They both are.
Shoot, send it to me. I'll use it. :biggrin:

Seriously, If I remember right, a full stick is about 13 inches long, so if you've got half a stick of it, then you've probably got enough to do at least a closed end jr. gent or something like that. There may even be enough to do a kitless, if you make the section out of something else. Here's the first closed end pen I made. the body is a little long, since I wasn't sure what I was doing, and that makes it stick out of my shirt pocket a little bit, but it's less than half a stick, so you could do it as well. Oh, sorry about the picture. It's a little blown out. Cell phone cameras aren't the same as DSLR's are.

Oh, and I got that thumbnail thing to work. Thanks again for the tip, Stephen!
 

Attachments

  • IMG_20120329_082615_2.jpg
    IMG_20120329_082615_2.jpg
    38.8 KB · Views: 124
Last edited:

turningfish

Member
Joined
Jan 21, 2011
Messages
29
Location
Ct.
Good looking pens. I am also a fan of the jr. retro. I haven't done any finials yet but but thought that after glueing a plastic in I might stick a heated nail head down the tube to put a good burr on the tennon to lock it in . The factory ones look like they are peened over. Does that sound logical ?
 

dow

Member
Joined
Jun 25, 2009
Messages
585
Location
Boerne, TX, USA
I don't think they're peened over. I think they're made slightly oversize for the hole in the crown and then pressed in. They're easy enough to get out with a transfer punch the right size. There's a tutorial article somewhere in the library that explains how to remove one from the jr. gent. The same rules apply for the retros.
 
Top Bottom