A couple more finished

Signed-In Members Don't See This Ad
See more from buttonsHT

buttonsHT

Member
Joined
Jan 25, 2014
Messages
94
Location
Burlington, ON
Here's a couple more that I've done recently. I took the advice of someone on youtube and turned some blanks from a scrap 2x4 and practiced CA finish on those. I feel I'm slowly getting the hang of it...

On to the new pens! There's a couple I can't post as they're for the BASH contests (Beginner and Russ Fairfield Slimline are the two I'm entering)

1 - A gold Slimline kit on unknown blank (some colored plywood type wood I had laying around)
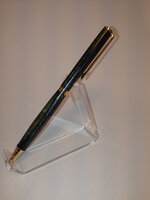
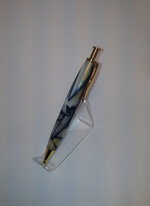
2 - A gold Longwood kit on an acrylic blank
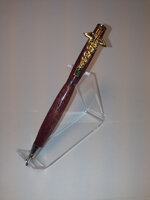
3 - A chrome Slimline Econo kit on purpleheart with a caduceus (for my girlfriends friend who is a nurse)
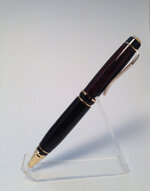
4 - A gold Cigar kit on Brazilian Rosewood
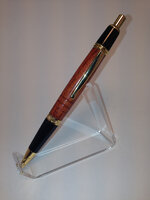
5 - A gold Sierra Click kit on Guatemalan Rosewood

Any comments and criticism are welcome. I know I still have some things to work on (including my terrible photography :biggrin:)

Thanks for looking!
 

Attachments

  • pen6.JPG
    pen6.JPG
    101.7 KB · Views: 134
  • Pen7.JPG
    Pen7.JPG
    84.7 KB · Views: 142
  • Pen9.JPG
    Pen9.JPG
    113.5 KB · Views: 150
  • pen10.JPG
    pen10.JPG
    98.3 KB · Views: 124
  • pen11.JPG
    pen11.JPG
    104.6 KB · Views: 126
Signed-In Members Don't See This Ad
Joined
Feb 25, 2010
Messages
1,799
Location
webberville, mi
Mark - Couple things. First, congrats. Your work shows attention to the craft. Practicing finishing before doing it "for real" is an excellent thing to do. You'll make the necessary mistakes and progress a lot faster than I did! It's cheaper, too! Second, a photography tip. Assuming you are doing digital work, take the same shot and bracket the exposures. Most cameras will allow this. You can choose which one to use after you look them over. Frankly, in my photos, I will most often choose a shot that is "overexposed" at least +1 stop.

Keep up the good work. I'm looking forward to seeing more of your work.
 

buttonsHT

Member
Joined
Jan 25, 2014
Messages
94
Location
Burlington, ON
I like them Mark. Nice work.

looken good, keep going.

Thank you both!

Mark - Couple things. First, congrats. Your work shows attention to the craft. Practicing finishing before doing it "for real" is an excellent thing to do. You'll make the necessary mistakes and progress a lot faster than I did! It's cheaper, too! Second, a photography tip. Assuming you are doing digital work, take the same shot and bracket the exposures. Most cameras will allow this. You can choose which one to use after you look them over. Frankly, in my photos, I will most often choose a shot that is "overexposed" at least +1 stop.

Keep up the good work. I'm looking forward to seeing more of your work.

I wasted 3-4 kits when I first got setup. :frown: 2 because I didn't glue them properly (I can be very impatient) and 2 because I didn't know what I was doing with CA! That stuff can get really messy really quick.

I went on youtube and watched 243284738 videos of CA finishing and the one that REALLY hit home was from the gentleman at Wood-n-Whimsies. He explained the process very well and I did it the way he did and it worked out much better. He's also who mentioned the idea of using scrap wood to try out on.
 

GaryT45

Member
Joined
Feb 26, 2012
Messages
50
Location
Avondale, AZ
I'm not sure what grit you are sanding to with the wood pens, but the last 2 look like there are still some sanding marks left.
I use 150, 240, 320, 400, 600, then 1000, 1500, 1800, 2400, 3200, 3600.
 

OZturner

Member
Joined
Aug 5, 2013
Messages
6,662
Location
Sydney. NSW. Australia
Nice Pens Mark,
As you have found, Pens, Adhesive, and CA etc., are not very forgiving.
You hit the nail on the head. Don't be in a hurry, a great pen is not judged on how quick it was built, but on the Material Selection, Form and Profile, Fit and Finish.
Just like in a Contact, "The Devil is in the Detail".
Congratulations,
Brian.
 
Top Bottom