knowltoh
Member
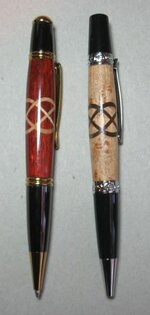
Here are a couple of my better celtic knots. I have a lot that were disasters! I am the type of person who tends to be impatient and I like projects that can be completed quickly. This great hobby has done a lot to instill patience in my personality---definitely a work in progress.
The pen on the left is a Le Roi in Bloodwood and the other is a Le Roi Elegant in Birdseye maple.
I have learned the following doing celtic knots.
1) The inlay must be as close to the kerf of the blade as possible.
2) Starting with a square blank is crucial
3) After cutting the blank for the first inlay, glue and clamp for at least 24 hrs before making the next cut.
4) Marking and drilling the blanks at the center has to be right on or the segments of the knot will not be symmetrical. This is probably the most critical part.
5) Avoid heat buildup when drilling or the inlays may (will) separate.
6)----
7)----
The list could go on, but these were major in my eyes. Start to finish was 7 days on these two pens, but they are best to date.
Comments and suggestions welcome.