Cappuccino Filler

Signed-In Members Don't See This Ad
See more from Timebandit

Timebandit

Member
Joined
Sep 25, 2010
Messages
1,446
Location
Austin,TX
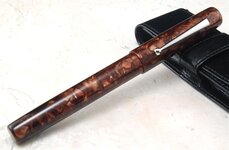
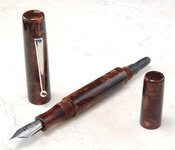
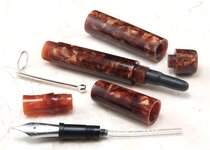
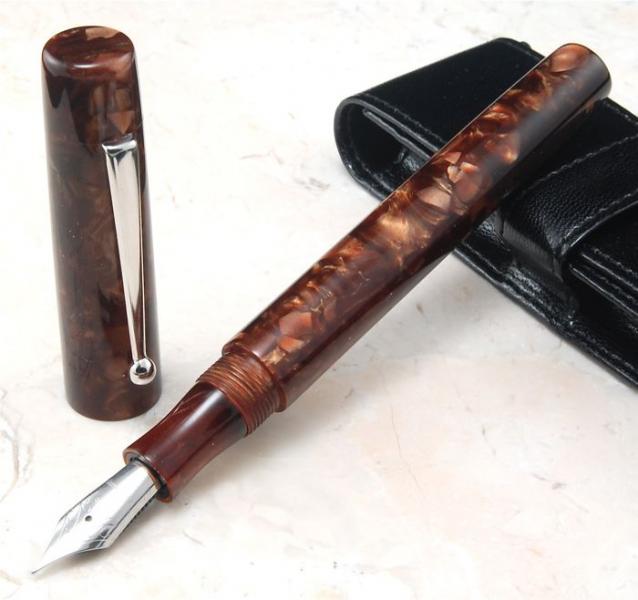
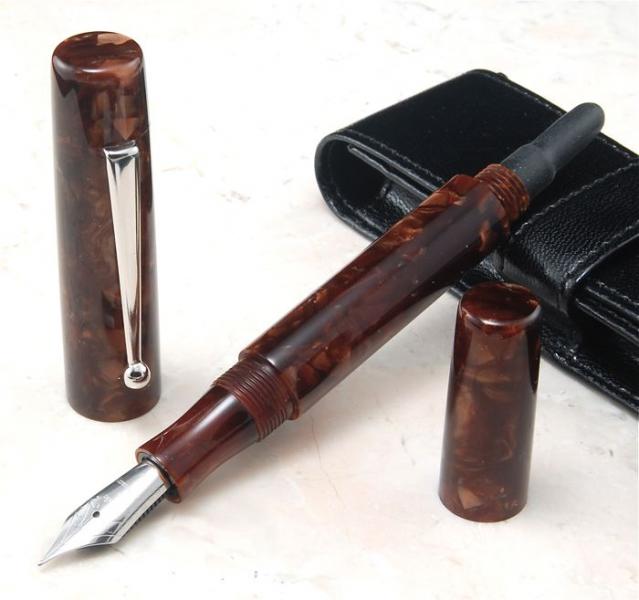
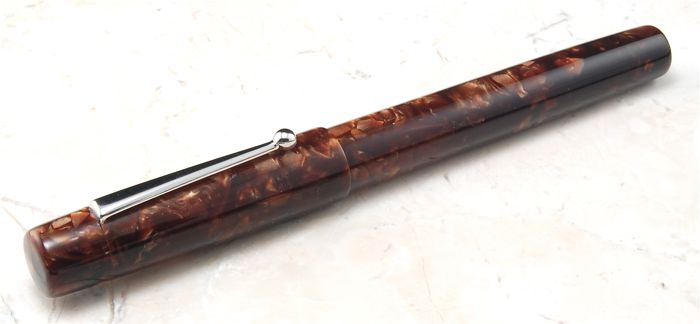
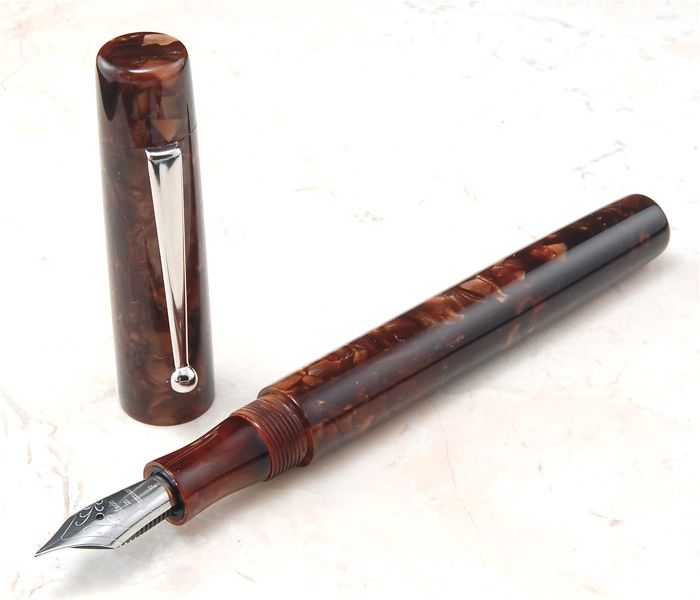
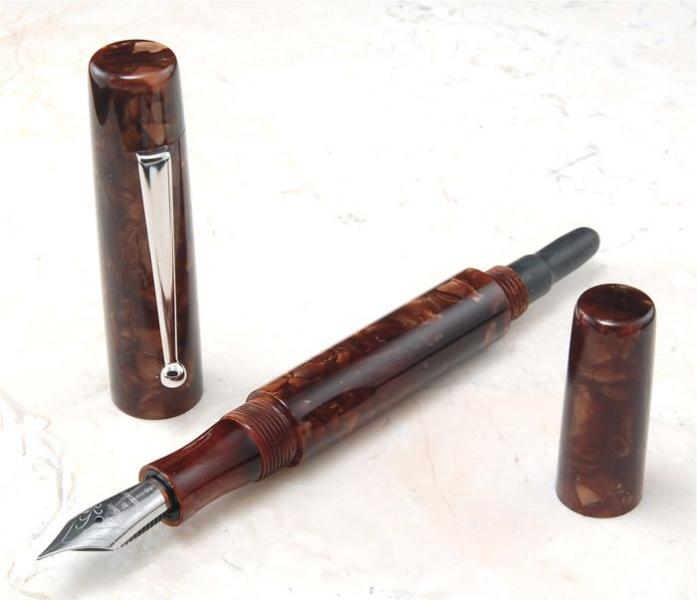
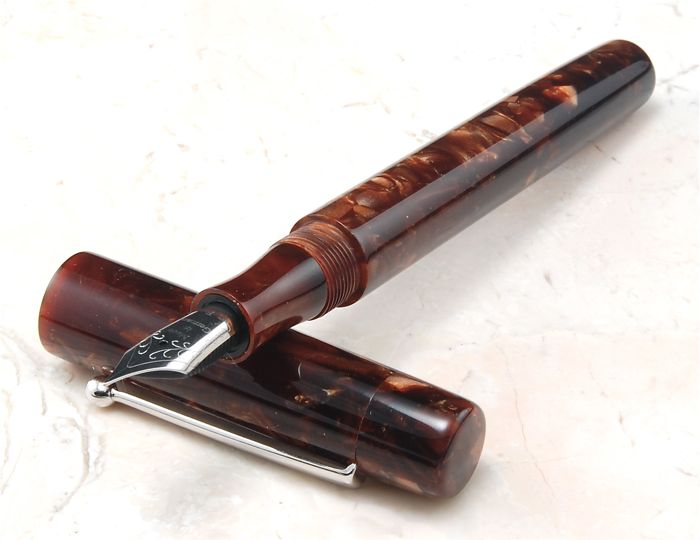
Here is one i finished yesterday. This one turned out good i think!:rolleyes:This one is a Bulb Filler in Cappuccino Flake acrylic with a #6 Meister Nib. The finial turned out to be shorter than my other ones because when i got to diameter and stopped the lathe, there was a large void at the center of the rod, so it had to be shortened. Its 1/2" instead of 3/4". I included a pic at the bottom of the pen taken apart because several people have expressed interest in seeing the inner workings.

All Comment Welcome

Thanks For Looking

Justin

attachment.php

attachment.php

attachment.php

attachment.php

attachment.php

attachment.php

attachment.php

attachment.php
 

Attachments

  • DSC_0541.jpg
    DSC_0541.jpg
    38.4 KB · Views: 663
  • DSC_0542.jpg
    DSC_0542.jpg
    35.8 KB · Views: 620
  • DSC_0545.jpg
    DSC_0545.jpg
    35 KB · Views: 624
  • DSC_0544.jpg
    DSC_0544.jpg
    22.7 KB · Views: 627
  • DSC_0546.jpg
    DSC_0546.jpg
    35.2 KB · Views: 623
  • DSC_0547.jpg
    DSC_0547.jpg
    30.4 KB · Views: 625
  • DSC_0548.jpg
    DSC_0548.jpg
    37.8 KB · Views: 618
  • DSC_0549.jpg
    DSC_0549.jpg
    45.5 KB · Views: 616
Signed-In Members Don't See This Ad

hewunch

Member
Joined
Aug 5, 2008
Messages
4,661
Location
Albany, GA
Very cool! If you don't mind me asking, where did you get your breather tube and bulb (sac)? Thanks!
 

Timebandit

Member
Joined
Sep 25, 2010
Messages
1,446
Location
Austin,TX

burgerman

Member
Joined
May 3, 2009
Messages
239
Location
Austin TX
Another beauty Justin! I think it's in perfect proportion. I like the finial on this one. I'm still trying to figure out how you got that little notch in the cap for the clip, without chipping anything out??? I don't see where you find the time to keep cranking these out! I know they are very time consuming. That's a lot of threads to cut! Great job.
 

wizard

Member
Joined
Aug 27, 2009
Messages
3,569
Location
Houston, Texas
Another gorgeous pen Justin!!:biggrin:. I really like that Cappuccino Flake Acrylic.
It gives almost a vintage celluloid appearance to the pen. Beautiful job! Thanks for sharing. Doc
 

philb

Member
Joined
Sep 1, 2007
Messages
1,561
Location
Midlands, United Kingdom.
Great pen!!

One question! How do you get the grain to match on the lower barrel that unscrews, as you must lose some of the blank when parting through, and the more lose with the tenon for the thread? But it seems perfectly matched!!

Phil
 

Timebandit

Member
Joined
Sep 25, 2010
Messages
1,446
Location
Austin,TX
Great pen!!

One question! How do you get the grain to match on the lower barrel that unscrews, as you must lose some of the blank when parting through, and the more lose with the tenon for the thread? But it seems perfectly matched!!

Phil

Thanks Phil!

Great question. You can never really perfectly line it up, because as you said, you lose some to threads and tenons and just the saw blade ( I dont part on the lathe) when you cut the pieces up. With material like these Flakes, they are much more forgiving. The pattern in them, even though random, is all flakes that look like other flakes. The main thing that i have to line up is the light and dark section in the blank. There is usually a side that is brighter and one that is darker with materials like these(Flakes, Mandraperlatto). So as long as i get those lined up, with these materials at least, its an optical illusion. They dont line up perfectly, but the pattern is so close its hard to tell. I even had a hard time seeing the seem where it unscrews for the bulb.:biggrin: Now with other materials its a little harder. Go back and look at my other pens and you will start to see a pattern(No pun intended) in the way they line up between the different materials.

Thanks for you question

Justiin
 
Last edited:

thewishman

Member
Joined
Mar 9, 2006
Messages
8,182
Location
Reynoldsburg, Ohio, USA.
WoW! Thanks for the picture of the parts - that makes the whole process more clear. It also shows how many parts must be threaded - is it 7? And at least a few of the threads need to be air-tight for the bulb filler.

Your pens look like you've been doing this for years. Such a pretty pen.
 

Timebandit

Member
Joined
Sep 25, 2010
Messages
1,446
Location
Austin,TX
WoW! Thanks for the picture of the parts - that makes the whole process more clear. It also shows how many parts must be threaded - is it 7? And at least a few of the threads need to be air-tight for the bulb filler.

Your pens look like you've been doing this for years. Such a pretty pen.


Try 9 threaded and taped parts. Threads on the finial,mating finial threads on the cap, cap threads to body, mating body threads to cap, section threads in body, body threads on blind cap for bulb filler, blind cap mating threads, section threads to body, and threads for the feed to the section. Plus a tenon for the bulb sac just for good measure:biggrin:

As for airtight, the bulb sac end is glued on with shelac so it is watertight/airtight. The section threads will have silicone grease on them to make the watertight/airtight.
 

joefyffe

Passed Away Aug 19, 2018
In Memoriam
Joined
Mar 29, 2010
Messages
1,316
Location
Indianapolis (almost Zionsville) Indiana
Kitless

Justin: Beautiful, just Beautiful. Also, thanks for the breakdown of parts. I think I'm getting close to trying "kitless", (Got tap and die on order) but didn't know where to start. This at least gives me a better understanding, and definitely a "RAISED BAR" !:beauty:
 
Top Bottom