Camphor/Walnut Segmented

Signed-In Members Don't See This Ad
See more from mark james

mark james

IAP Collection, Curator
Joined
Sep 6, 2012
Messages
12,752
Location
Medina, Ohio
A few months ago I friended a newer member and this is our second "Trade."

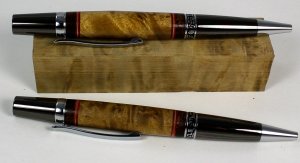
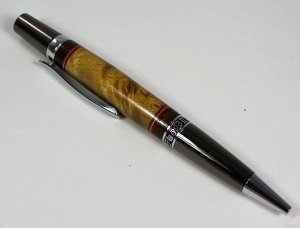
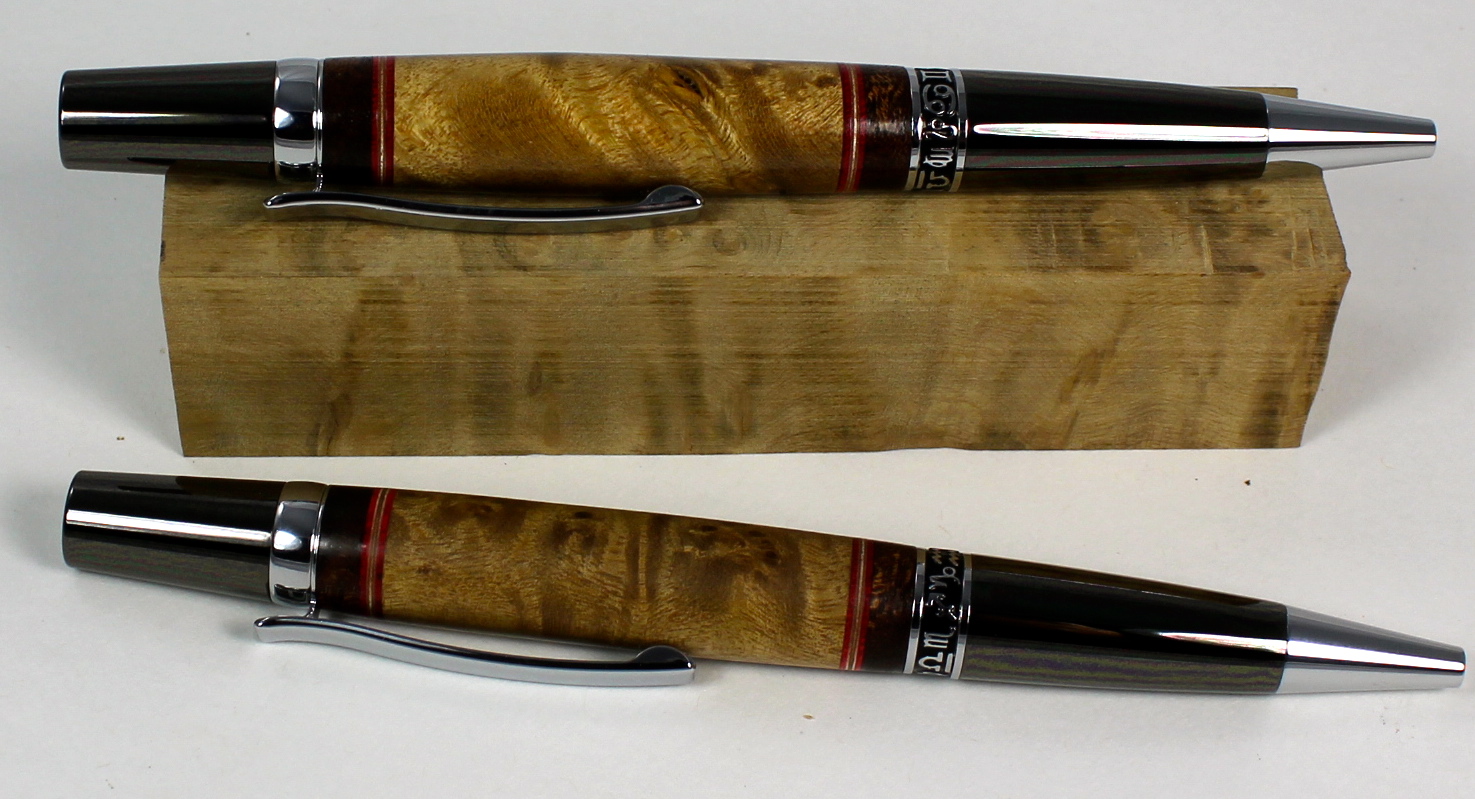
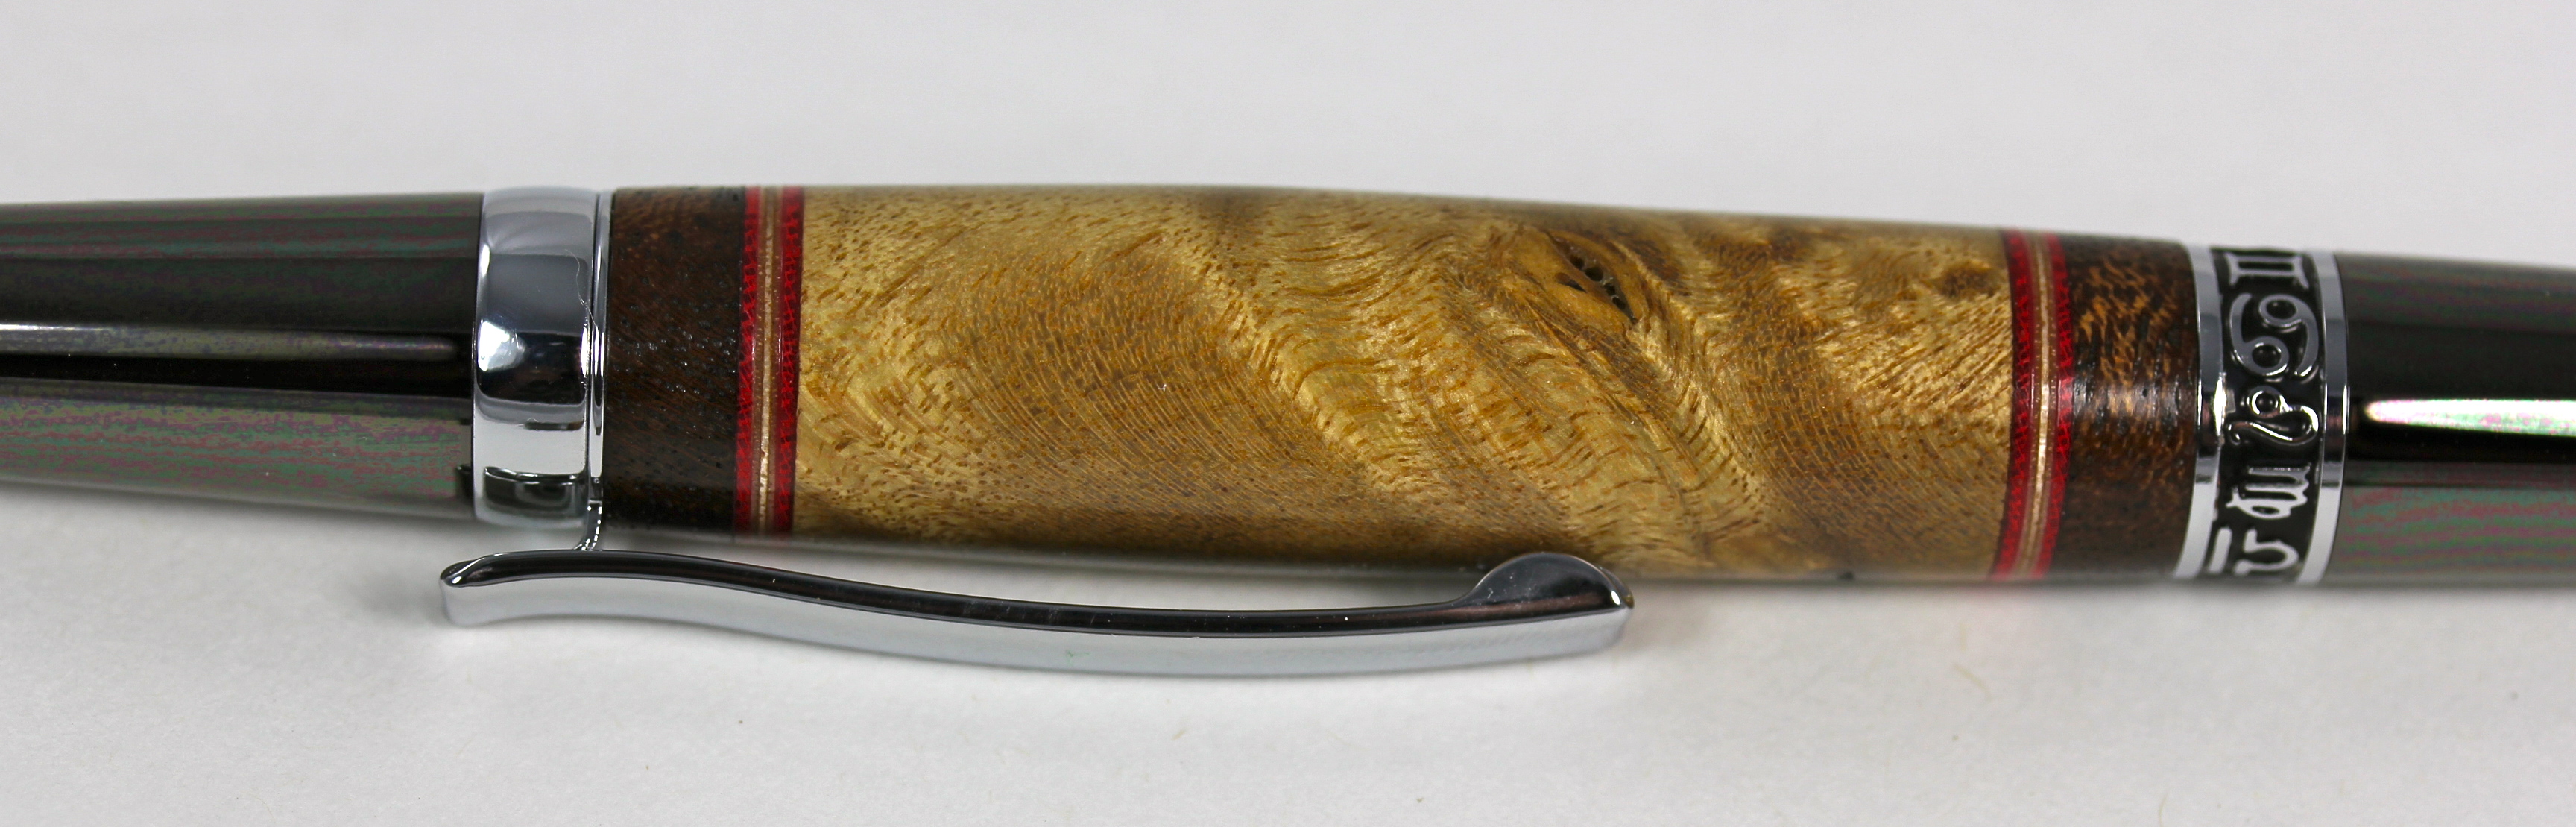
He supplied the kits and I supplied the Camphor Blanks.

I cheated and added some elements :tongue:

The Chatoyance in Camphor is beautiful! Similar to Koa or Nice Oregon Myrtle.

One is finished with Pens Plus, the other with Danish Oil. I'll keep the one with Danish Oil as I prefer matte finishes.

THANK YOU Mack C. Your description/procedure for your pens in the IAP Collection made this a success for me. I could have figured it out myself, but you saved me time and a few blanks. :bananen_smilies046:

C/C welcome!


View in Gallery


View in Gallery


View in Gallery
 
Signed-In Members Don't See This Ad

mark james

IAP Collection, Curator
Joined
Sep 6, 2012
Messages
12,752
Location
Medina, Ohio
Where do you learn to do self-magnifying photos like that?

Magic :tongue::tongue::tongue:! Actually blame Jeff!

The magnifying effect occurs when you download a photo to YOUR photo album on IAP.

On the top of the page under "Photos", work your way through the menu to download a photo from your computer onto your personal IAP Photo Album.

Then when making a thread or a post, on the Right side of the screen, the second box "My Photos", you click on "Insert." That will pull up your pics. Simply click on each you want, and it will insert them and give you the
"Gallery Affect."

If you simply add a photo as an attachment, it will not self-magnify, or have a "slide show" feature.

I'm sure others can give a clearer explanation, so ask if this is a botched attempt from a non-photographer.

Oh... It's a cool effect, and I really like it (Mostly), but be prepared - What looks fairly well done to the eye, will look mighty different under magnification! :eek: I have posted stuff that showed flaws that I never would have noticed otherwise. Fortunately, I am fine with my warts and blotches!

Have FUN!
 

Sprung

Member
Joined
Jul 1, 2014
Messages
773
Location
NE WI
Wow! Those are awesome, Mark! I really like the segmentation on those - very classy looking.
 

mark james

IAP Collection, Curator
Joined
Sep 6, 2012
Messages
12,752
Location
Medina, Ohio
Really nice Mark!!

I just picked up some Danish Oil today, any tips? Do you topcoat at all?

Hi Warren:

No, I dry sand, or walnut oil sand with abranet - 240 - 500'ish ? Then apply 2-3 coats of the Danish Oil. I leaves a very matte finish. Basically looks like bare wood, but very smooth. I put 2 coats on (2-3 drops, lathe turning), then apply a 3'rd and let sit overnight. I have never put anything over the Danish Oil? Hmnnn... may need to try that?

Please note: I sell almost nothing, so these are not for typical consumers who may like a more shiny finish. I LIKE it. I also like Pens Plus.

For the Camphor, the Pens Plus looked better - the shimmer is very pronounced. But I'm keeping the one with Danish Oil.
 

southernclay

Member
Joined
Sep 6, 2013
Messages
2,260
Location
Dawsonville, GA
Cool thanks Mark

I'm not selling much, I should but feels like work so I'll ease into that : )

I like Pens Plus a lot, don't like the feel or even doing a CA finish, the look is nice but not the feel which I think matters more....to me at least and that's all that matters. Danish oil being matte is attractive as well to me.

For the topcoat I was wondering if a Ren wax type product may be good. I have never used any of the wax topcoats so not much help, just curious.

Thanks again, keep up the good work, these are really classy.
 

mark james

IAP Collection, Curator
Joined
Sep 6, 2012
Messages
12,752
Location
Medina, Ohio
Those are a couple of nice looking pens. What did you use for the red accent?

Hi Steve: Thanks!

I glued up 3 strips of veneer, I believe they are 1/32" thick and come in sheets, I bought at a local Rockler - can be bought many places though.

I Made 5-6 strips 6" long and cut small pieces when needed (about 1" square, 3/32" thick). I drilled a hole through both veneers and both walnut segments at the same time, with a piece of sacrifice wood on top and bottom.

As Mack C has described: I glued the Camphor onto the tube, turned it down to the brass on each end for as thick as my segmenting, and then glued the veneer and walnut onto the tube (slightly proud). Then turned as typical.

Have FUN!
 
Top Bottom