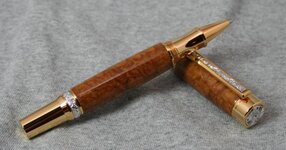
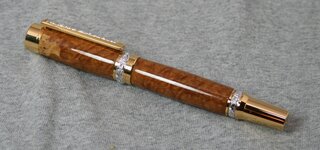
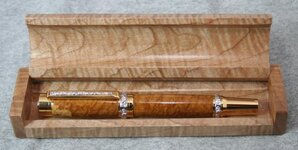
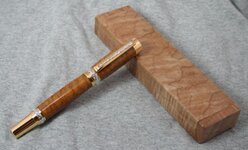
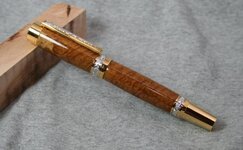
Brown Mallee Roman Harvest (and box)

Signed-In Members Don't See This Ad
See more from mb007

mb007

Member
Joined
Jan 2, 2011
Messages
205
Location
Noblesville, IN
This is the fourth of five pens made for a silent auction to benefit my church's food pantry. It's a Gold Ti w/ Rhodium accent Roman Harvest kit from Timberbits, wrapped in Brown Mallee burl from isaacrapelje. Finish is CA (12 coats thin followed by 12 coats medium), sanded through 12,000 MM. The box is made by me as well, from a piece of curly maple I had lying around.
 

Attachments

  • Brown Mallee RH 1.jpg
    Brown Mallee RH 1.jpg
    51 KB · Views: 194
  • Brown Mallee RH 2.jpg
    Brown Mallee RH 2.jpg
    46.7 KB · Views: 151
  • Brown Mallee RH 3.jpg
    Brown Mallee RH 3.jpg
    255.2 KB · Views: 155
  • Brown Mallee RH 5.jpg
    Brown Mallee RH 5.jpg
    49.2 KB · Views: 270
  • Brown Mallee RH 4.jpg
    Brown Mallee RH 4.jpg
    53.2 KB · Views: 188
Signed-In Members Don't See This Ad

RogerH

Member
Joined
Jul 28, 2011
Messages
307
Location
Illinois
Wow, gorgeous pen and beautiful box. What a nice addition to a charity auction. Somebody is going to get a WONDERFUL pen. Congrats on beautiful work.
 

islandturner

Member
Joined
Jul 17, 2009
Messages
376
Location
Victoria, BC
Hey Matt, This is really nice. In this post and your previous posts, your boxes are excellent too -- really like the design. Would it be possible to see a photo of the back edge of the box (not the bottom)? I'm curious as to how you deal with the back bottom edge of the lid (if that makes any sense ), to prevent binding when the lid opens. I've used the 45 degreen campher on the top and bottom. Do you do that or round the back-bottom edge of the lid?

Thanks
Steve
 

mb007

Member
Joined
Jan 2, 2011
Messages
205
Location
Noblesville, IN
Steve - pictures of the back of the box are something else I didn't take. :frown: I've already dropped them off for the auction, so I'm not sure if I can get access to take a pic, so I'll just explain it (you're pretty close in your assumptions!)

I did a 45 degree chamfer on the top half only on the back. I left the bottom half square. The hinge pin is set roughly 3/16" in from both the top and the back - it's not centered height-wise in the top piece, it's above the center line. This way, the lid rotates slightly up when opening, making it where only the small chamfer is needed! If you look closely at the picture of the open box, you can see the small chamfer - that's all I did! Let me know if I can clarify this any further!

If I can get back to snap a pic before the auction, I definitely will. Or maybe I can find out who the high bidder is, and ask if I can get a pic!
 
Last edited:

islandturner

Member
Joined
Jul 17, 2009
Messages
376
Location
Victoria, BC
Hey Matt, That's great -- I think I understand what you're describing. I'll give this a try. This box looks like it would easier to make than the ones I'm doing now....

Cheers
Steve

Steve - pictures of the back of the box are something else I didn't take. :frown: I've already dropped them off for the auction, so I'm not sure if I can get access to take a pic, so I'll just explain it (you're pretty close in your assumptions!)

I did a 45 degree chamfer on the top half only on the back. I left the bottom half square. The hinge pin is set roughly 3/16" in from both the top and the back - it's not centered height-wise in the top piece, it's above the center line. This way, the lid rotates slightly up when opening, making it where only the small chamfer is needed! If you look closely at the picture of the open box, you can see the small chamfer - that's all I did! Let me know if I can clarify this any further!

If I can get back to snap a pic before the auction, I definitely will. Or maybe I can find out who the high bidder is, and ask if I can get a pic!
 
Top Bottom