
mark james
IAP Collection, Curator
Several years ago George: http://www.penturners.org/forum/member.php?u=8750 and I did some "horse-trading"and this is one of the blanks I received.
I have looked at it many times, put it back in the drawer, etc...
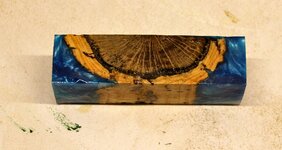
Well, today was a wet and rainy day outside, so a perfect day to try a challenge - A blank that had three mediums: Resin; soft/spongy outer cork; and an inner hard layer... FUN!
I began this with full intents that this would be a pen for me - If successful!
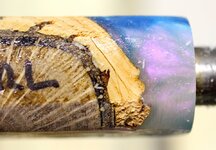
There were many cracks in the blank, which I had previously applied CA.
I did not record the number on the blank, but I believe it is #24 - Cork Tree. Hopefully my Mate will join the thread and correct any of my mistakes!
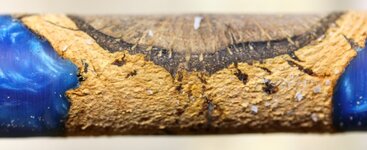
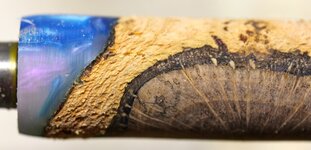
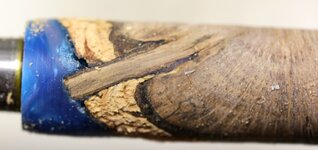
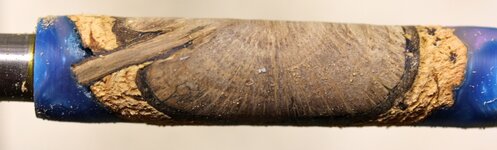
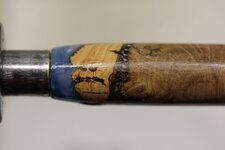
First five pictures are of the raw blank; a view of the cracks. You can see in the fifth picture the cork, which is very spongy.
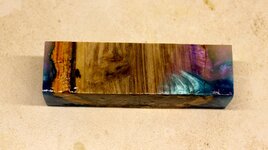
In the 7'th and 8'th pics you can see that as turning the blank thinner, a stem emerged, which I was hoping would stay until the end as a nice visual element.
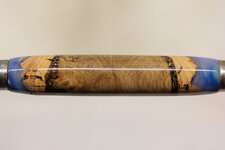
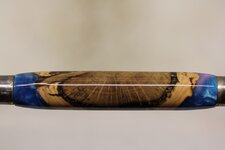
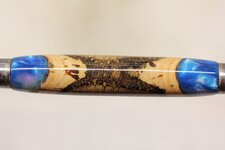
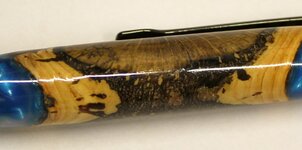
Minor comments: I was hoping for the best, and expecting the worst! I flooded the blank with thin CA every few passes. The cork was very spongy (I could push my fingernail into it and leave a line). I'm not very proficient with CA, so it was a crap-shot. I intentionally left the profile thicker than optimal, as I was not comfortable turning "cork" to 1mm thickness... After final turning, I dry sanded 240-600. Then applied 2 coats of medium CA, and 10 coats of thin CA. Wet sanded with micromesh up to 12,000. McGuires Plastix; final buffing.
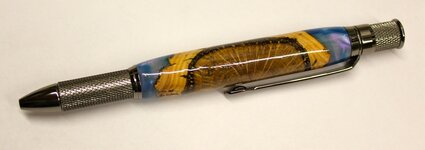
My thoughts... The final profile is a bit "unique." Not bad by any evaluation, but still a bit thick. However - I couldn't be happier how it turned out! This is not a pen I would sell/give away! It was a challenge to turn, and I can remember my "Mate" laughing at me at every difficult turn!
Be well George!
I have looked at it many times, put it back in the drawer, etc...
Well, today was a wet and rainy day outside, so a perfect day to try a challenge - A blank that had three mediums: Resin; soft/spongy outer cork; and an inner hard layer... FUN!
I began this with full intents that this would be a pen for me - If successful!
There were many cracks in the blank, which I had previously applied CA.
I did not record the number on the blank, but I believe it is #24 - Cork Tree. Hopefully my Mate will join the thread and correct any of my mistakes!
First five pictures are of the raw blank; a view of the cracks. You can see in the fifth picture the cork, which is very spongy.
In the 7'th and 8'th pics you can see that as turning the blank thinner, a stem emerged, which I was hoping would stay until the end as a nice visual element.
Minor comments: I was hoping for the best, and expecting the worst! I flooded the blank with thin CA every few passes. The cork was very spongy (I could push my fingernail into it and leave a line). I'm not very proficient with CA, so it was a crap-shot. I intentionally left the profile thicker than optimal, as I was not comfortable turning "cork" to 1mm thickness... After final turning, I dry sanded 240-600. Then applied 2 coats of medium CA, and 10 coats of thin CA. Wet sanded with micromesh up to 12,000. McGuires Plastix; final buffing.
My thoughts... The final profile is a bit "unique." Not bad by any evaluation, but still a bit thick. However - I couldn't be happier how it turned out! This is not a pen I would sell/give away! It was a challenge to turn, and I can remember my "Mate" laughing at me at every difficult turn!
Be well George!
Attachments
-
 IMG_2838.jpg163.6 KB · Views: 218
 -
 IMG_2839.jpg159.9 KB · Views: 170
 -
 IMG_2840.jpg227.5 KB · Views: 170
 -
 IMG_2841.jpg294.3 KB · Views: 151
 -
 IMG_2842.jpg131.9 KB · Views: 185
 -
 IMG_2843.jpg147.9 KB · Views: 119
 -
 IMG_2845.jpg117.9 KB · Views: 177
 -
 IMG_2846.jpg106 KB · Views: 158
 -
 IMG_2847.jpg102.6 KB · Views: 177
 -
 IMG_2849.jpg90.8 KB · Views: 154
 -
 IMG_2850.jpg79.7 KB · Views: 170
 -
 IMG_2851.jpg98.6 KB · Views: 143
 -
 IMG_2854.jpg119.6 KB · Views: 177
 -
 IMG_2853.jpg78.6 KB · Views: 213
 -
 IMG_2852.jpg105.3 KB · Views: 237
Last edited:
 .
.