17 Pours = 1 pen

Signed-In Members Don't See This Ad
See more from ElMostro

ElMostro

Member
Joined
Mar 17, 2007
Messages
1,940
Location
San Antonio, TX.
Here is one I have been working on for a bit. It is made of alumilite, 17 very small pours.

DSC00074_zpsadb04805.jpg

DSC00072_zps00ee9e68.jpg


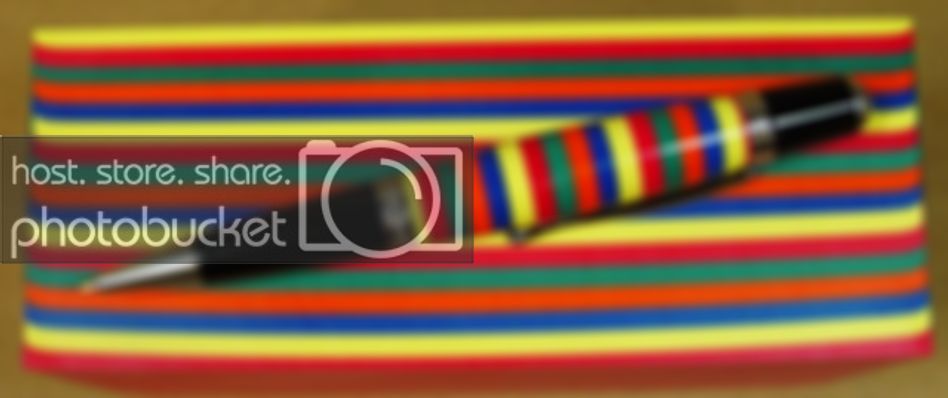
Thanks for looking, Eugene.
 
Signed-In Members Don't See This Ad

JohnU

Member
Joined
Jan 31, 2008
Messages
4,954
Location
Ottawa, Illinois
Looks great Eugene! I've been trying to find the time to work a similar pour to resemble a roll of life savers. I think I like your smaller stripes better. Nice work!
 

maxwell_smart007

Lead Moderator
Staff member
Joined
Aug 4, 2007
Messages
6,711
Location
middle of nowhere in the great, white North
Neat idea!
I don't like the gentle bulge you turned, however, as it's not complementary to the curve of the sierra's front...different curves on the same blank look 'off' to me...

A blank that nice and with that much effort deserves a higher end plated kit, too, in my mind...
 

alphageek

Former Moderator
Joined
Jul 19, 2007
Messages
5,120
Location
Green Bay, WI, USA.
Luckily it looks like there is the possibility for much more than one pen in that block :)

I don't know how hard this was, but there is a lot of cool potential in this idea yet. I'm picturing random patterns of colors (vs the repeated 5) and "random" thicknesses too.
 

ElMostro

Member
Joined
Mar 17, 2007
Messages
1,940
Location
San Antonio, TX.
Neat idea!
I don't like the gentle bulge you turned, however, as it's not complementary to the curve of the sierra's front...different curves on the same blank look 'off' to me...
A blank that nice and with that much effort deserves a higher end plated kit, too, in my mind...

Yea, I should have done BtoB. Maybe the next one.

Wow Eugene, nice pour. How long did you wait between pours? You got patience my man...

About 2 mins between pours, to make sure their is enough heat left in the previous pour to get good adhesion.

Very Nice! You must measure very precisely and have a very level pressure pot!

The pot and mold have to be dead center and need to pour slowly to avoid bubbles. Also need to make sure the bottom of the mold is rigid enough to not flex with the heat buildup.

Luckily it looks like there is the possibility for much more than one pen in that block :)
I don't know how hard this was, but there is a lot of cool potential in this idea yet. I'm picturing random patterns of colors (vs the repeated 5) and "random" thicknesses too.

Yea, I am sure I can get a few more ;). Not hard at all but there is no multi-tasking when you are doing it bec timing is important, if you get distracted poof! I also made some with just 2 colors, ivory & black, and made the stripes different thicknesses...still have not cut that one up. There are a lot of possibilities here.

Thanks folks, Eugene.
 

flyitfast

Member
Joined
Sep 3, 2009
Messages
1,690
Location
San Antonio, TX 78247
Eugene, you are thinking outside the mold!! I hope you have some of these blanks at our next meeting. Please save me one?
Great job with the pour and your patience!
gordon
 

OOPS

Member
Joined
Feb 6, 2010
Messages
674
Location
Spokane, WA
That's incredible! Had I not seen the photo, I never would have assumed that such a pour would have been possible. Your measuring must be incredibly exact to keep the bands so uniform. Also impressive is that the colors are exact throughout the piece. I have poured Alumilite before but found that duplicating the color from pour to pour to be exceedingly difficult. Congrats on your fine idea and execution.
 

Katya

Member
Joined
Jan 12, 2012
Messages
393
Location
Toronto, Ontario Canada
Nice idea! I agree with the other comments here. As to the colours, to me it has a kind of "Dr. Seuss" vibe that I quite like<g>.

Would love to see more work like this! Can you post pics of your setup?
 

ElMostro

Member
Joined
Mar 17, 2007
Messages
1,940
Location
San Antonio, TX.
Nice idea! I agree with the other comments here. As to the colours, to me it has a kind of "Dr. Seuss" vibe that I quite like<g>.
Would love to see more work like this! Can you post pics of your setup?

Thanks folks! Sure I can post some pics of the set up... but let me clear the mess a bit so that you can understand the pics...I've got too much crap in the way right now...stay tuned.
Eugene.
 

InvisibleMan

Member
Joined
Feb 13, 2011
Messages
716
Location
San Jose, CA
Looks really good! I was working on pretty much the same thing, but gave up. I couldn't get rid of the air bubbles and......other related stuff. I do have one way to try that I haven't gotten to yet, but need to build another mold first. Won't be as clean as yours though, if it works at all.
 

ElMostro

Member
Joined
Mar 17, 2007
Messages
1,940
Location
San Antonio, TX.
Looks really good! I was working on pretty much the same thing, but gave up. I couldn't get rid of the air bubbles and......other related stuff. I do have one way to try that I haven't gotten to yet, but need to build another mold first. Won't be as clean as yours though, if it works at all.

Precision, patience and timing is the name of the game...if any of the 3 are missing it won't come out well, oh and throw in some luck just in case.
Eugene
 
Top Bottom